Address Books
Vendor Rep List
(Roles: Super Admin, Address Book Manager, Admin Panel Manager)
OVERVIEW
A Vendor is typically the company that sells, supplies or distributes products and items. In order for a Vendor to be selected when writing a Specification, the address and contact information must first be entered in the ‘Admin > Address Books’ page.
In the Vendor Rep List page, Vendors can be filtered by Office and Status.
QUICK TUTORIAL
Adding Vendors (6 Steps)
- Step 1: In the Left Navigation click on ‘Admin’.

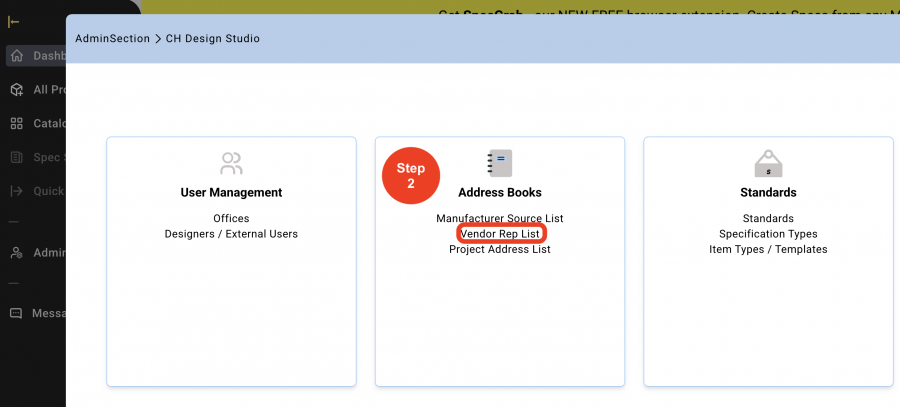
- Step 2: Go to 'Address Books' and click on ‘Vendor Rep List’.
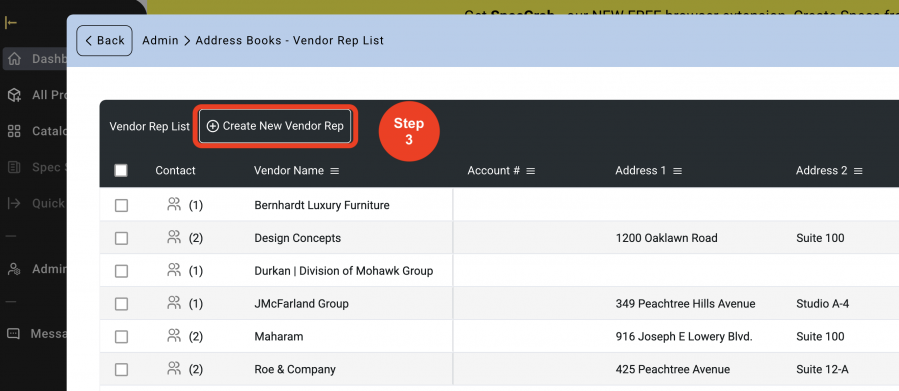
- Step 3: Click on ‘Create New Vendor Rep'.
Option 1: Add Vendor Manually (6 Steps)
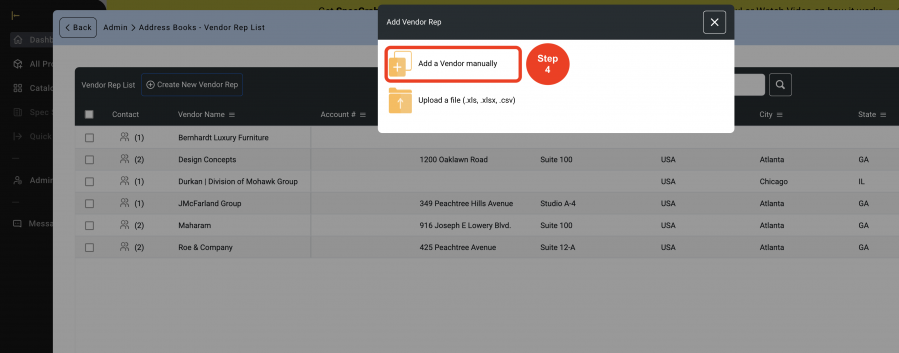
- Step 4: Click on ‘Add a Vendor manually’.
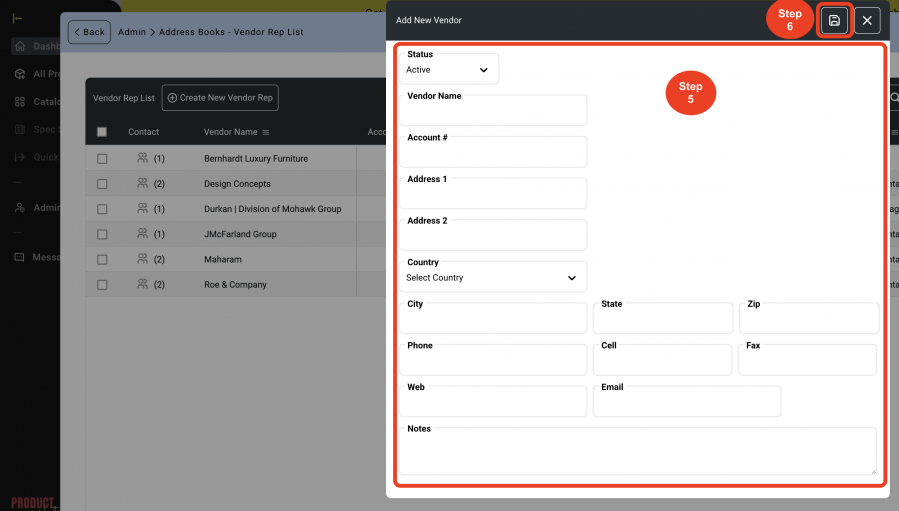
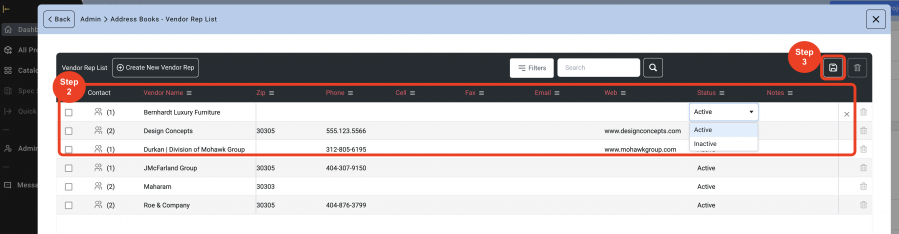
- Step 5: Click on the dropdown to change the Vendor ‘Status’. A Manufacturer or Vendor can be taken out of the active list to be selected by a Designer / User using the ‘Status’ box. This will NOT delete them from Items they were previously attached to, it will just prevent them from being attached to any new items.
Enter the Vendor information. - Step 6: Click on ‘Save’.
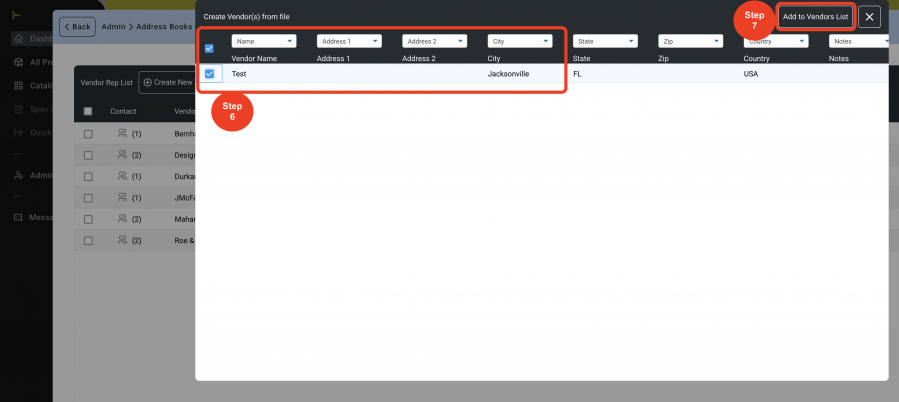
Option 2: Upload a File (7 Steps)
- Step 1: In the Left Navigation click on ‘Admin’.
- Step 2: Go to 'Address Books' and click on ‘Vendor Rep List’.
- Step 3: Click on ‘Create New Vendor Rep'.
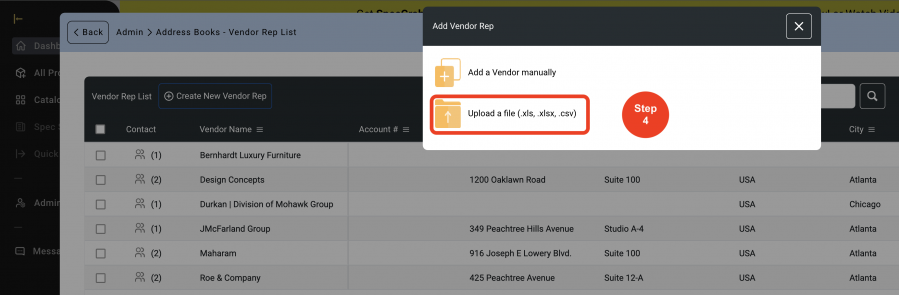
- Step 4: Click on ‘Upload a file ( .xls, .xlsx, .csv)’
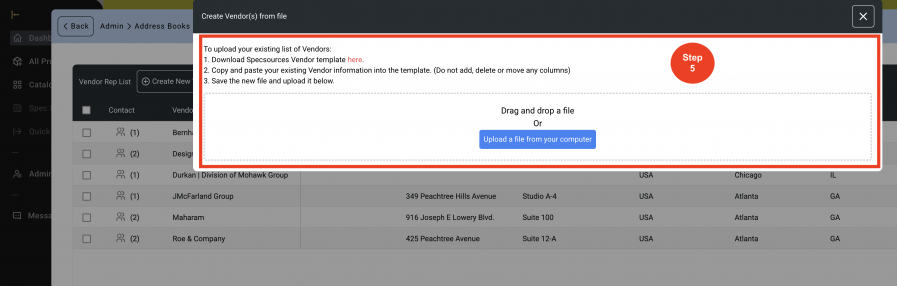
- Step 5: Click on the word ‘here’ to download template and fill.
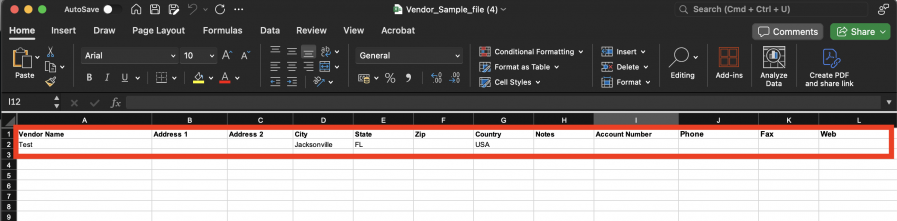
*Follow the instructions on the Excel file to fill the cells. Copy and Paste your Manufacturer information into the appropriate columns.
*DO NOT add or remove any columns on the spreadsheet.
Drag and drop file or browse from computer to upload file.
- Step 6: Select the Vendors to add from the list by clicking on the checkbox.
- Step 7: Click ‘Add to Vendor List’ to add.
Editing Vendors (3 Steps)
When a Vendor changes or the address changes, it's necessary to Edit.
- Step 1: Click on the 'Pen Icon'.

- Step 2: Enter the information, and choose if the 'Status' is Active or Inactive.
* This will help keep the Vendor information without Deleting it, and it will not show on the Master List of Vendors.
- Step 3: Click on 'Save'.
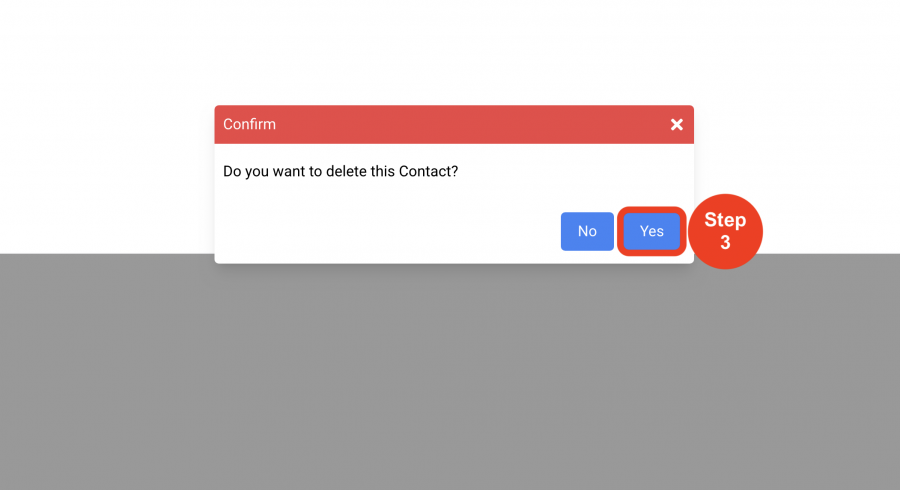
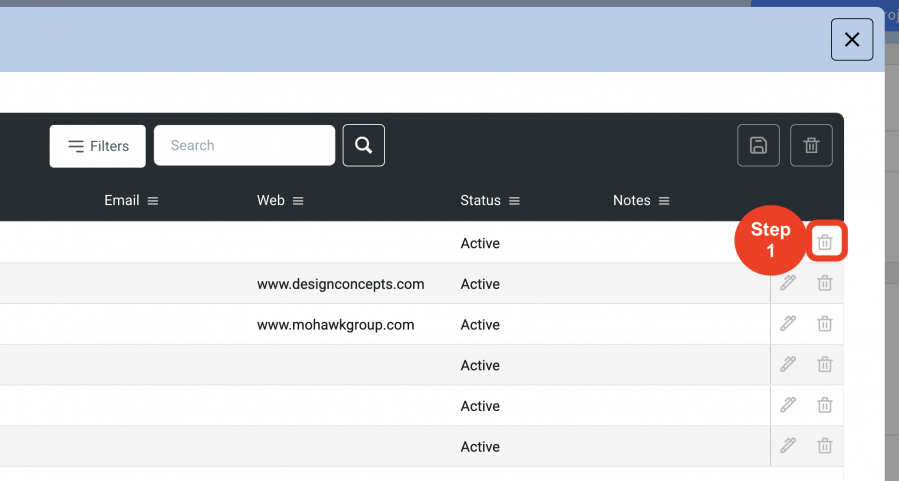
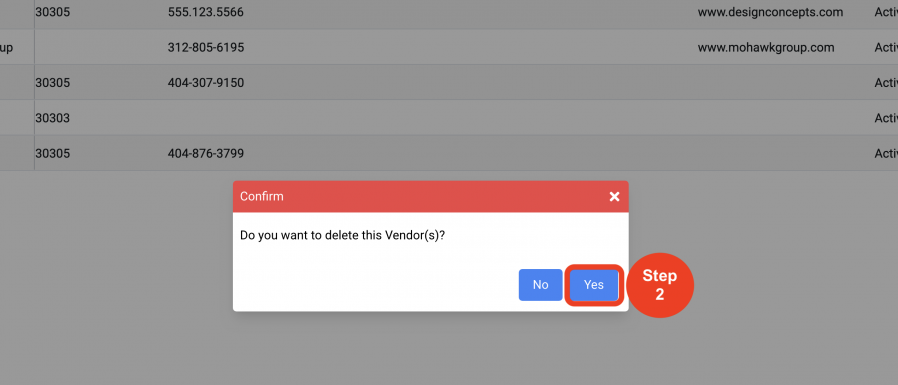
Deleting Vendors (2 Steps)
Whenever it is needed to completely remove a Vendor, it is necessary to Delete.
- Step 1: Click on the 'Trash Bin' icon on the end of the row of the Vendor to be Deleted.
- Step 2: Click on 'Yes', if the desired outcome is to Delete the Vendor.
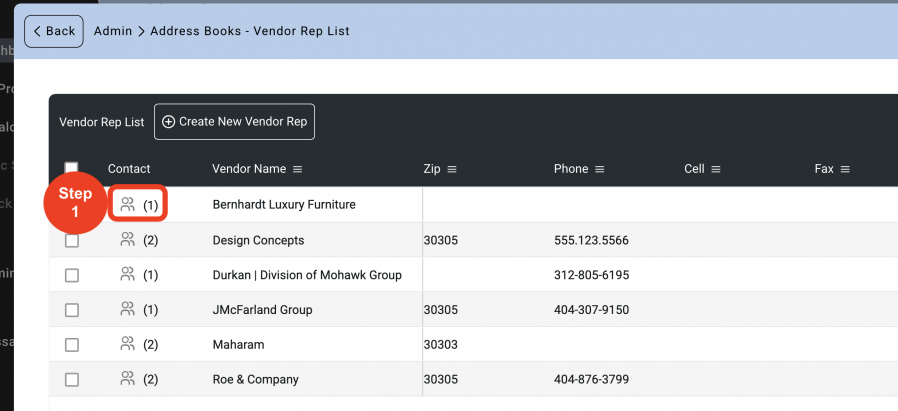
Adding Contacts (4 Steps)
In order to populate the Vendors address fields, a contact must be selected from the Contact dropdown when writing a spec. Therefore, contact names must be added to the Vendors Source List. If there is no contact person, then a contact must be created call ‘Default’ which will enable the action of selecting a contact from the dropdown in order to populate the text of the Manufacturer’s address in the Spec Sheet.
Multiple contacts can be added for each Vendor depending on region and office locations.
Contacts can also be assigned to specific Design firm offices which can then be filtered By Design Offices.
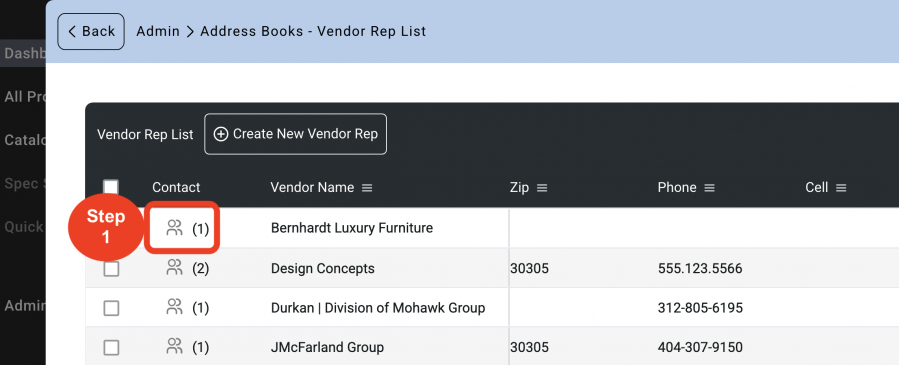
- Step 1: Click the on the 'Contact Icon'.
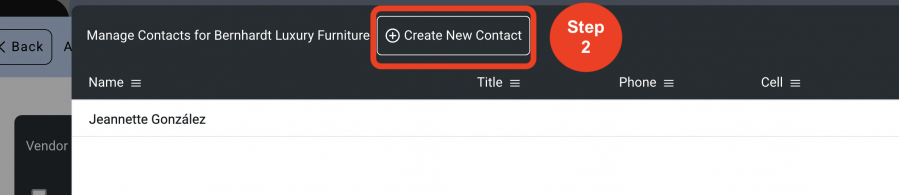
- Step 2: Click on 'Create New Contact'.
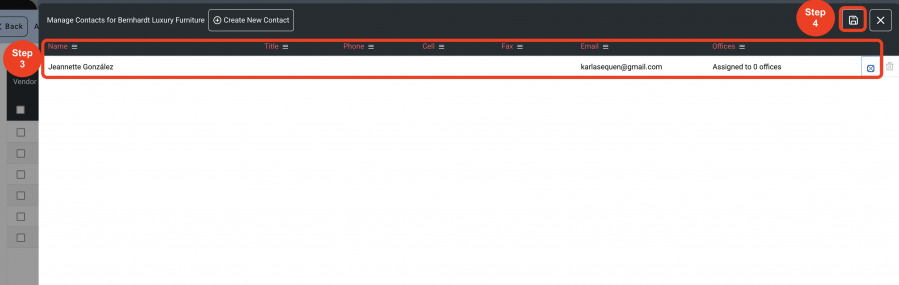
- Step 3: Enter the information and choose the Office from the Dropdown.
- Step 4: Click on 'Save'.

Editing Contacts (4 Steps)
Whenever a contact needs updating, it's necessary to edit it.
Contacts can also change offices if needed.
- Step 1: Click on the 'Contact Icon'.

- Step 2: Click on the 'Pen Icon'.

- Step 3: Enter the information in the desired text box of any of the columns with the Header Font that is in red.
- Step 4: Click on 'Save'.
Deleting Contacts (3 Steps)
Whenever a Contact is no longer with the Vendor, then it needs to be deleted.
- Step 1: Click on the 'Contact Icon'.
- Step 2: Click on the 'Trash Bin' icon.
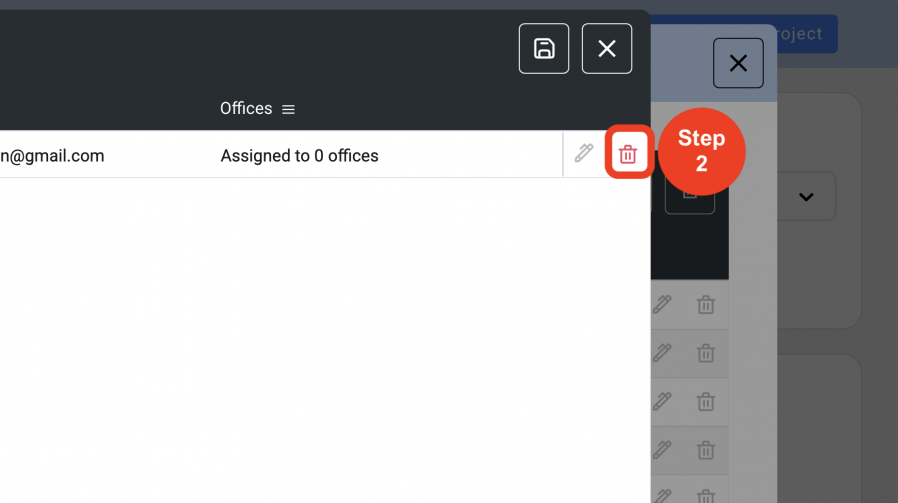
- Step 3: Click on 'Yes'.