
Tools
Company Settings
(Roles: Super Admin, IT Manager)
OVERVIEW
The Company General Settings allows the Super Admin or Admin Panel Manager roles to activate various master settings that will affect all users in the Company. These include:
- Apply Company-wide Filter by Office
- Use Payment Requests
- Show Second Language
- Set Up Default Highlighting Colors
- Company Default Logo
QUICK TUTORIAL
Company General Settings
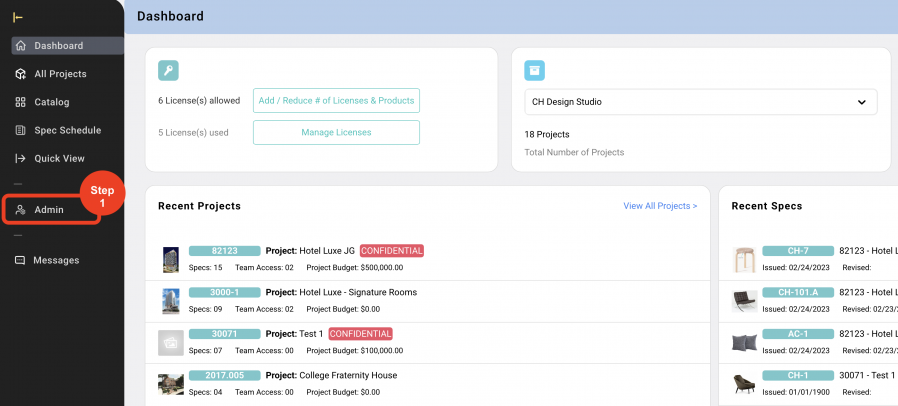
- Step 1: In the Left Navigation click on ‘Admin’.
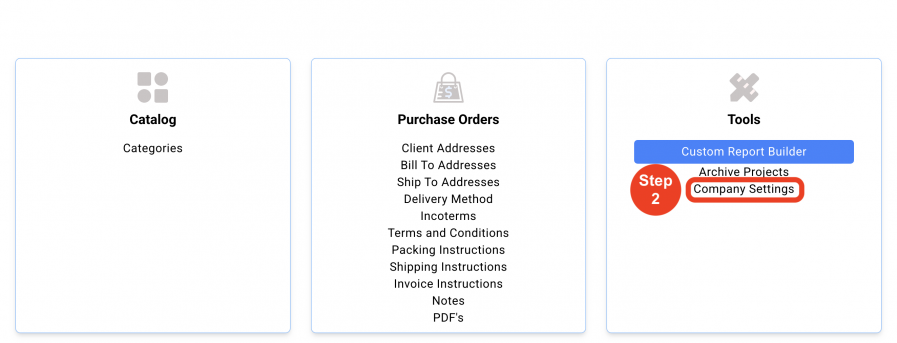
- Step 2: Go to 'Tools' and click on 'Company Settings'.

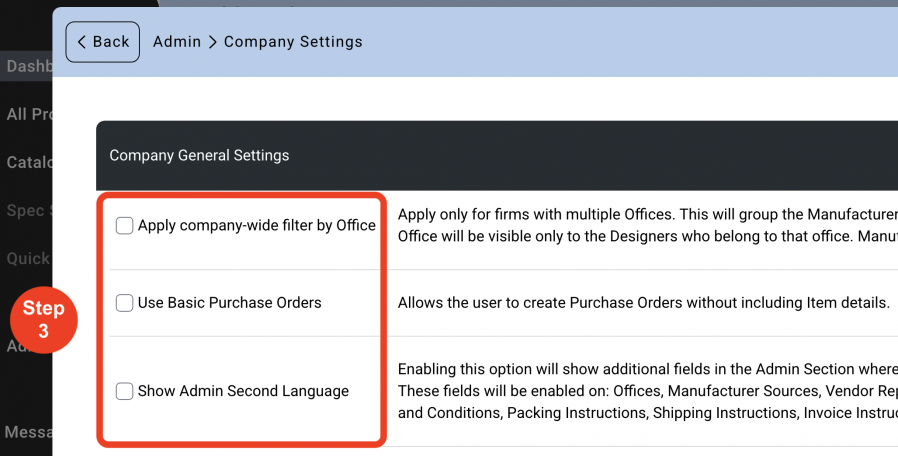
- Step 3: Select from the desired Checkboxes.
- Apply Company-wide Filter by Office
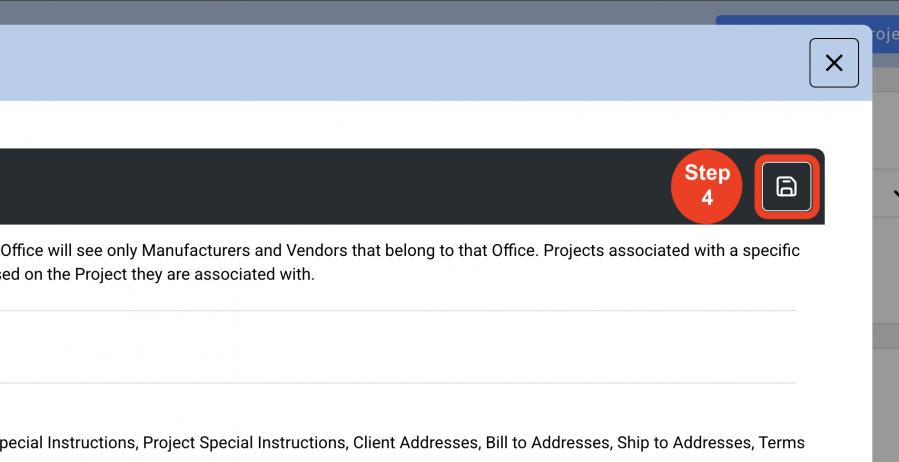
- This option is used only for firms with multiple Office locations. This will group the Manufacturers / Vendors by each Office. Designers assigned to an Office will see only Manufacturers and Vendors that belong to that Office. Projects associated with a specific Office will be visible only to the Designers who belong to that office. Manufacturers and Vendors will be filtered by the Office based on the Project they are associated with.
- Use Payment Request
- This option allows the PO Manager or PO Editor role to create Payment Requests without including Invoice details.
- Show Admin Second Language
- Enabling this option will show additional fields in the Admin page where text in a second language can be entered.
These fields will be enabled for: Offices, Manufacturer Sources, Vendor Reps, Project Addresses, Spec Types, Item Types, Item Special Instructions, Project Special Instructions, Client Addresses, Bill to Addresses, Ship to Addresses, Terms and Conditions, Packing Instructions, Shipping Instructions, Invoice Instructions and Notes.
Second languages MUST be enabled ON EACH PROJECT in the Project Config tab.
- Step 4: If 'Show Admin Second Language' is chosen, click on the Language to be used.
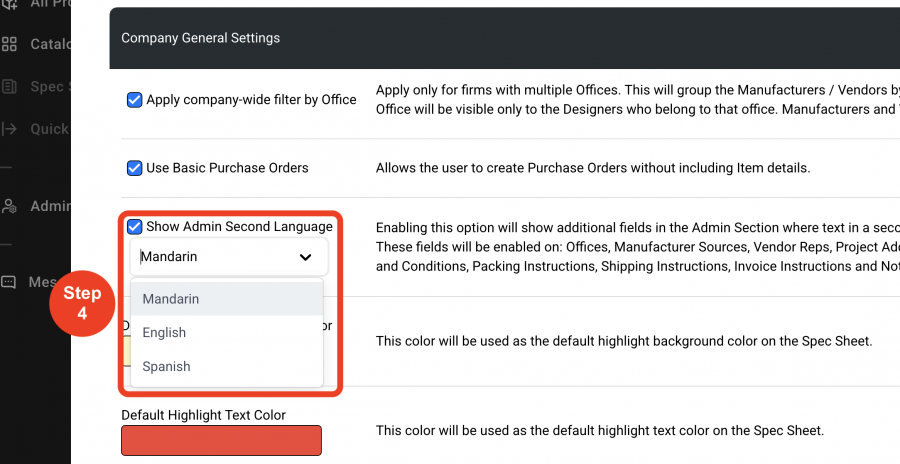
- Step 5: Set Up Default Highlighting Colors
- By clicking in the color fields, a Super Admin can pre-select the highlighting colors for both the background and text colors. These will become the Default option on the spec sheet and on other reports.
- Step 6: Click on 'Save'.
Company Default Logo
A Super Admin can upload a Company Logo as the Company Default Logo.
Changing the Company Default Logo in Admin > Company Settings > Company Default Logo will change the Logo on EVERY project where ‘Use Company Default Logo’ is selected.
- Step 1: In the Left Navigation click on ‘Admin’.

- Step 2: Go to 'Tools' and click 'Company Settings'.
- Step 3: Click on 'Upload a File from your computer', or drag and drop the desired image in the box.
* The logo needs to be 2.9 X 0.6 inches.
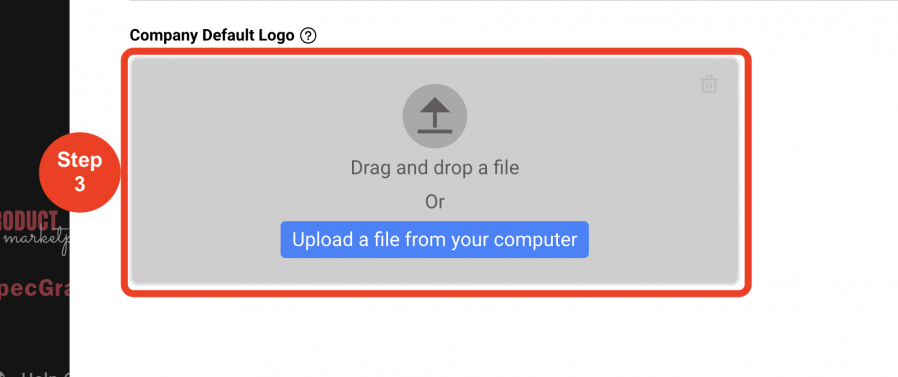
- Step 4: Click on 'Save'.
Custom Fields
OVERVIEW
The Custom Fields page allows a Super Admin to customize information above what is available in the Specsources’ standard Spec Sheet. A group of labels or fields can be created in order for the user to input additional information into a Spec Sheet. The Custom Fields page must be turned on in the Spec Type to enable the spec sheet to be printed with custom information.
Important Fact: Coordination is required with Specsources’ development team to examine how the output of this custom information will be printed on the spec sheet.
