Add-Ons
SpecBIM
OVERVIEW
The SpecBIM Revit Add-On is an additional product that can be purchased through Specsources which allows for the passing of data from the Revit model into Specsources’ SpecWeb application. It is primarily used to pass Areas, Rooms and Quantities. However, additional information such as Room Types, Descriptions and Notes can also be passed.
QUICK TUTORIAL
ABOUT THE ADD-ON
- Can be installed on unlimited computers.
- Compatible with Revit versions 2021 – 2025.
- SpecWeb and the Revit model can be worked in simultaneously. A designer/architect can be working independently in the Revit model, tagging items, while a designer is creating specifications in SpecWeb.
- The tagging of furniture or items in the Revit model must match the Spec Sheet item numbering configuration exactly as created in SpecWeb > Spec Type > Config page.
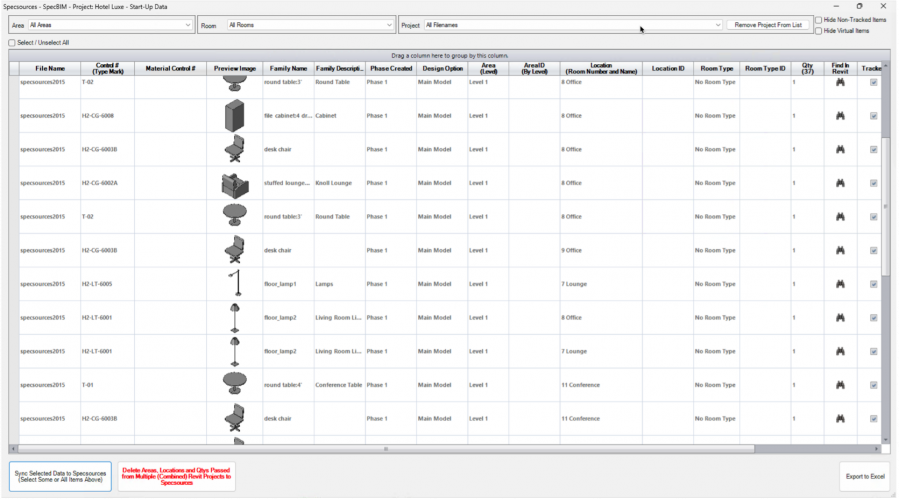
- Data synchronization occurs by passing Areas, Rooms and Quantities from the Revit model into SpecWeb and automatically populating these fields in the Areas / Rooms page.
- A designer writing specs in SpecWeb should not manually enter Areas, Rooms and Quantities.
Important Fact: The Item numbering configuration on the Spec Sheet must include an Item Type Code.
INSTALLATION
OVERVIEW
A Revit Add-On Installer has been created by Specsources and is accessible via SpecWeb > Dashboard > Left Navigation > SpecBIM. A subscriber is responsible for running the installer on each user’s computer that has Revit installed.
Install SpecBIM
- Step 1: Close Revit before beginning this process.
- Step 2: Go to your Specsources' account.
- Step 3: Click on 'SpecBIM' in the Left Navigation Panel.
Important Fact: Please follow the instructions on the website.
STEPS / SCREEN SHOTS
- Step 1: Create a project in SpecWeb. This is necessary to do first in order for the Revit Add-on to be able to recognize the project in SpecWeb that data will be passed to.
- Step 2: Open the Revit file. Go to Add-Ons > click on the ‘Specsources’ tab
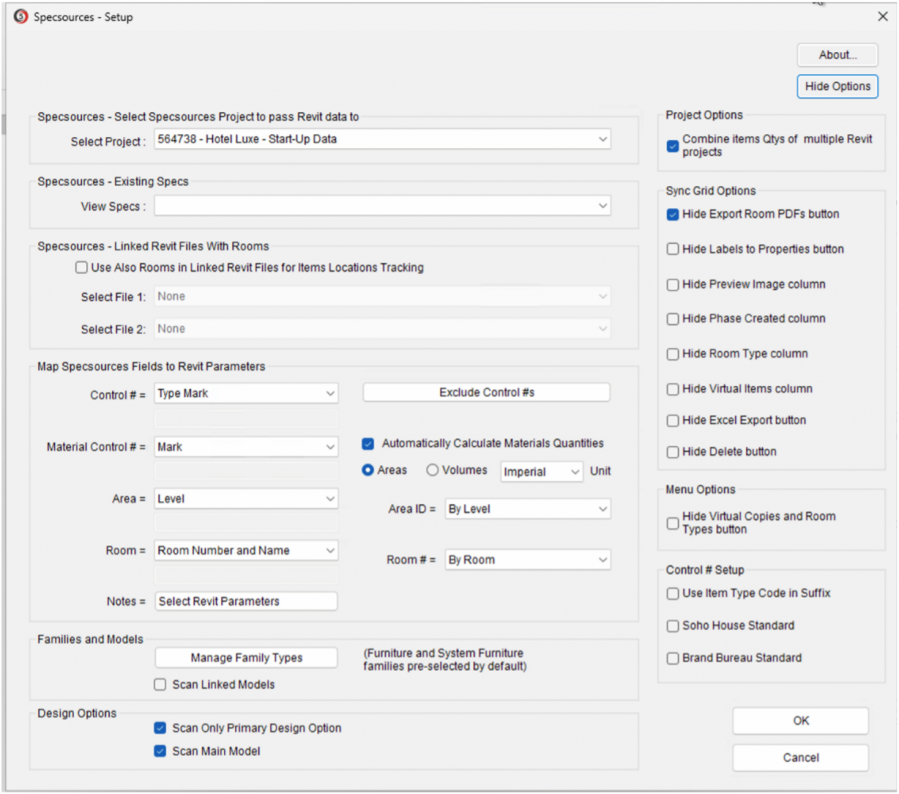
- Step 3: Click on ‘Set Up’ icon.
- Step 4: Select a Specsources project to pass data to.
- Step 5: View Existing Specs that were created in SpecWeb (Optional)
- Step 6: Select Linked Files as required. More than one linked file can be selected.
- Step 7: Map Specsources Fields to Revit Parameters. Typically:
- Specsources: Control # maps to Revit: Typemark
- Specsources: Area maps to Revit: Level
- Specsources: Room maps to Revit: Room Name
- Specsources:
- Step 8: Confirm / Select Revit Families. Furniture and Furniture Systems are preselected by default.