
User Management
Offices
(Roles: Super Admin, IT Manager)
OVERVIEW
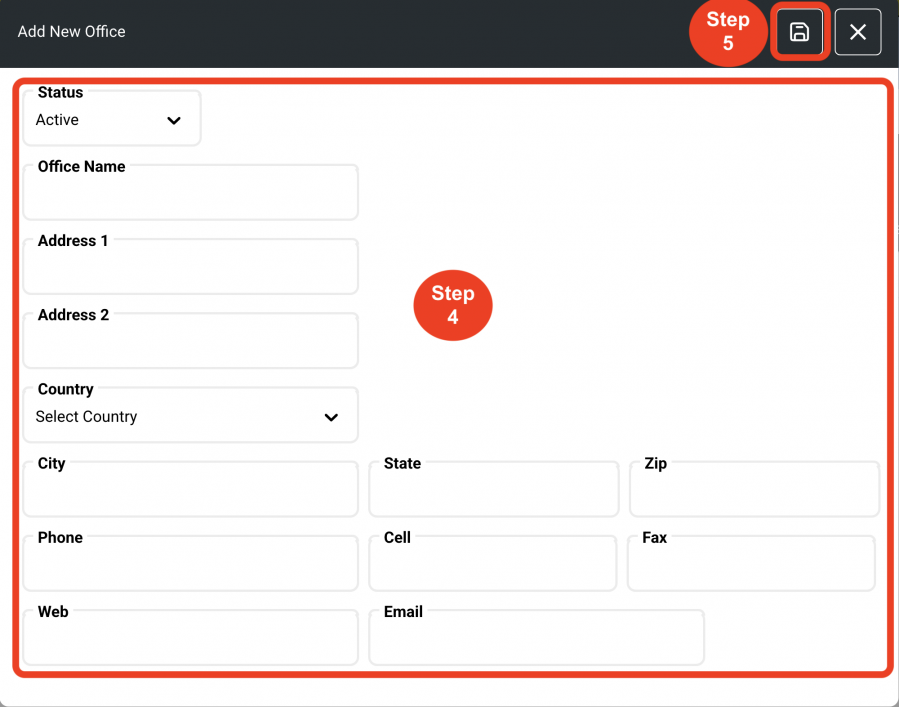
In order to create a project, ‘Select Office’ is a required field. Therefore, offices must be created first in the Admin page by either a Super Admin or IT Manager Role. One or multiple offices can be created as required. The office address prints as the footer at the bottom of the spec sheets and reports. An office Logo can be uploaded here so it can be selected to be used in a project.
QUICK TUTORIAL
Creating a New Office (5 Steps)
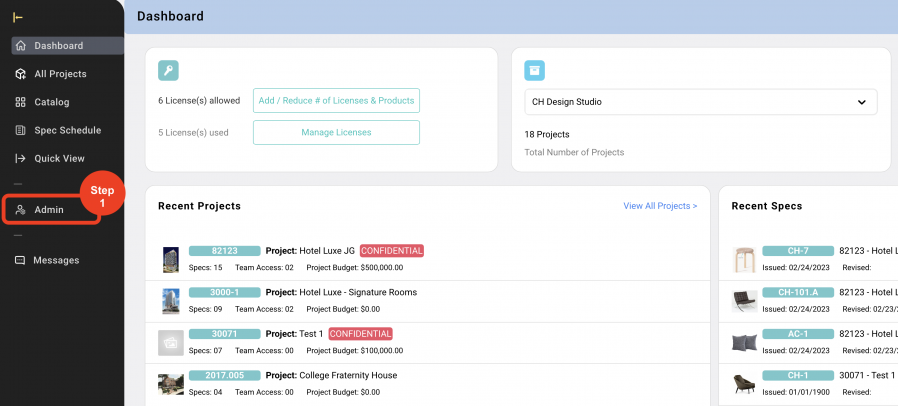
- Step 1: In the Left Navigation click on ‘Admin’.
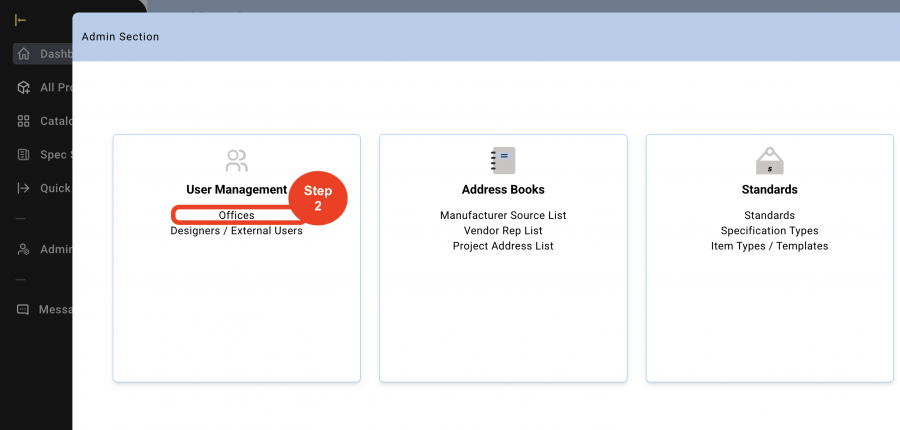
- Step 2: Go to 'User Management' and Click on ‘Offices’.
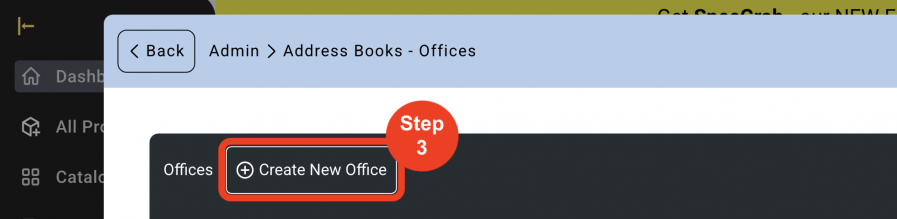
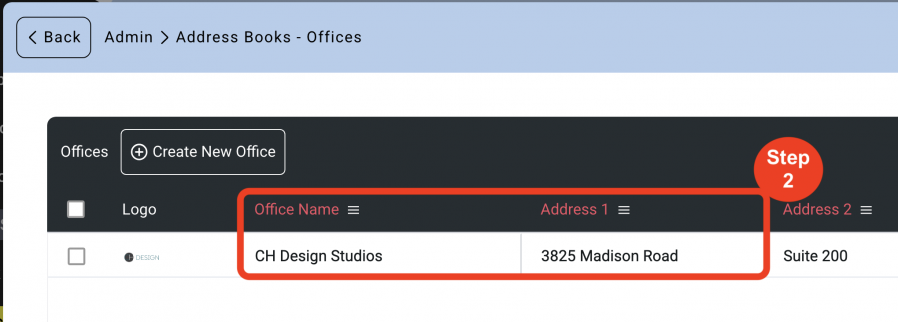
- Step 3: Click on ‘Create New Office’.
- Step 4: Enter the Office information.
- Step 5: Click on ‘Save’.
Edit An Office
- Step 1: Click on the editing 'Pen' at the right side of the screen. This function is a toggle on and off.
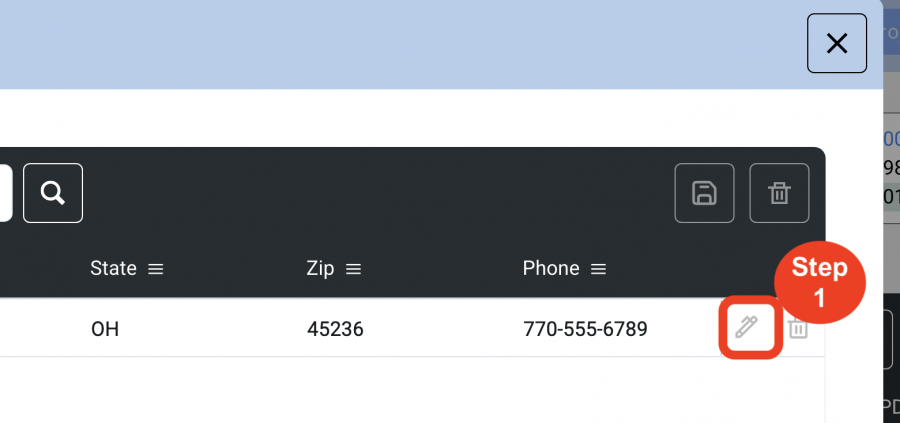
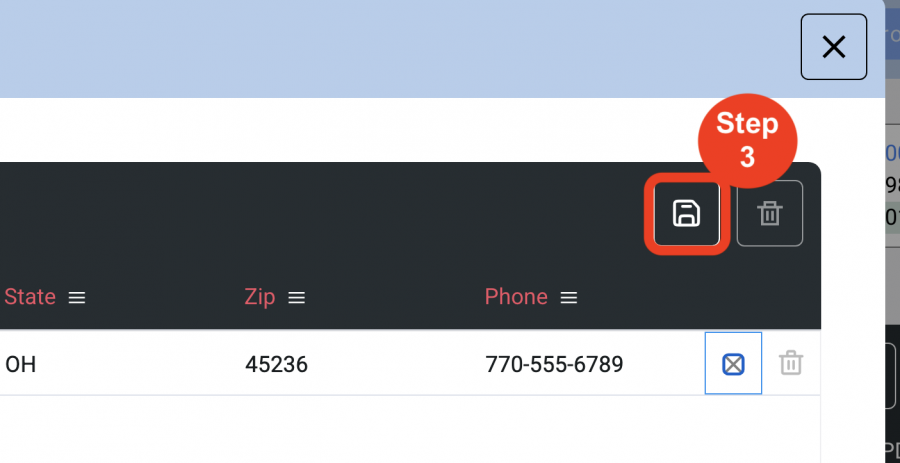
- Step 2: Information can be edited in each column with a heading that is red. Once data is revised, HIT ENTER.
- Step 3: Click on 'Save'.
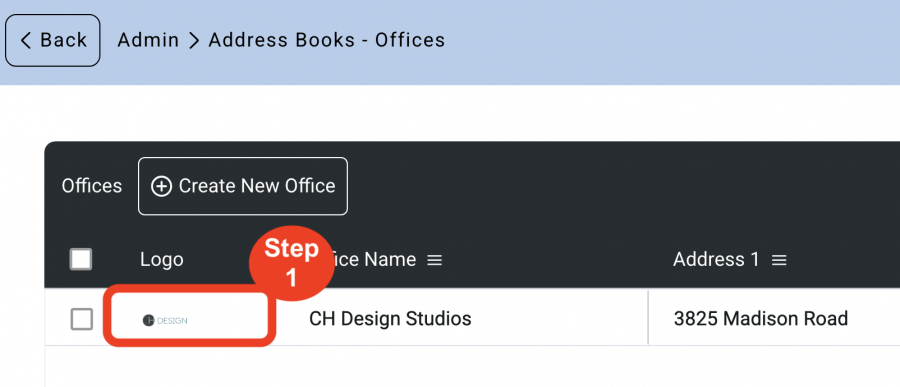
Add Office Logo (2 step)
Once an office is created, an Office Logo can be added by uploading a graphic for this logo that is a 2.9 x 0.6 inches.
- Step 1: Click on the 'Logo' icon.
- Step 2: Drag and drop or click on 'Upload a file from your computer'.

