Create New Project
Create New Project - Project Info
OVERVIEW
‘Create New Project’ enables the user to input general project information such as the Project Name, Project Number, Office and Project Address.
Most important is the selection of the ‘Standard’ by which all of the Spec Book packages, item numbering and Special Instructions for the Project are organized. Once a Project is saved, the Standard selection cannot be changed.
Any edits required to the Item numbering, Spec Sheet Options or Spec Sheet Sections, must be done in the Project’s Config page. Updating in the Admin page will not automatically update an existing Project.
Additional information to be incorporated in a Project includes assigning a Logo, uploading a Cover Sheet Image and any project related PDF documents, ie. A Preamble, an index or floor plans.
Special additional features in a Project include
- Designate the Project as Confidential. This means that the creator of the Project is the only user that can view and work in the Project. Other team members will need to be assigned to the Project.
- Budget Tracker. By entering a Project Budget amount in the Project info page, the actual costs of the items can be tracked against the Project Budget to indicate in or over budget.
QUICK TUTORIAL
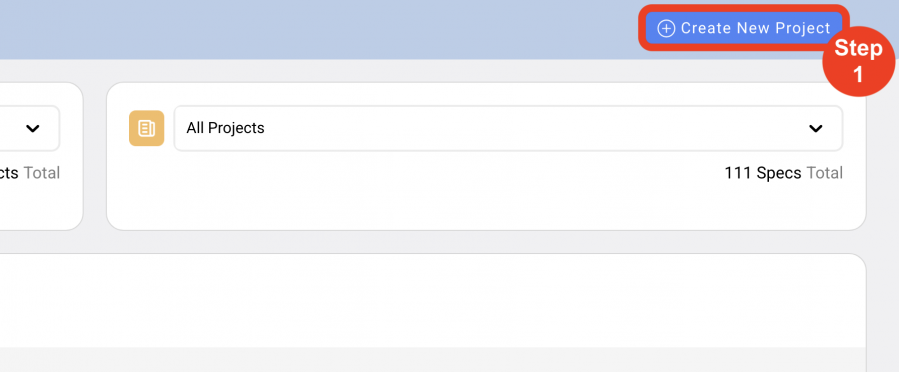
Create New Project (6 steps)
- Step 1: Go to Dashboard. Click on the blue button ‘Create New Project’ in upper right corner.
- Step 2: Select the Standard (Required)
By selecting a Standard, the Designer / User is assigning the breakdown of different Spec Types, Item Types, Templates and Special Instructions - all created under the particular Standard that is selected.
- Step 3: Select the Office (Required)
By selecting an Office associated with this Project, that office address will be used to print as the footer on the bottom of Spec Sheets and reports.
- Step 4: Type in a Project Name (Required)
- Step 5: Type in a Project Number (Required)
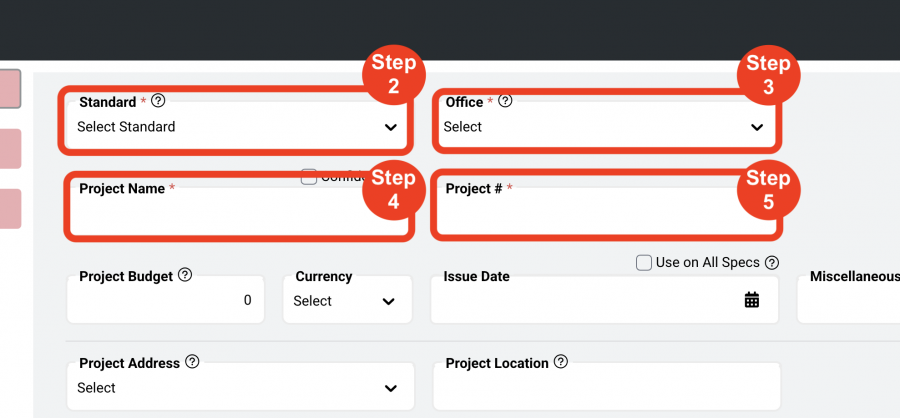
Important Fact: Steps 2 – 5 are the minimum required fields to create a Project.
- Step 6: Click Save
This action generates and saves the Project. Additional information can be input in the Project Info page.

Important Fact: Once a project has been saved, the Standard selected CANNOT BE CHANGED.
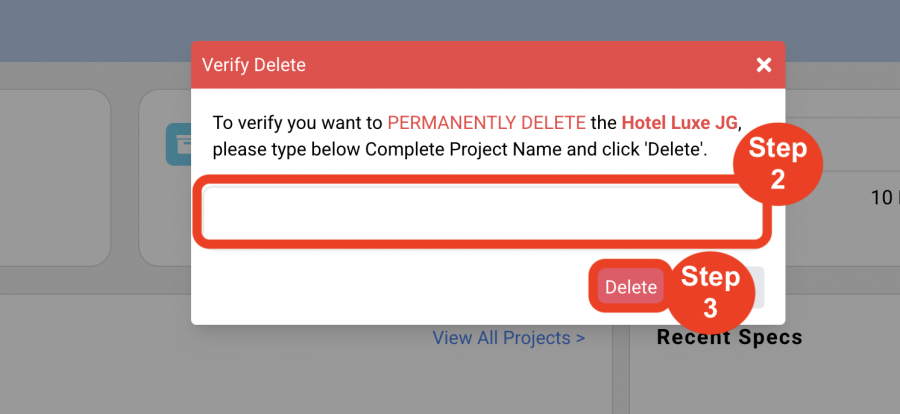
Delete a Project
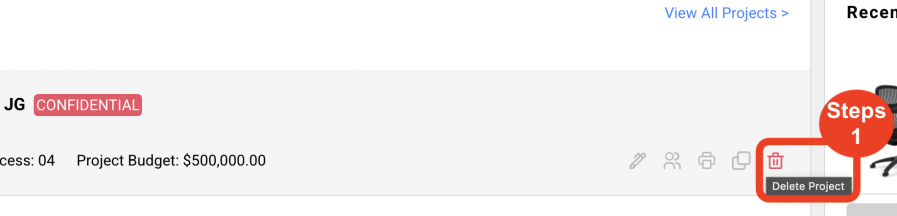
- Step 1: Click the 'Trash Bin Icon', which appears when scrolled over with the mouse pointer.
- Step 2: Type in the text box the Complete Project Name to delete.
*This is a case sensitive text box.
- Step 3: Click ‘Delete’ to delete.
*Once deleted, the Project is not restorable.