Project Sections
Config
Overview
This option allows modification of the Control Number configuration for a specific Spec Type within the active Project. The initial settings are inherited from the Admin Config, established by a Super Admin. In most cases, these configurations should remain unchanged. Adjustments made here will apply only to the current Project and will not affect other Project configurations.
QUICK TUTORIAL
Control Number Format
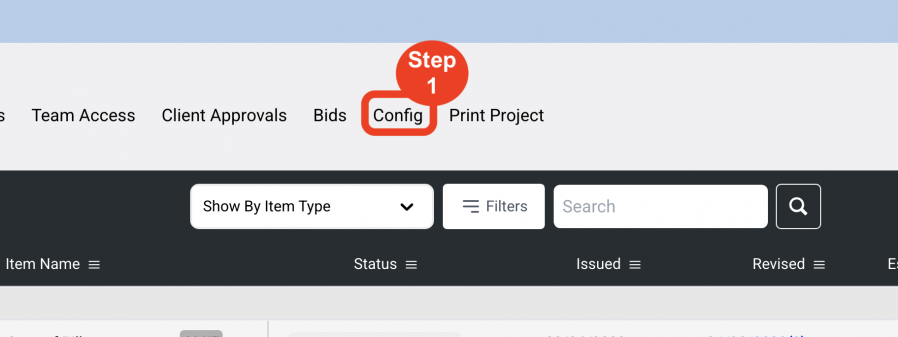
- Step 1: Click ‘Config’.
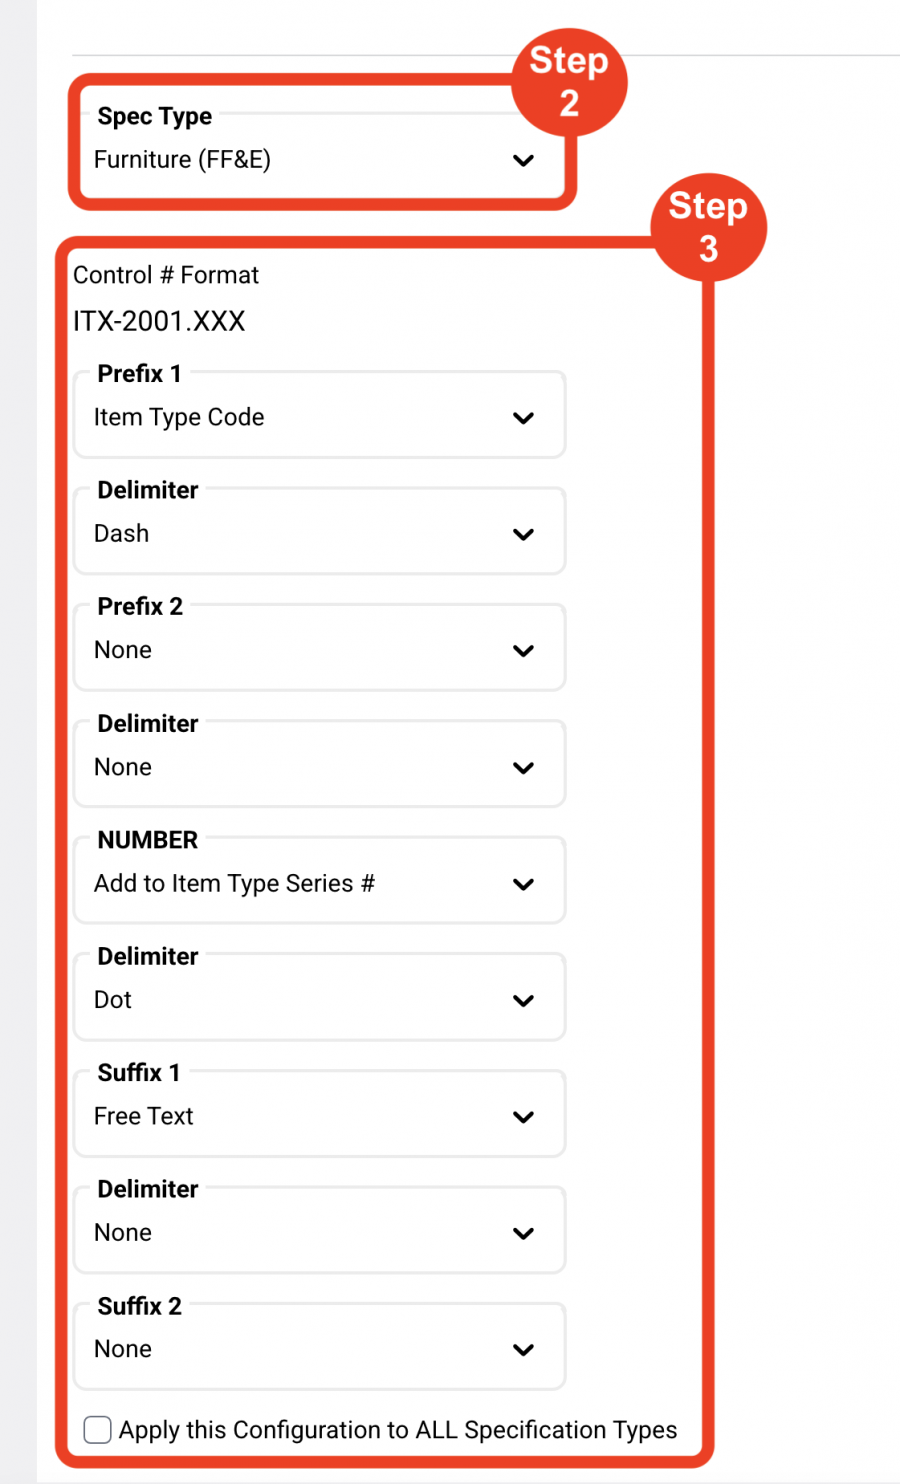
- Step 2: In the dropdown select the ‘Specification Type’.
- Step 3: Create a Control # Format by selecting from the dropdown options.
Control # Builder - Recommended format is:- Prefix 1 - Item Type Code
- Delimiter - Dash
- Prefix 2 - None
- Delimiter - None
- Number - Number
- Delimiter - Dot
- Suffix - Free Text
CH-1.A
- Step 4: Click on any checkboxes you will need to be applied.
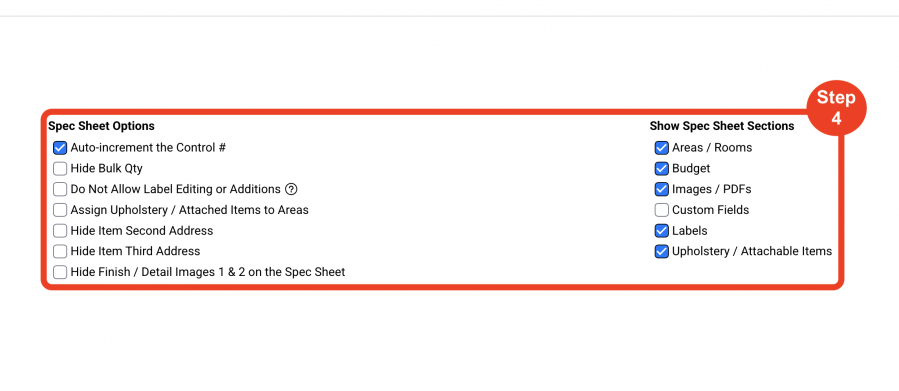
- Step 5: Click on 'Save'.
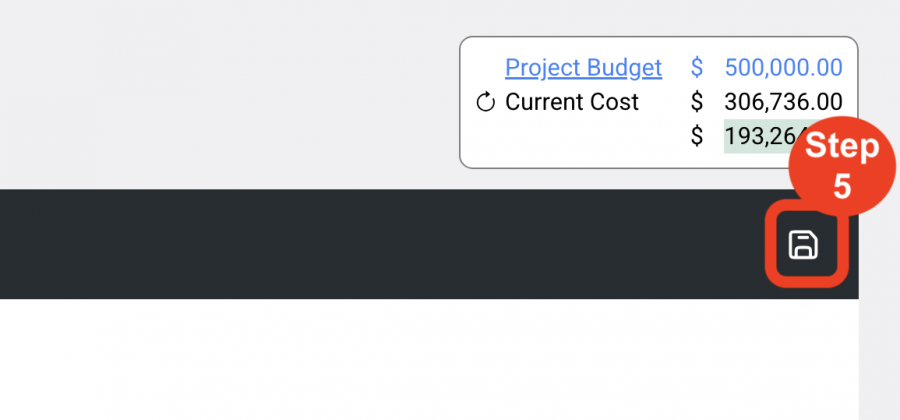
Spec Sheet Options
Auto-Increment the Control #
Checking Auto-increment the Control # automatically generates the next consecutive numeral in the control # builder so that after completing the first seating Spec CH-1, Create New Spec will automatically show up with CH-2, and the next seating Spec created CH-3 etc.
Hide Bulk Qty
Checking Hide Bulk Qty will remove the Bulk Qty field from the Budget tab. In Specsources, Bulk Qty refers to ‘attic stock’ or ‘extra pieces’.
Do Not Allow Label Editing or Additions
By checking this box, Administrators have the ability to prevent the design team from being able to edit or add to the list of labels that are in the templates when writing their Specs.
Assign Upholstery / Attached Items to Areas
Checking this box will enable an upholstery or attached item to have the Area Code as part of the control #. This function will also allow the upholsteries and attached items to be sorted by Area in different standard Reports.
Hide Item Second Address
Checking Hide Item Second Address will remove the Vendor Rep address and contact info from the printing on the Spec Sheet.
Hide Item Third Address
Checking Hide Item Third Address will remove the Manufacturer/Vendor Rep address and contact info from the printing on the Spec Sheet.
Hide Item Fourth Address
Checking Hide Item Fourth Address will remove the Manufacturer/Vendor Rep address and contact info from the printing on the Spec Sheet.
Hide Finish Images
Checking this box will prevent the additional finishes fields Finish #1 and Finish #2 from printing on the Spec Sheet.
Show Spec Sheet Sections
Areas / Rooms
This check box will allow access to the Areas / Rooms section of the Specification Schedule in order to enter Areas and Rooms for the Project.
Budget
This check box will allow the Budget pull-out tab to be visible for Spec items in order to enter and calculate item pricing.
Images / PDFs
This box will enable the + Additional Images and + PDFs sections so that the designer can upload as many additional image pages as they need and to attach as many Item PDFs as they need.
Labels
The Labels section is where the Spec information is written based on the Template that is selected for each item.
Upholstery / Attachable Item
Checking this box will enable the function to attach upholstery or other attachable items to another item in the Main Page of the Spec Sheet.
- Check this box only to apply the Configuration to all the Specification Types.
- Click ‘Save Config’.
