Address Books
Project Address List
(Roles: Super Admin, Address Book Manager, Admin Panel Manager)
OVERVIEW
A Project Address typically refers to the physical location where the Project is being executed. It is distinct from a client’s address and is not required when creating a new project.
If entered, the Project Address will appear on the Cover Sheet of the generated Spec Book, using the provided address fields.
QUICK TUTORIAL
Create New Project Address
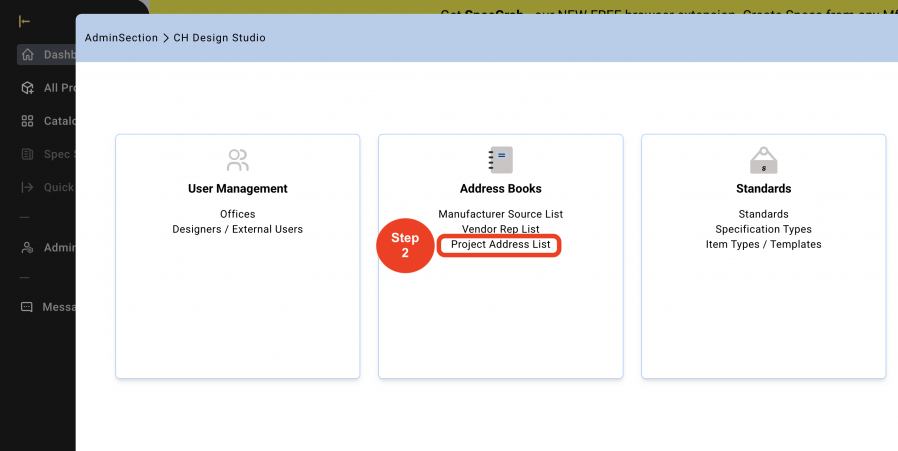
- Step 1: In the Left Navigation click on ‘Admin’.

- Step 2: Go to 'Address Books' and click on ‘Project Address List’.
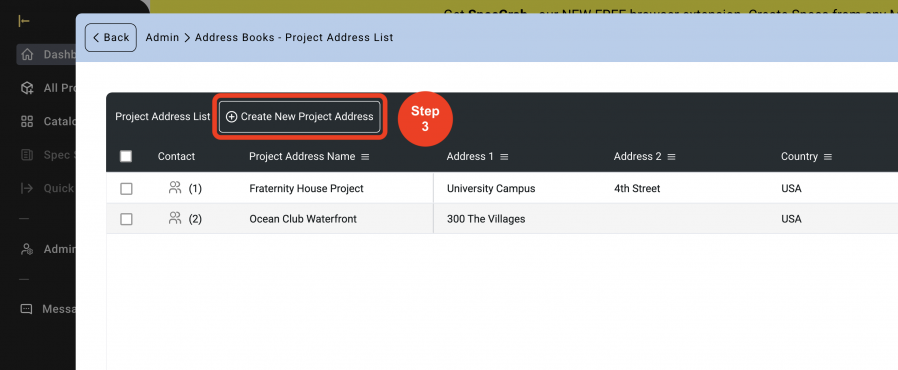
- Step 3: Click on ‘Create New Project Address’.
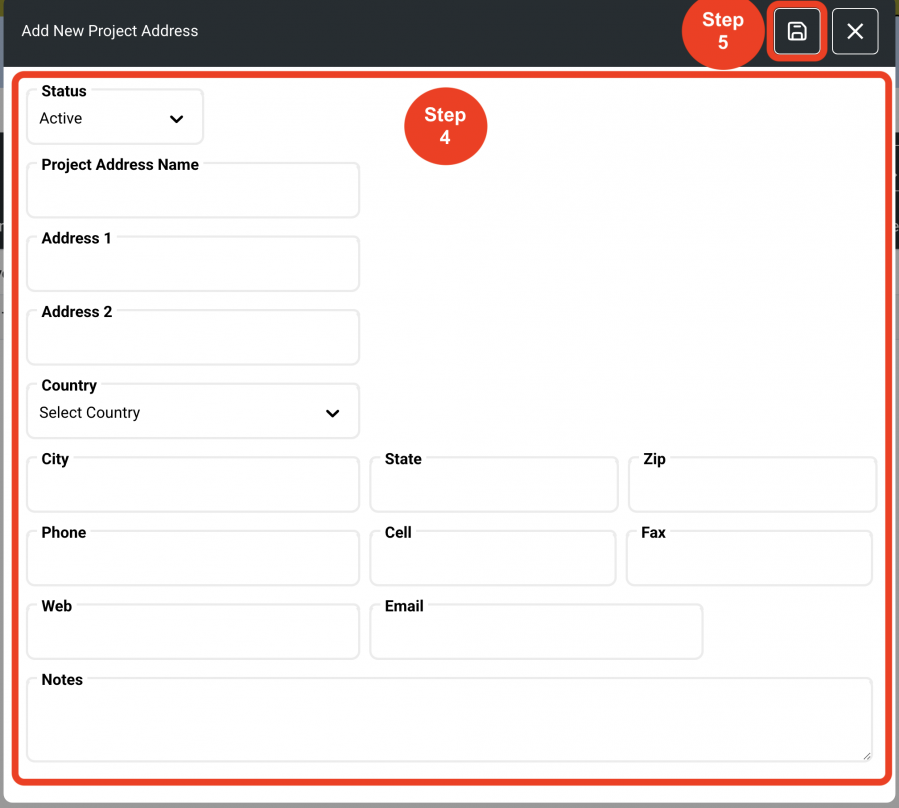
- Step 4: Select from the dropdown, if Project Address is ‘Active’ or ‘Inactive’. ‘Active’ should be the selection if the Project Address will be assigned to Projects. A Project Address can be taken out of the Active list to be selected using the ‘Status’ box.
*This will NOT delete it from Projects it was previously attached to, it will just prevent it from being attached to any new Projects.
Fill out the Information.
- Step 5: Click on ‘Save’.
Editing Project Addresses
A Project Address can be edited within the individual rows in the Project Address schedule.
- Step 1: Click on the ‘Pen’ icon. This is a toggle on and off. When toggled on, column headings will turn red indicating that information can be edited directly in the rows.
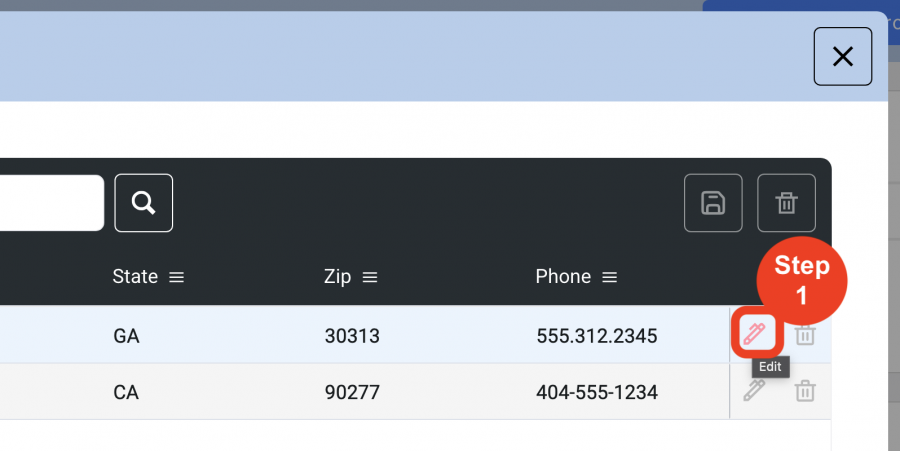
- Step 2: Enter information in the desired text box of any of the columns with the red headings directly in the grid.
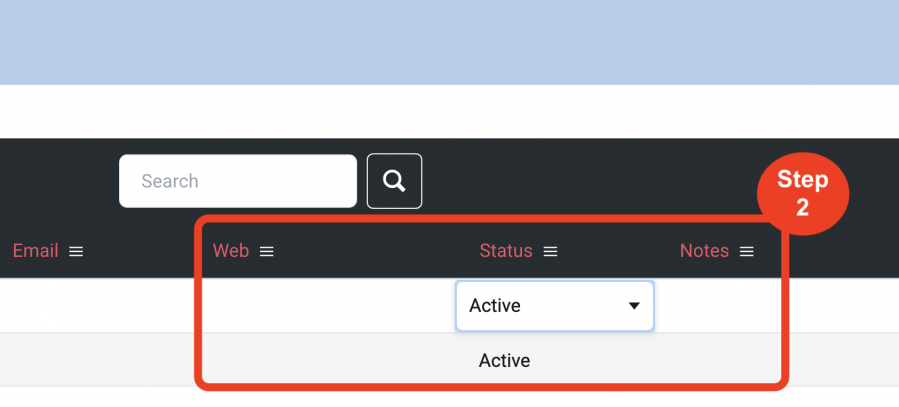
* A status can be changed to ‘Inactive’ so as not to delete the Project Address and keep it on the list. This change in 'Status' takes the address out of the active list that is used to select a Project Address in the Project Info page of a Project.
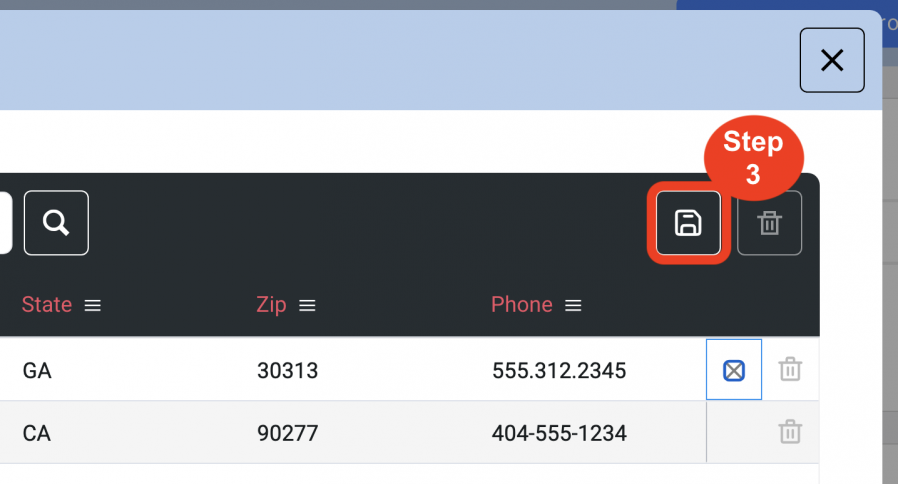
- Step 3: Click on 'Save'.
Adding Contacts
In order to populate the Project Address fields, a contact must be selected from the Contact dropdown in the Project Info page of a project. Therefore, contact names must be added to the Project Address contact page. If there is no contact person, then a contact must be created call ‘Default’ which will enable the action of selecting a contact from the dropdown in order to populate the text of the Project Address in the Project Info page of a Project.
Multiple contacts can be added for each Project Address depending on region and office locations.
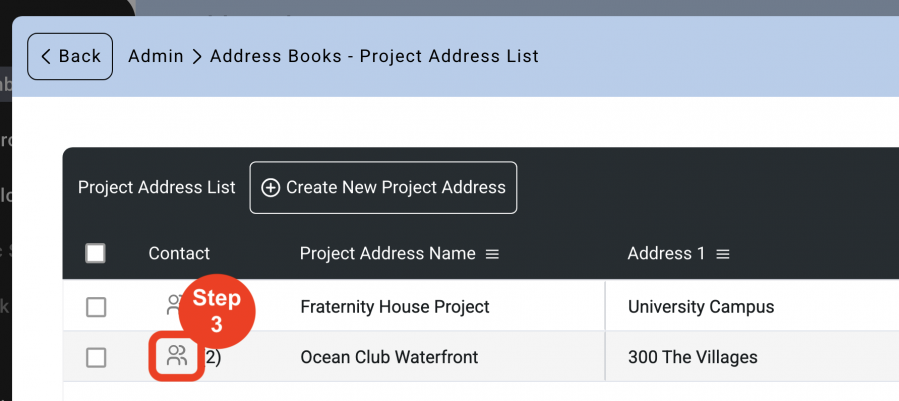
- Step 1: In the Left Navigation click on ‘Admin’.
- Step 2: Go to 'Address Books' and click on ‘Project Address List’.
- Step 3: Click on the 'People Icon'.
- Step 4: Click on 'Create New Contact'.
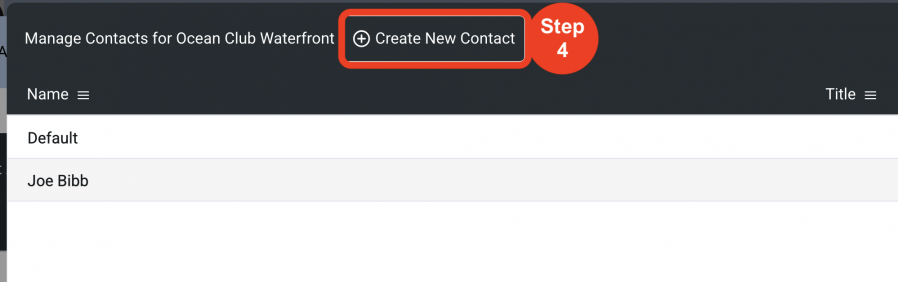
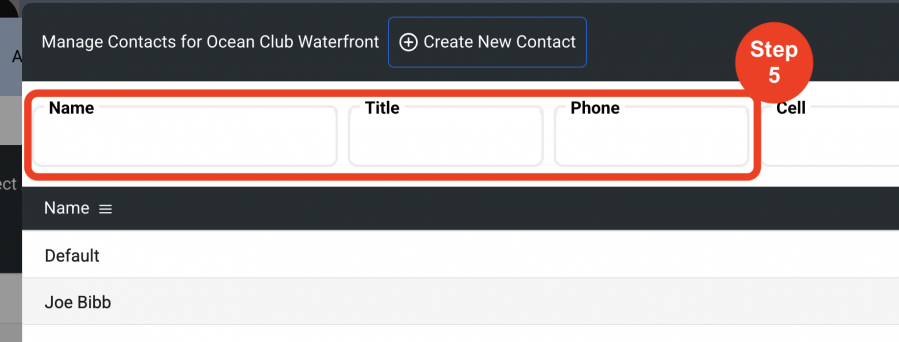
- Step 5: Fill out the Information.
- Step 6: Click on 'Save'.

Editing Contacts
All contact information can be edited.
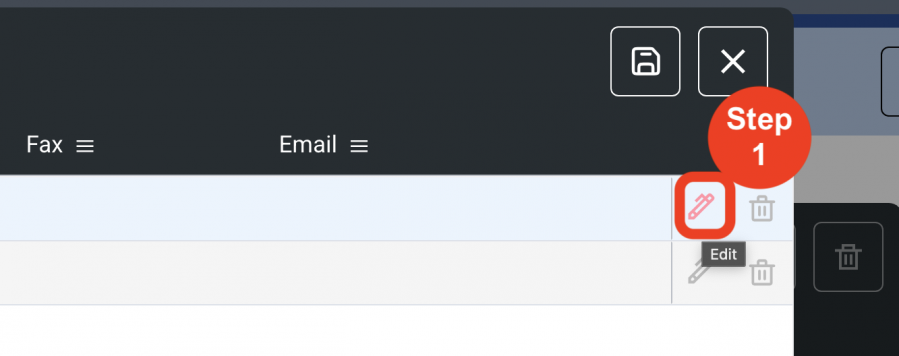
- Step 1: Click on the ‘Pen’ icon.
This is a toggle on and off. When toggled on, column headings will turn red indicating that information can be edited directly in the rows.
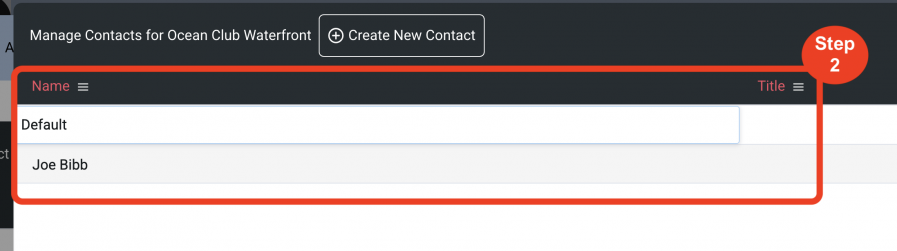
- Step 2: Enter information in the desired text box of any of the columns with the red headings directly in the grid.
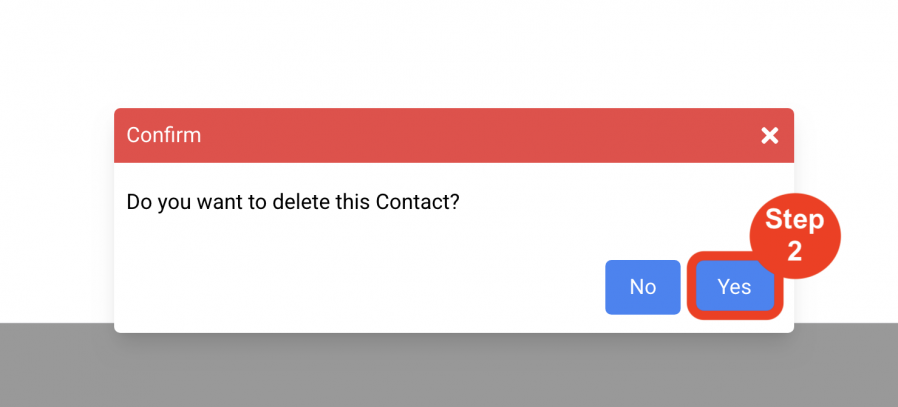
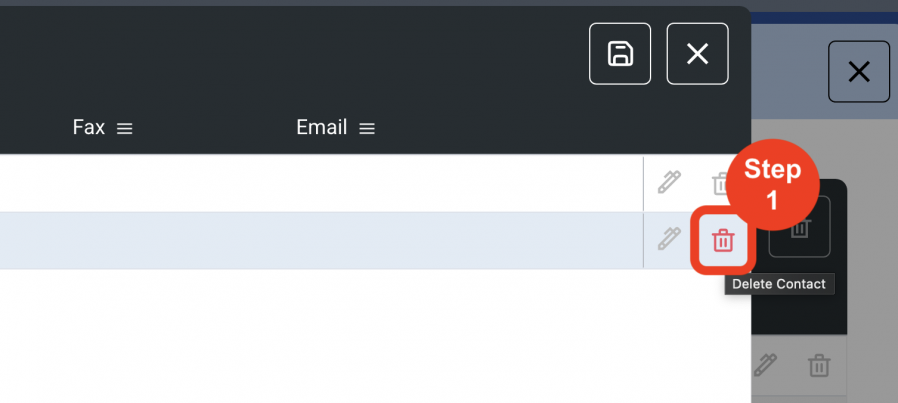
Deleting Contacts
When a contact is no longer associated with a Project Address, the contact list can be updated by deleting this contact.
- Step 1: Click on the 'Trash Bin' icon.
- Step 2: Click on 'Yes' to delete.