User Management
Designers / External Users
(Roles: Super Admin, IT Manager)
OVERVIEW
Access to SpecsWeb for a Designer / User requires the account to be created within the Admin page by a user with either the Super Admin or IT Manager role.
The number of Designers / Users that can be added is determined by the total number of active licenses purchased for the organization.
Some internal User roles—such as Payment Manager and IT Manager—do not require a purchased license and can be assigned without impacting the license count.
QUICK TUTORIAL
Adding a New Designer (7 Steps)
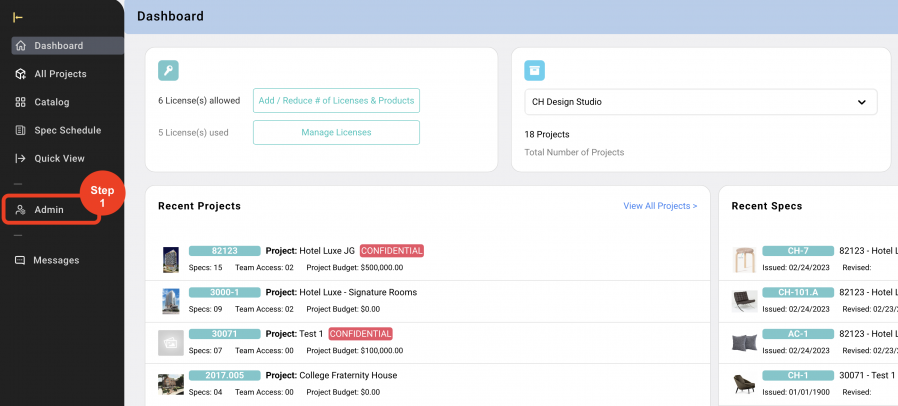
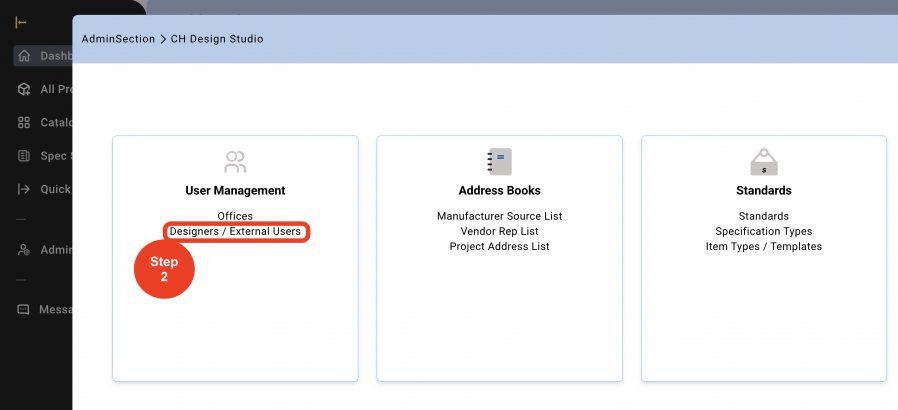
- Step 1: In the Left Navigation click on ‘Admin’.
- Step 2: Go to 'User Management' click on ‘Designers / External Users’.

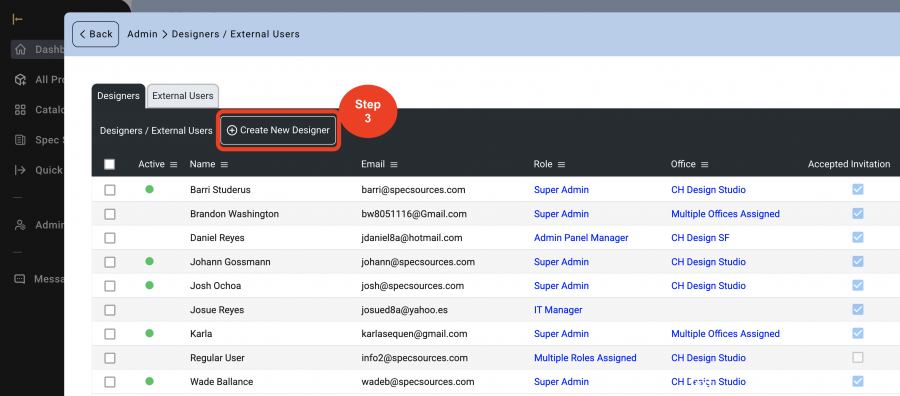
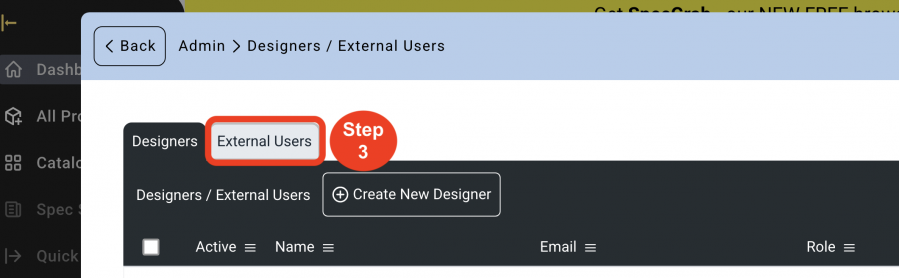
- Step 3: Click on ‘Create New Designer’.
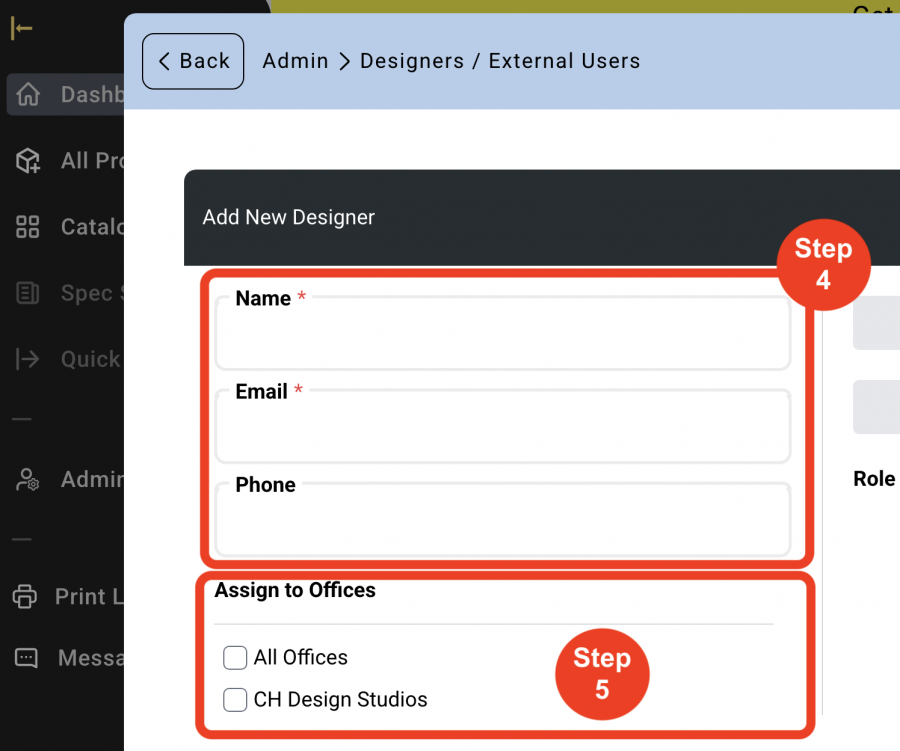
- Step 4: Enter required fields 'Name', and 'Email'.
'Phone' is optional. - Step 5: Select a 'Specific Office' or select 'All Offices'.
A Designer can be assigned to more than one Office.
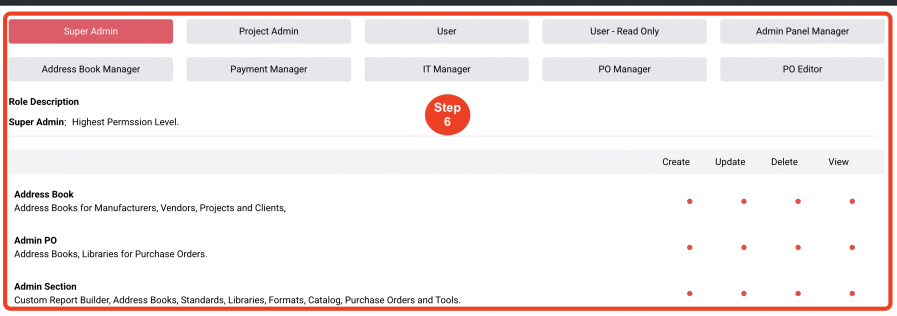
- Step 6: Click on a Role to be assigned to this Designer / User.
A Designer / User can be assigned to more than one role. Each role has a written description of the function within SpecWeb along with a matrix to show what the role can create, edit or view within SpecWeb.
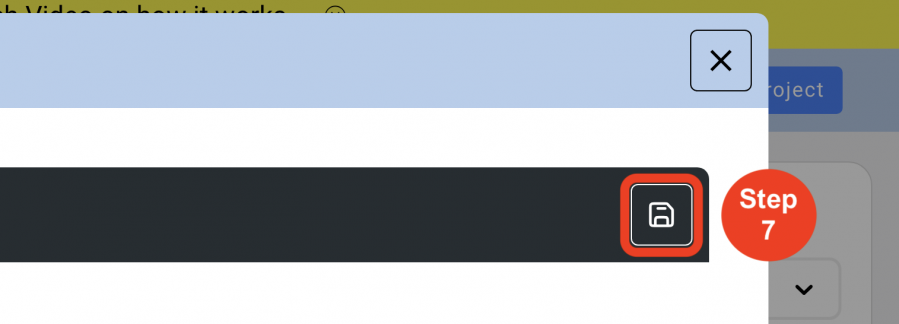
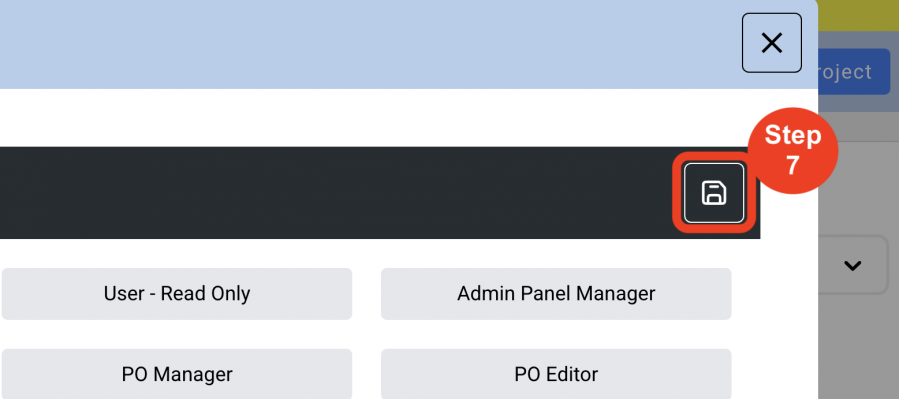
- Step 7: Click on ‘Save’.
* The Designer / User will be notified by email requesting to verify their email address and to create a password.
External User
OVERVIEW
An External User is described as a Client or a Vendor.
The Client can review specifications in a read-only view and approve, approve as noted or reject specifications that they receive from a designer.
The Vendor provides pricing and bids for a Project a Designer / user has given them access to.
External Users must first be created in the Admin page by either a Super Admin or IT Manager role. No cost to add an External User.
Notifications received from the Designer.
QUICK TUTORIAL
Adding a New External User
- Step 1: In the Left Navigation click on ‘Admin’.

- Step 2: Go to 'User Management' click on ‘Designers / External Users’.
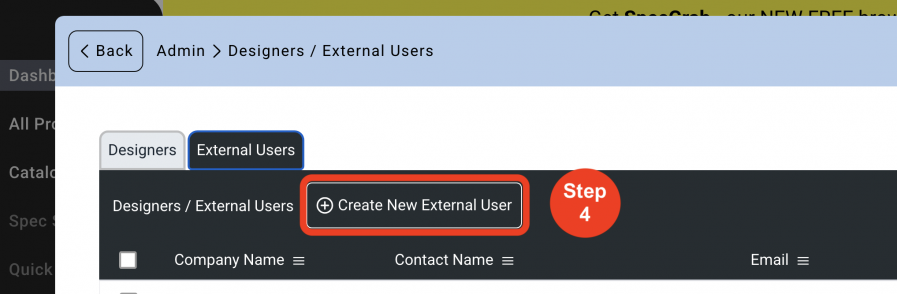
- Step 3: Click on the 'External Users' tab.
- Step 4: Click on 'Create New External User'.
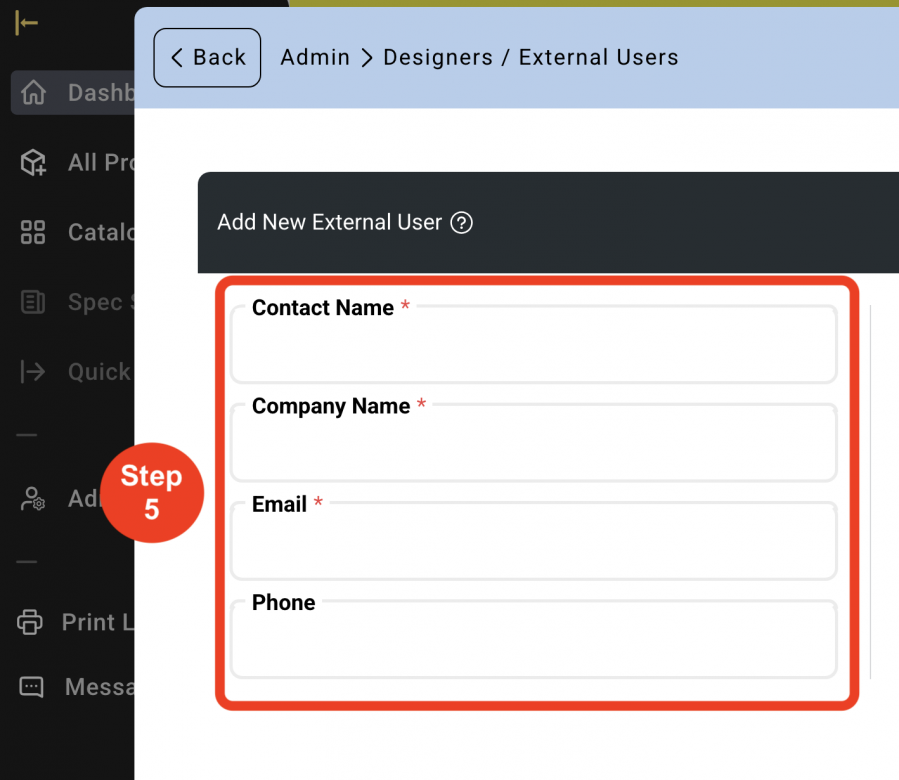
- Step 5: Enter required fields 'Contact Name', 'Company Name', and 'Email'.
'Phone' is optional.
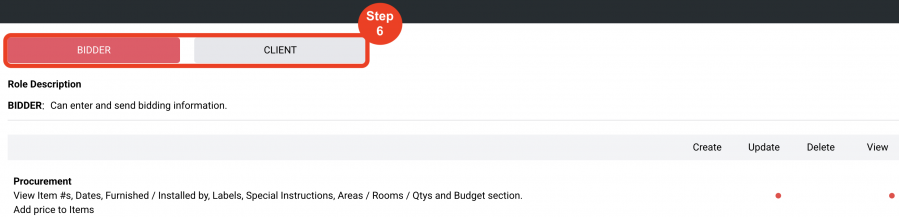
- Step 6: Click on the Role to be assigned to this External User.
- Step 7: Click on ‘Save’.
* The External User will be notified by email requesting to verify their email address and to create a password.