
Standards
Specification Types
(Roles: Super Admin, IT Manager)
OVERVIEW
The Specification Type page is where the Master settings are defined for how the Spec Book packages are managed for a particular Standard. Master settings include defining the Spec Type
names, determining the configuration of the Item numbers on the Spec Sheets, selecting Spec Sheet Options and Spec Sheet Sections
required for writing Specifications.
Spec Type
A Specification Type, or Spec Type, is a sub-section under the Standard title. It organizes groups of items that make up the Specification Spec Book for that particular Spec Type.
Common Specification Type names for producing Spec Books are:
- Furniture (FF&E)
- Architectural Finishes
- Hardware
- Sanitary Ware
- OFCI
Important Fact: Specification Types generate separate spec books and CANNOT be combined when printing Spec Books or Reports.
QUICK TUTORIAL
Create a new Specification Type
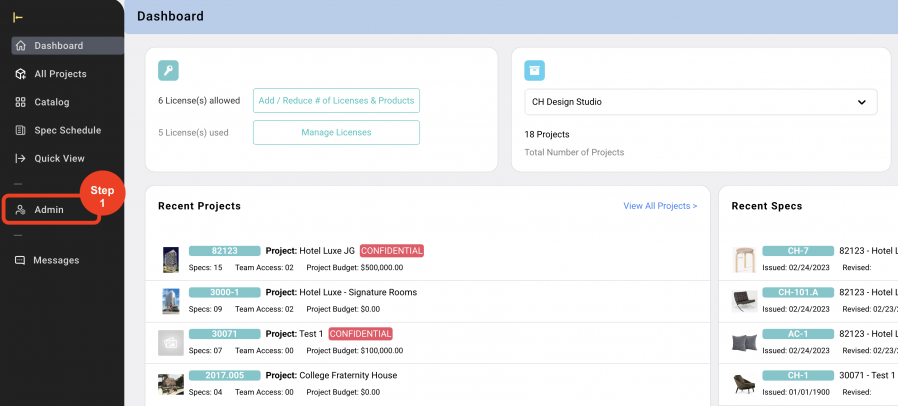
- Step 1: In the Left Navigation click on ‘Admin’.
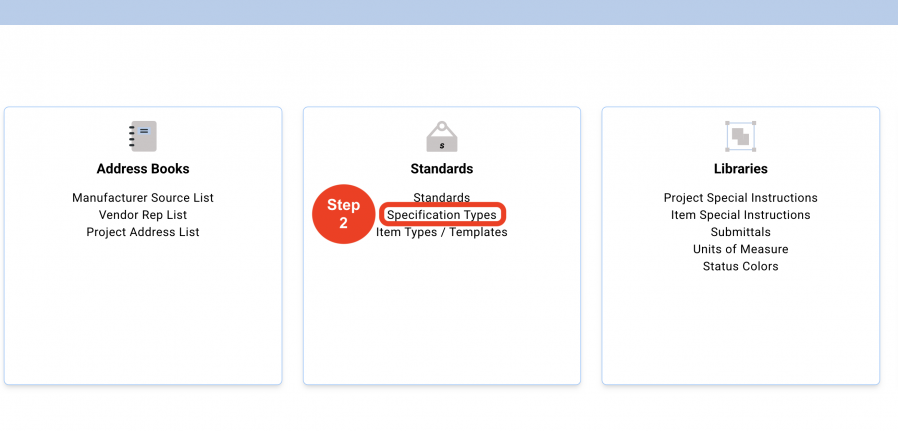
- Step 2: Go to 'Standards' and click on ‘Specification Types’.
- Step 3: Select the 'Standard' from the dropdown.

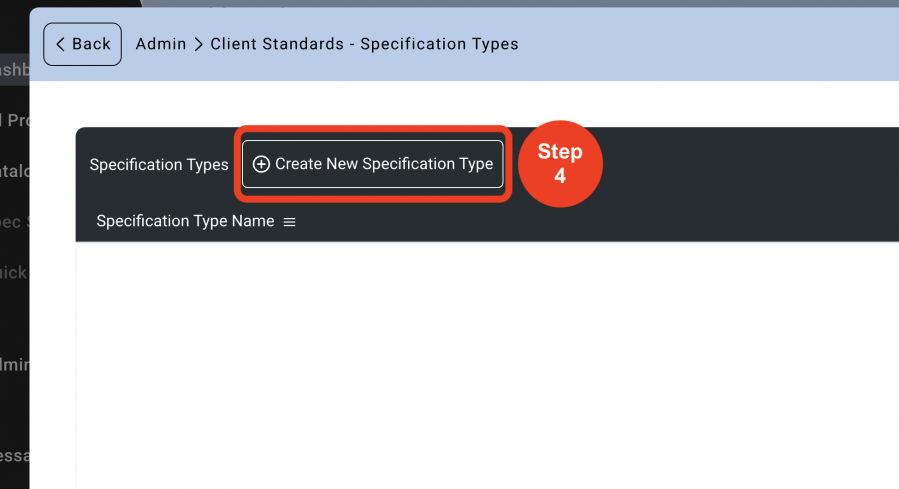
- Step 4: Click on ‘Create New Specification Type’.
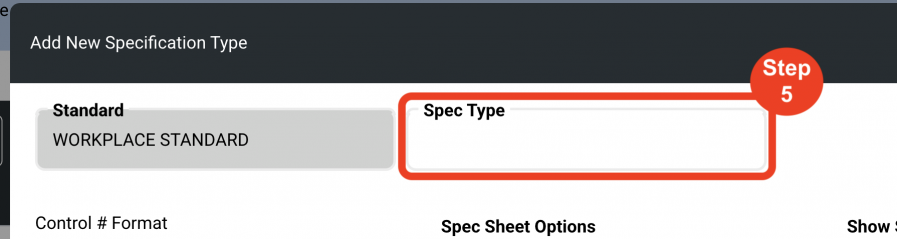
- Step 5: Enter the Specification Type name.
Control # Format
The Item Number on a Spec Sheet is referred to as a Control #. The Item Number can be configured a variety of ways with different Prefixes, Delimeters, Numbers and Suffixes. Once the Config has been saved, the Item Numbers will automatically be created in the Spec Sheet based on the formatting that has been set up in this page. Each Spec Type can have a different Control # Format.
Prefixes and Suffixes can be selected from one of the following:
- None
- Area Code Guestroom -GR, Public Area- PA
- Area Series # First floor – 100 series, Second floor – 200 series
- Item Type Code Case goods -CG, Seating - CH
- Item Type Series # Case goods -300 series, Seating – 400 series
- Room ID Room Codes – ie. Lobby, LO or Room # - 102,103, 104
- Free Text
Delimeters are pre-selected in this page and will generate automatically in the Spec Sheet. There is no need to manually type in a dash or a dot. Example selections include:
- None
- Dash
- Dot
- Colon
The Number on a Spec Sheet must be configured from a numeral. The options are:
- Manually or Auto-incrementally add a single number.
- Add to Area Series # - ie. The first floor is the 100 series, second floor the 200 series.
- Add to an Item Type Series # - ie. All case goods are the 300 series, artwork the 800 series.
Important Fact: In the Spec Sheet, if adding the number to the Area Series # or the Item Type Series #, SpecWeb will automatically add the single number to the series number so that an item will become 202 or 302. Do Not put the full series number into the field or 202 will become 402 because the system is adding the series number 200 to the entry of 202.
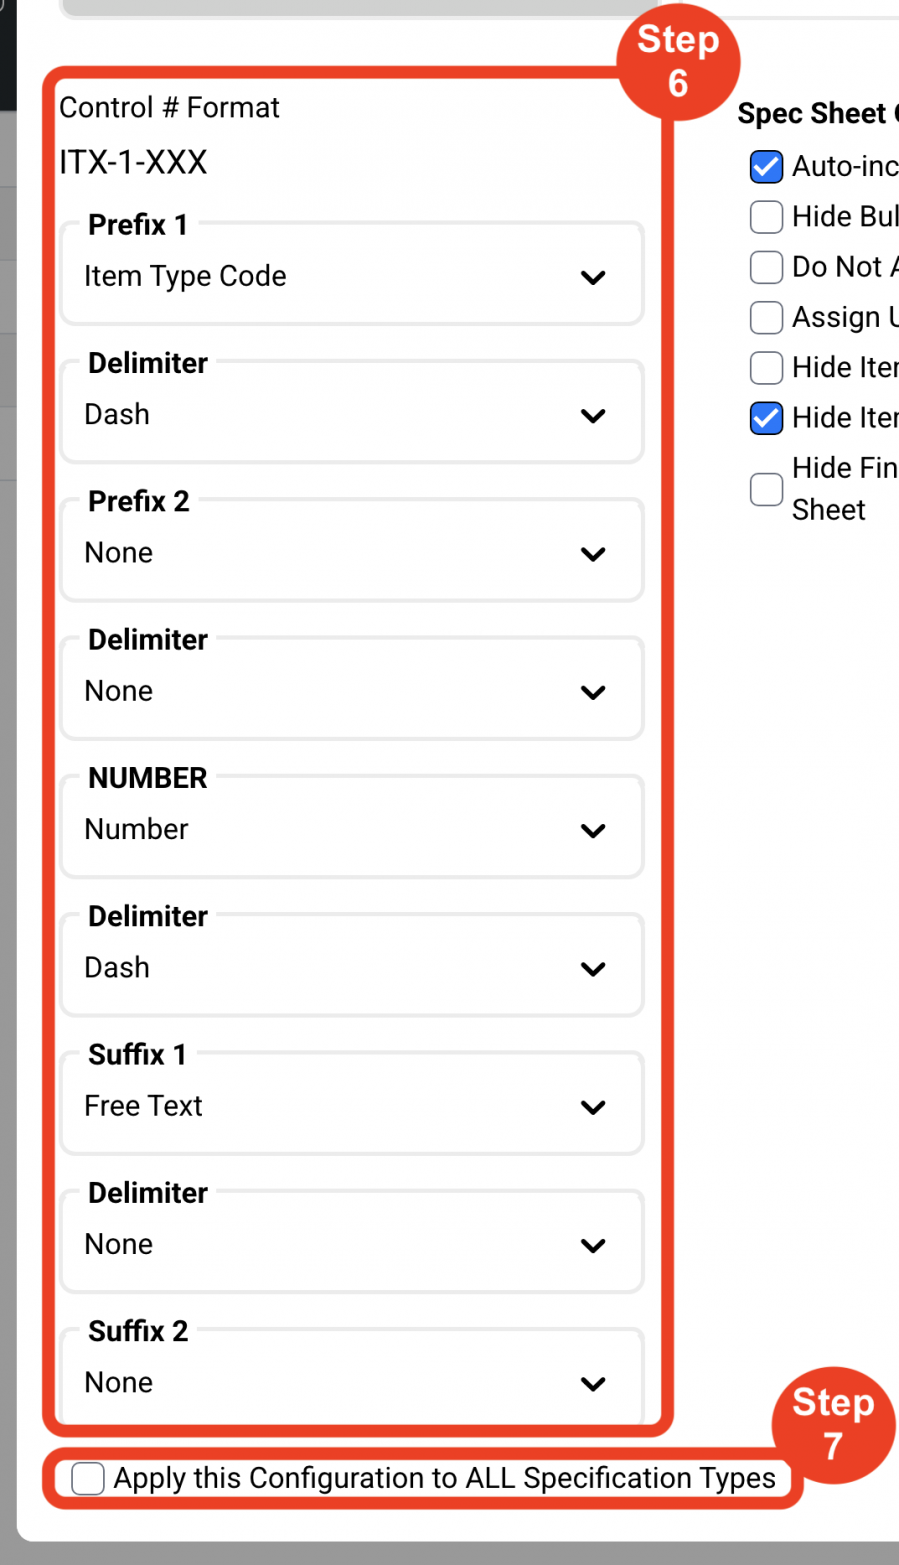
- Step 6: Create a Control # Format by adding from the dropdown options.
*Recommended format is:- Prefix 1 - Item Type Code
- Prefix 2 - None
- Number - Number
- Suffix 1 - Free Text
- Suffix 2 - None
- Step 7: Click on the checkbox only if you wish to apply the Configuration to all the Spec Types.
Spec Sheet Options
Spec Sheet Options are Master settings to allow or prevent actions by the Spec writer for the Project.
- Auto-increment the Control # - Allows for automatic numbering in sequence.
- Hide Bulk Quantity – Bulk Quantity is considered Attic Stock or Additional Pieces. This active field can be hidden in the Spec Sheet to prevent data entry by the Spec Writer.
- Do Not Allow Label Editing or Additions – This will prevent the Spec Writer from editing or adding Labels and text in the Spec Sheet.
- Assign Upholstery / Attached Items to Areas – Required in order to assign the Area to the upholstery or attached items Spec Sheets so that the Area Code appears in the Item Number of the Upholstery / Attached Items Spec Sheet.
- Hide Item Second Address – Removes the ability to select from the Vendor drop down in the Spec Sheet
- Hide Item Third Address - Removes the ability to select from an optional third drop down in the Spec Sheet
- Hide Finish Images - Removes the ability to add secondary finish images to the Spec Sheet.
Spec Sheet Sections
Spec Sheet Sections are Master Settings to display or remove active components that the Spec writer can utilize for writing Specs for the Project.
- Areas / Rooms – Displays the section to manually enter the Areas and Rooms for a Project.
- Budget – Displays a Budget pull-out tab for Spec Writer to input Actual Costs for an item.
- Images / PDFs – Displays fields to upload images and pdfs for the Spec Sheet.
- Labels – Displays the section where the Spec Writer inputs the Specification information.
- Upholstery / Attachable Items - Displays the section to allow the Spec Writer to attach fabrics and/or other attachable items to a Spec Item.
- Custom Fields – Displays fields that can be utilized for the customization of the Spec Sheet to incorporate miscellaneous information not standard to the printed Spec Sheet.
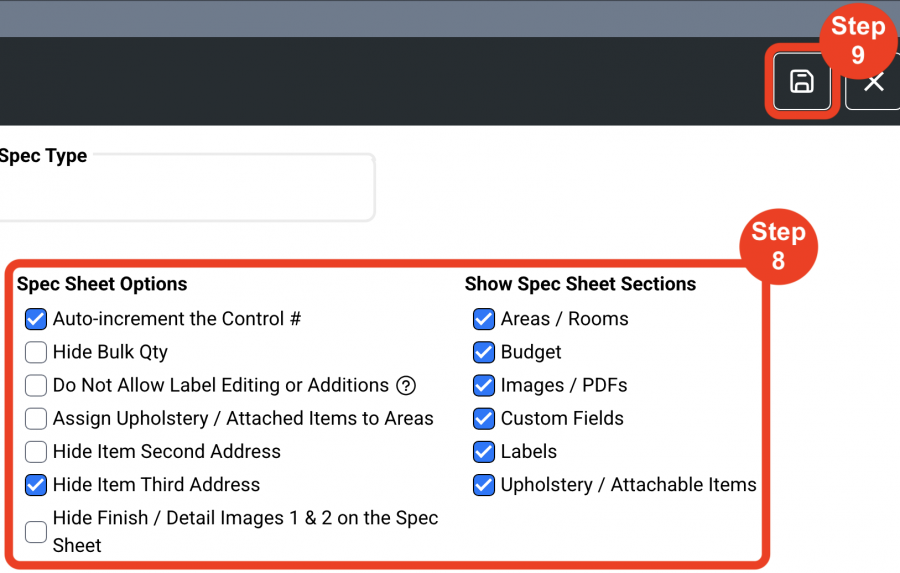
- Step 8: Check the checkboxes to customize the way the Specs will be shown.
- Step 9: Click on ‘Save Specification Type’.
Editing Specification Type
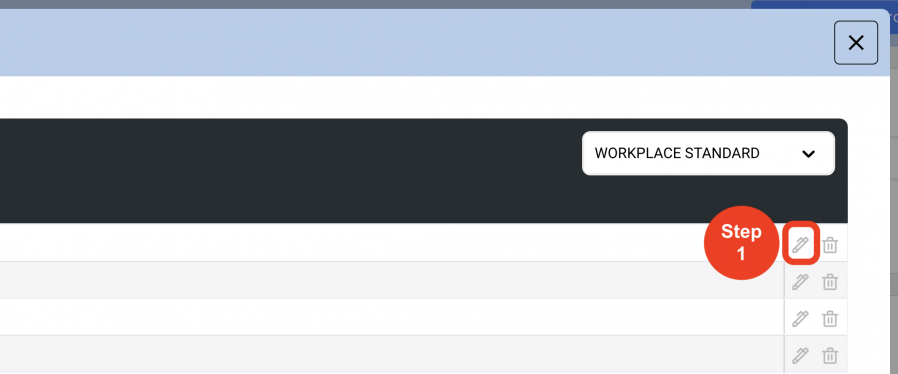
- Step 1: Click on the 'Pen Icon' of the Desired Specification Type to be edited.
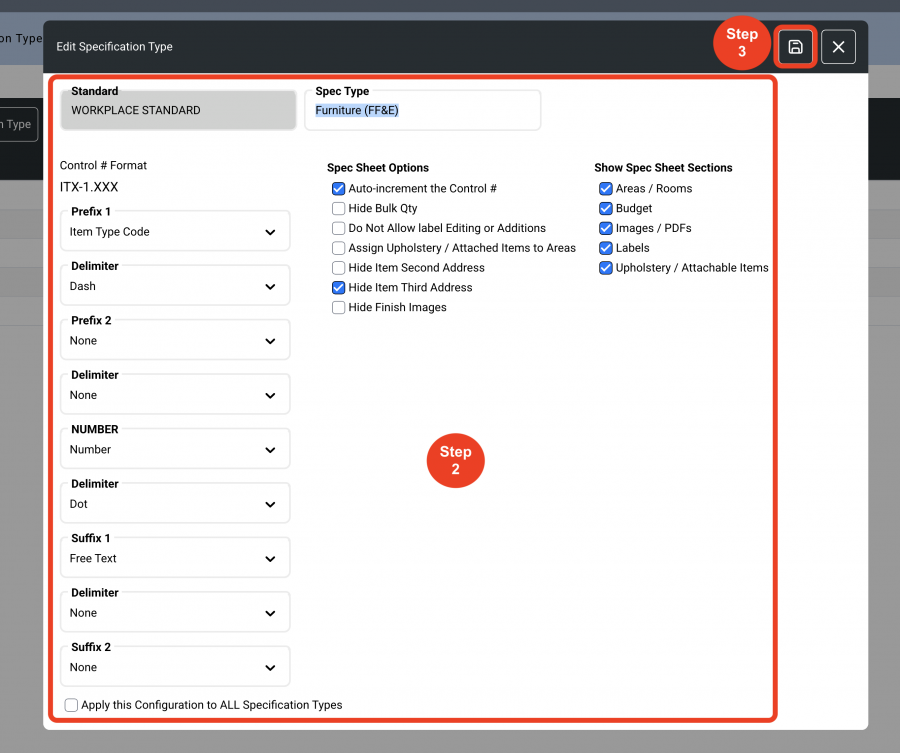
- Step 2: Enter the desired information and make the necessary changes.
- Step 3: Click on 'Save'.
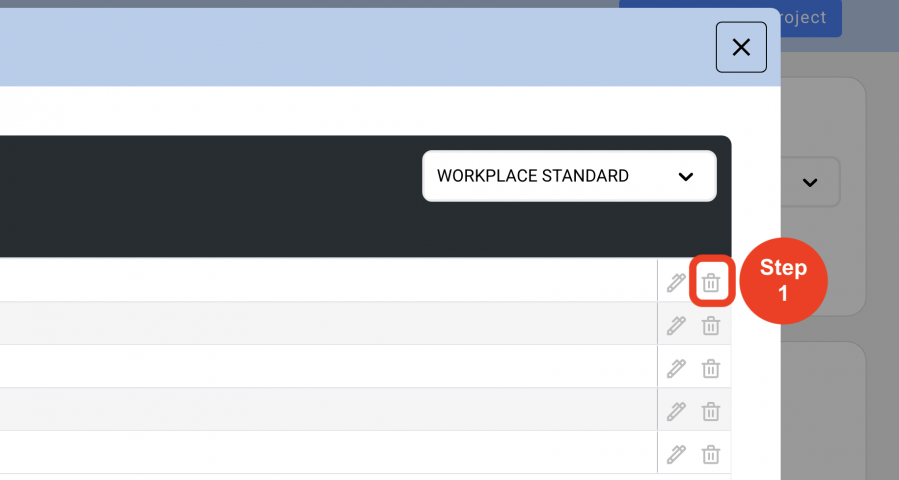
Deleting a Specification Type
- Step 1: Click on the 'Trash Bin' icon to the right.
- Step 2: Click on ‘Yes’.
*A Spec Type CANNOT be deleted if Item Types are assigned to it.

