Standards
Item Types / Templates
(Roles: Super Admin, IT Manager)
OVERVIEW
The Item Types and Templates page is where the Master Settings are defined for how the Standard / Spec Type / Item Type categories are managed for a particular Spec Book. Master Settings include defining the Item Type Name, determining the Item Type Code and Item Type Series # and creating master Templates for each item type category as required.
QUICK TUTORIAL
Create a New Item Type
Item Types are the categories that make up the specification items in the Spec Book.
- Step 1: In the Left Navigation click on ‘Admin’.
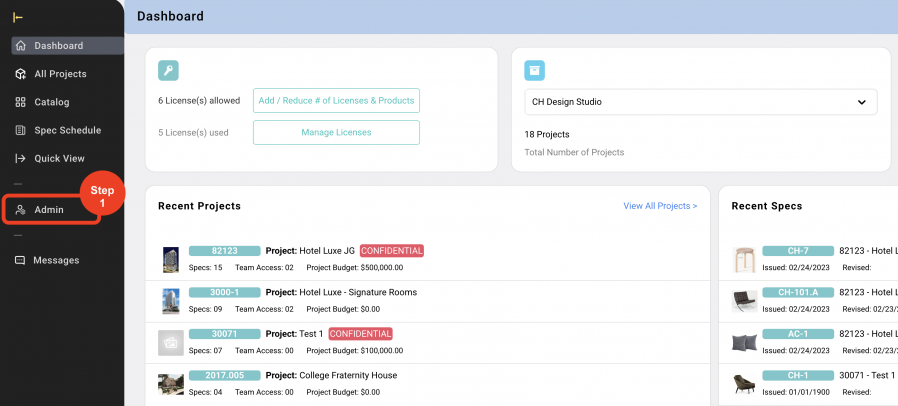
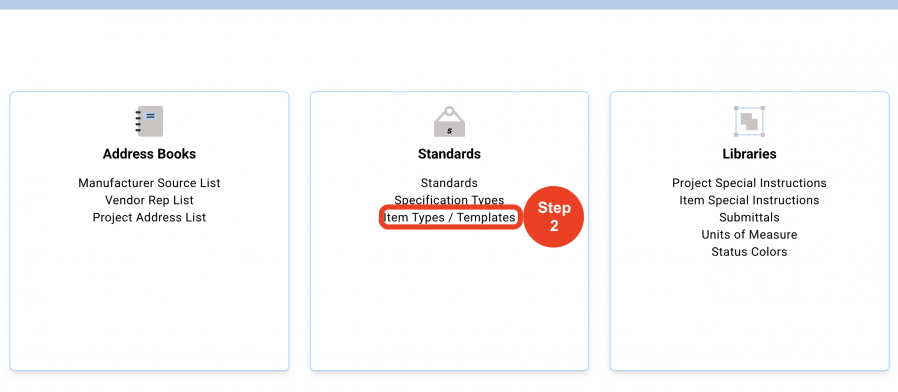
- Step 2: Go to 'Standards' and click on ‘Item Types / Templates’.
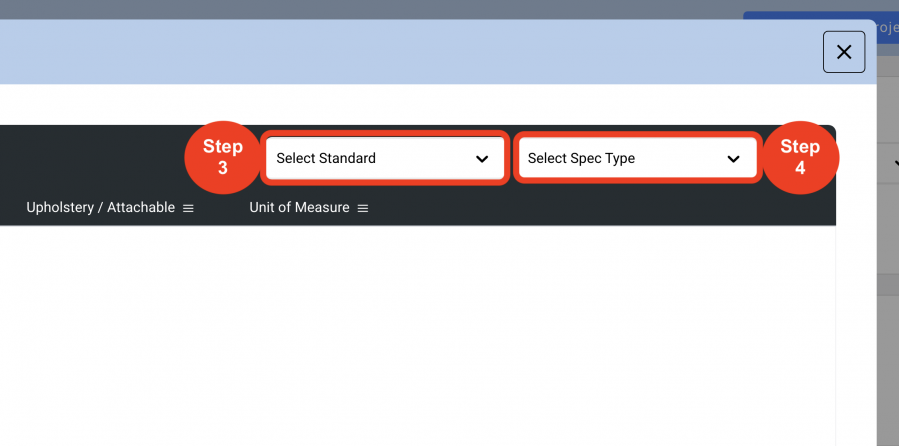
- Step 3: In the dropdown at the top right of the page, select the 'Standard'.
- Step 4: On the next dropdown select the 'Spec Type' to add Item Types.
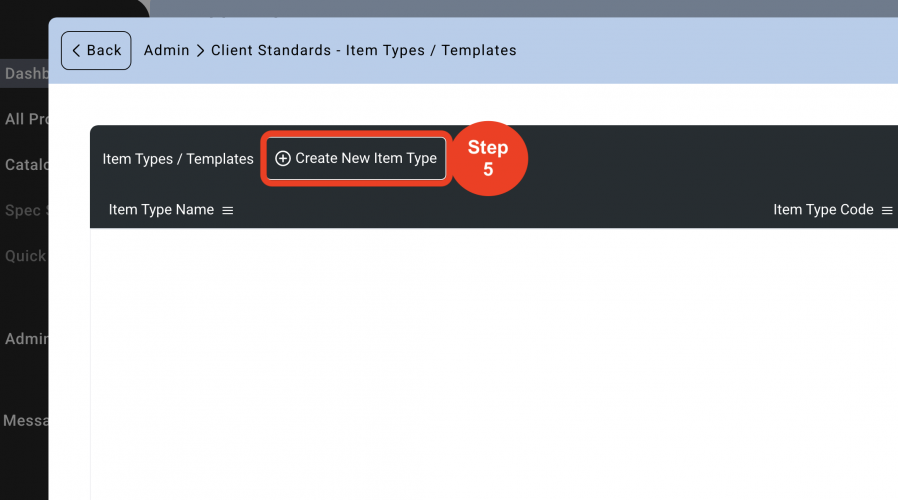
- Step 5: Click on ‘Create New Item Type’.
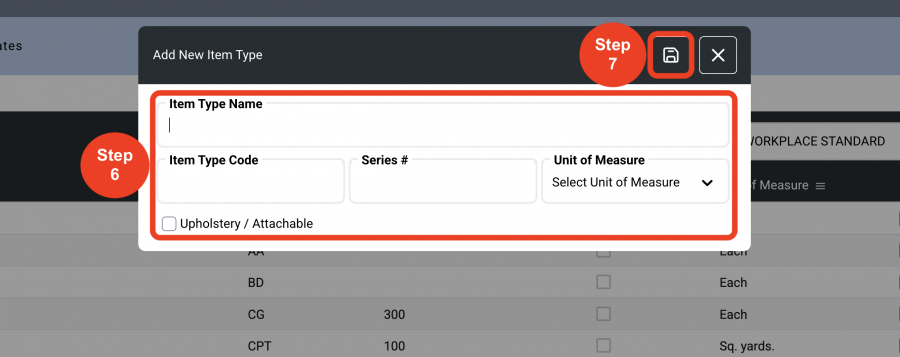
- Step 6: In the Pop-up, click in the blank row at the top, enter the Item Type name. Enter ‘Item Type Code’. This is a code that will represent the prefix for the Control # if the configuration incorporates the Item Type Code. For example:All Case goods – CG
All Seating – CH
All Upholstery – UPH
Enter ‘Item Type Series #’. This is a series number that will represent the numbering for the Control # if the configuration incorporates the ‘Add to an Item Type Series #’. For example:All Casegoods are the 300 Series
All Seating is the 400 Series
All Upholstery is the 900 Series
Select a Unit of Measure from the dropdown which was populated in Admin>Units of Measure. Assigning a Unit of Measure (UOM) when creating the Item Type as a Master Setting, saves the Spec Writer time when writing the Spec. The UOM can be edited in the Spec Sheet by the Spec Writer.
Check the ‘Upholstery / Attachable Spec Sheet’ checkbox ONLY if this is Upholstery or an Item Type that can be attached to another Item Type.ie. Check it if it’s Upholstery, but NOT if it’s the chair it’s going on.
- Step 7: Click on 'Save'.
Editing Item Types
Item Types can be Edited if an Item Type Code, Item Type Series # or Unit of Measure changes.
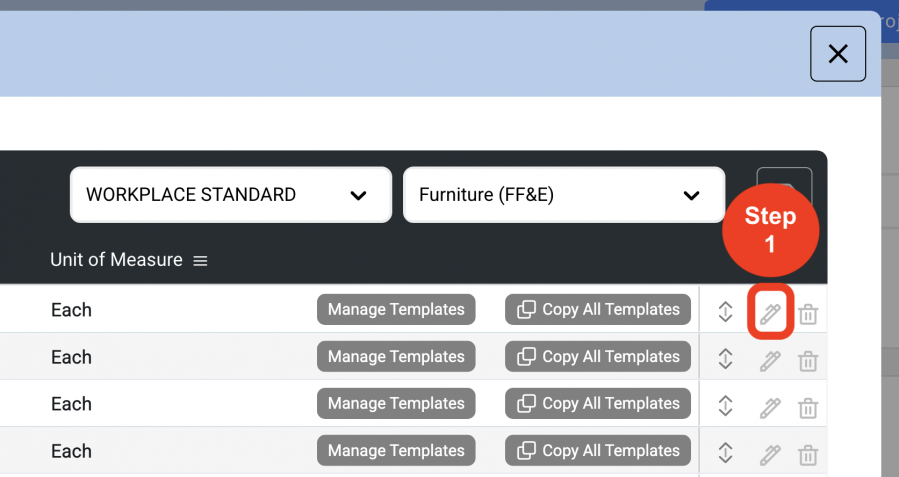
- Step 1: Click on the 'Pen Icon'.
- Step 2: Edit the information in the fields of the row.
*The red font in the top Header indicates that the texts below can be edited.

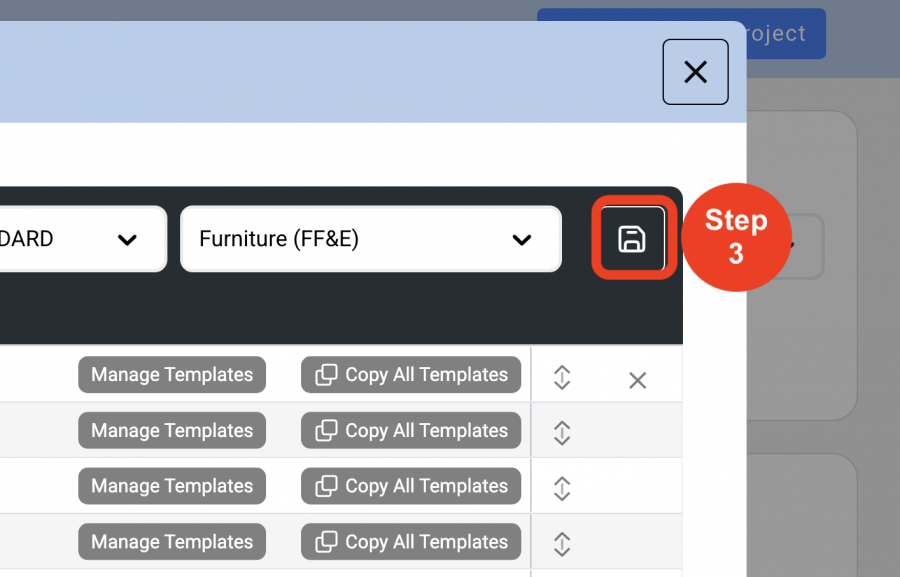
- Step 3: Click on 'Save'.
Create a New Template
OVERVIEW
Master Templates can be created for each Item Type in order to save the Spec Writer time when writing Specs. Templates are composed of four sections: Submittals, Furnished / Installed by, Labels, and Item Special Instructions. Each section contains pre-determined information intended to help standardize descriptions and formatting of the Spec Sheets.
Once a Template is created in the Admin Page, the Spec Writer can select the Template Name while writing the Spec and it will be loaded into the Spec sheet, ready for data entry. The submittals will have been pre-selected, the Labels column already filled out and the Item Special Instructions are already complete. All the Spec Writer has to do is write the text beside the labels. Each section can be edited by the Spec Writer if allowed permission to do so by the Super Admin in the Spec Type master settings.
QUICK TUTORIAL
Create a New Template
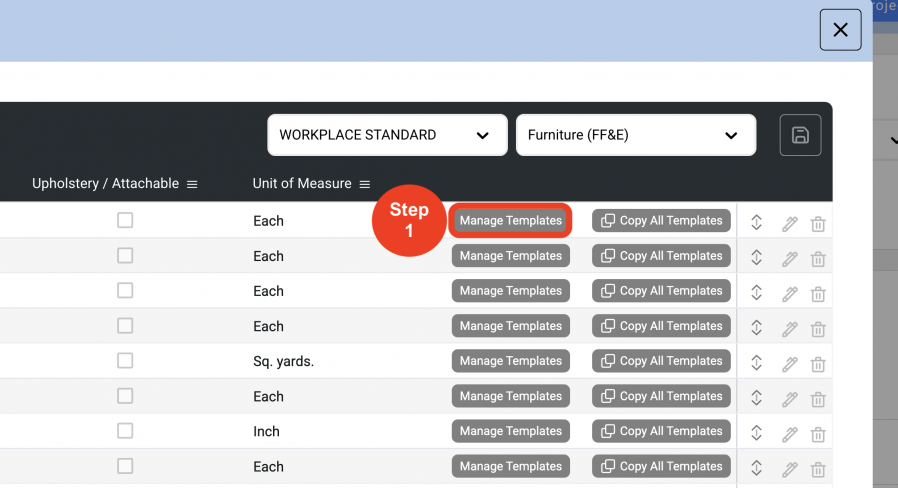
- Step 1: Click on 'Manage Templates'.
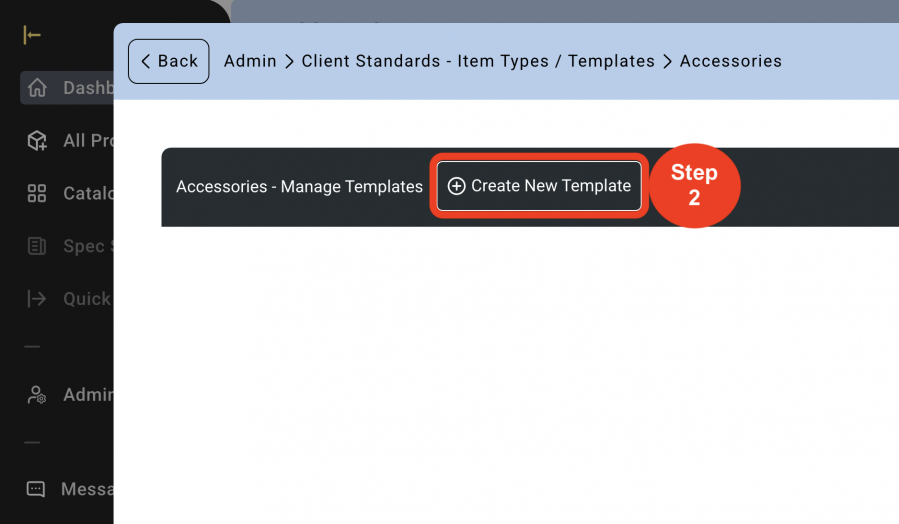
- Step 2: Click on 'Create New Template'.
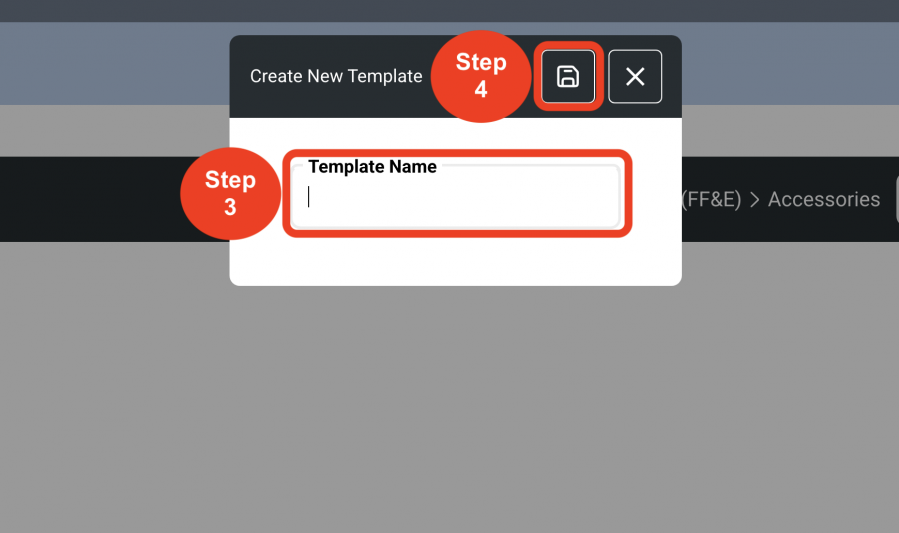
- Step 3: Enter the Template Name.
- Step 4: Click on 'Save'.
- Step 5: Check the checkboxes of the desired Submittals that should be displayed in the Spec sheets (you can only select up to 5).
If a Submittal is not displayed, click on 'Add New Submittal'. Add a name and save. (This will display the Submittal on the Template page).

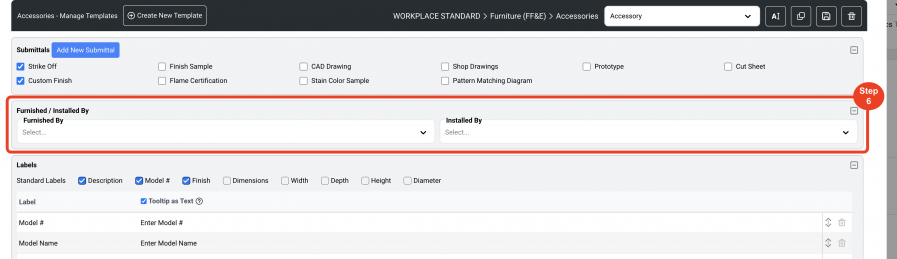
- Step 6: Furnished / Installed by. Pre-select the ‘Furnished by’ and the ‘Installed by’ entities from the drop down. The Standard options are below. These selections are a print option to show on the Spec Sheet or to run in a Report.
- None
- Contractor
- Owner
- Purchaser
- Hotel
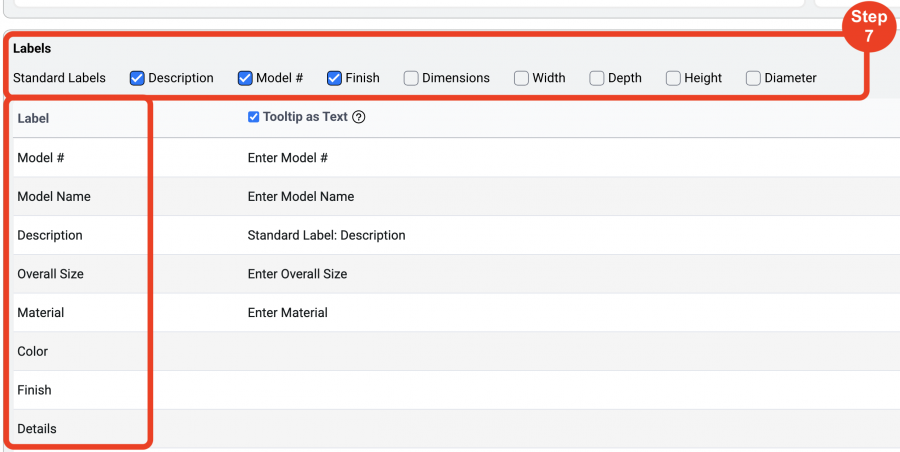
- Step 7: Labels - A Label is a descriptor of the Item Category ie. Model #, Model Name, Description, Dimensions; all Specification requirements for that Item Type Category. Specsources’ Standard Labels can be added to the Label column by selecting from the Standards check boxes.
In the Label column, click in the row to enter Label text. Hit enter on your keyboard to accept the text that was entered. Then click the plus to add this label row. Use the arrows at right to drag and drop to position the label in the desired order. To Delete rows, click on the 'Trash Bin' icon
- Step 8: Tooltips - A Tooltip is a prompt to the Spec Writer from the Super Admin. Tooltips Do Not print on the Spec Sheet. An example of a Tooltip is W x D x H in the Tooltip column of the Label column Dimension row. When the spec writer scrolls over this row when writing the Spec, a bubble will pop up displaying ‘W x D x H’ to remind the Spec Writer that this is the format for Dimensions.
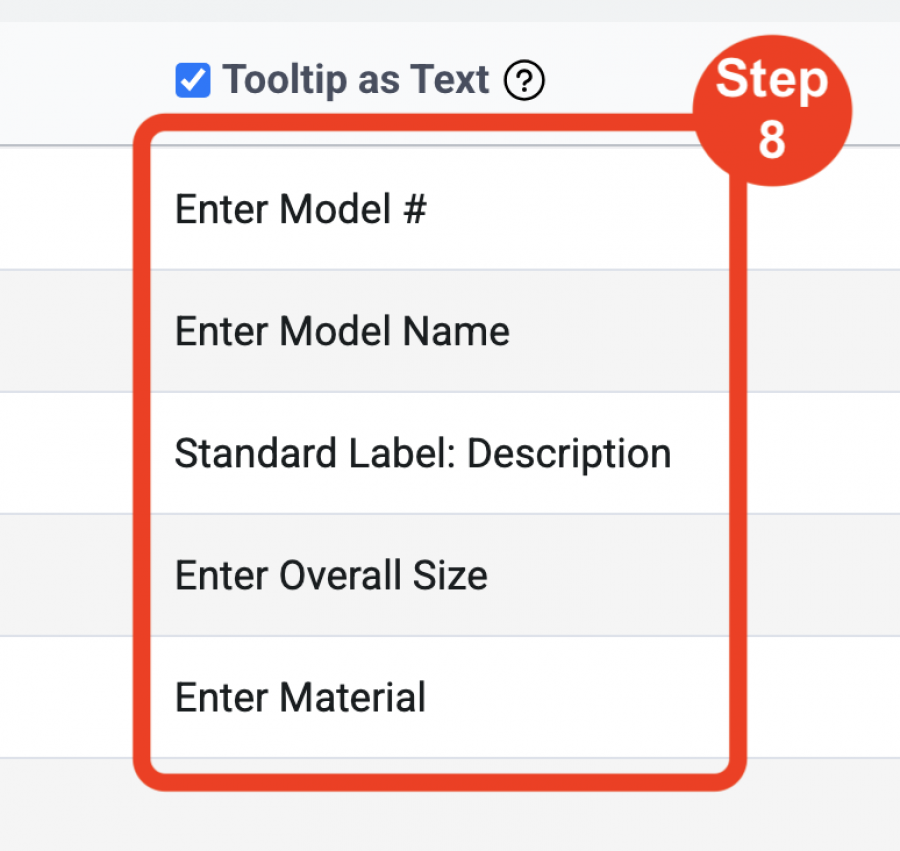
- Step 9: 'Tooltip as Text' – If the desire is to print the Tooltip text on the Spec Sheet, check the option ‘Tooltip as Text’ to activate the function which WILL print the Tooltip text on the spec sheet.

A Master Template can be edited in the Admin > Standards > Item Types / Templates page by clicking on the ‘Manage Templates’ button.
Important Fact: Editing a Template in the Admin page Does Not automatically update Specs that have been written in Project.
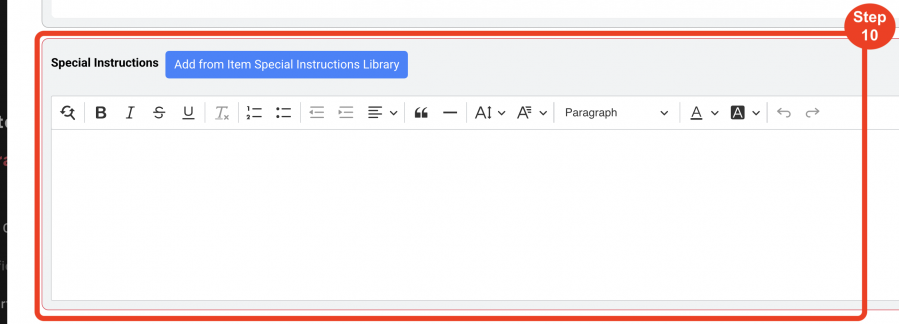
- Step 10: Item Special Instructions Library - Click on ‘Add from Item Special Instructions Library'.
*Special Instructions can be typed into the Text box field, and can also be copied and pasted from another document.
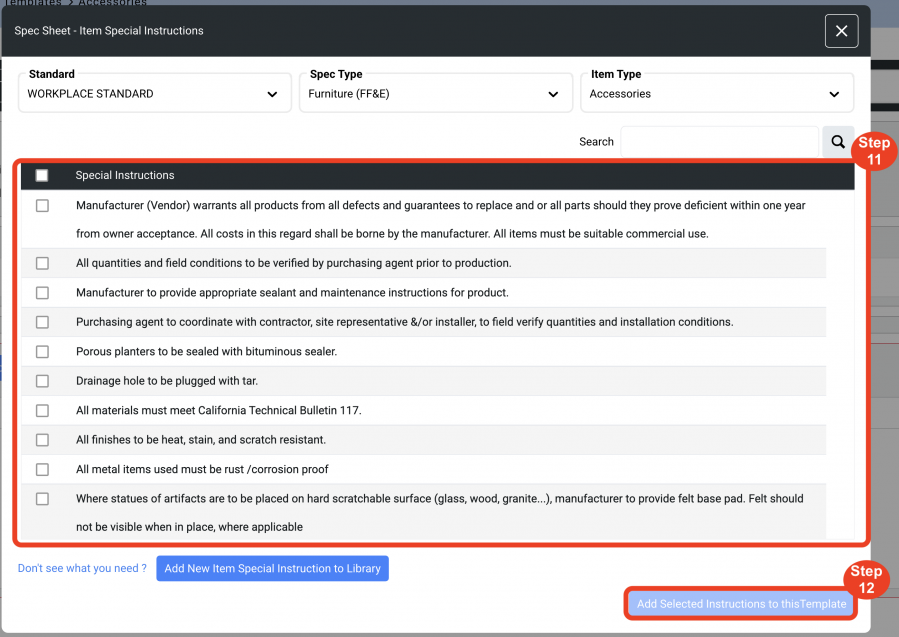
- Step 11: Select from the list of existing Special Instructions (Choose as many as needed).
- Step 12: Click on 'Add Selected Instructions to this Template'.
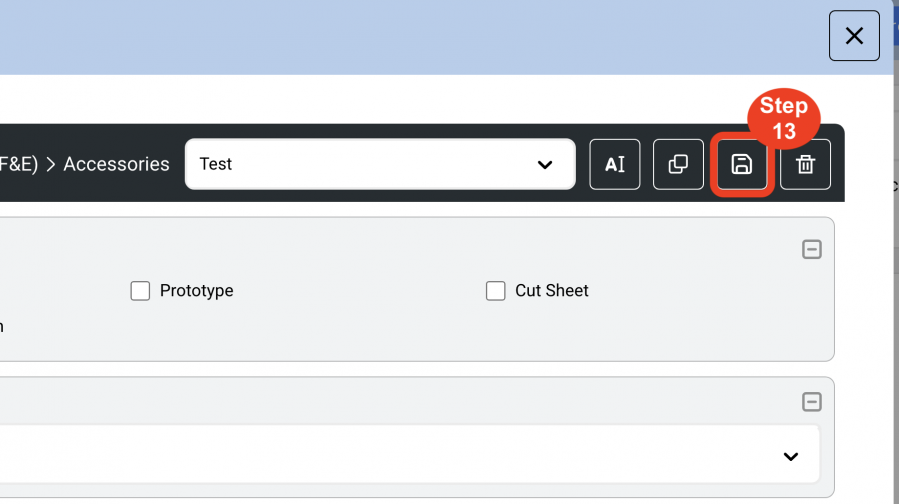
- Step 13: Click on 'Save'.
Edit a Template Name
A Master Template can be edited in the Admin > Standards > Item Types / Templates page by clicking on the ‘Manage Templates’ button.
Important Fact: Editing a Template in the Admin page Does Not automatically update Specs that have been written in Project.
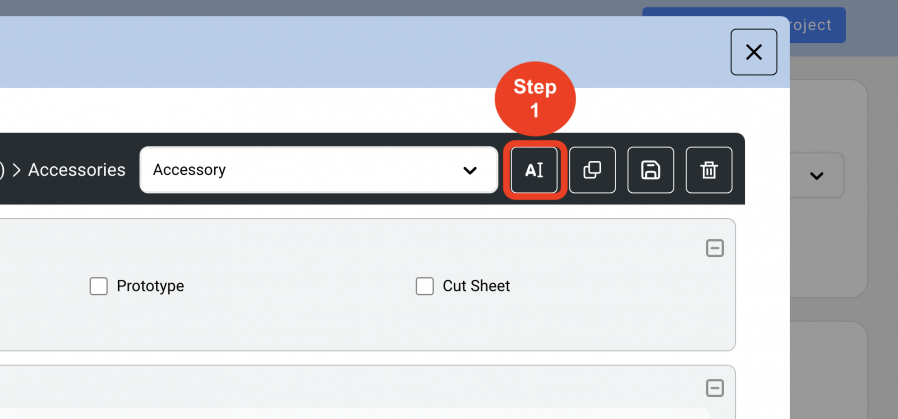
- Step 1: Click on the 'Text Icon'.
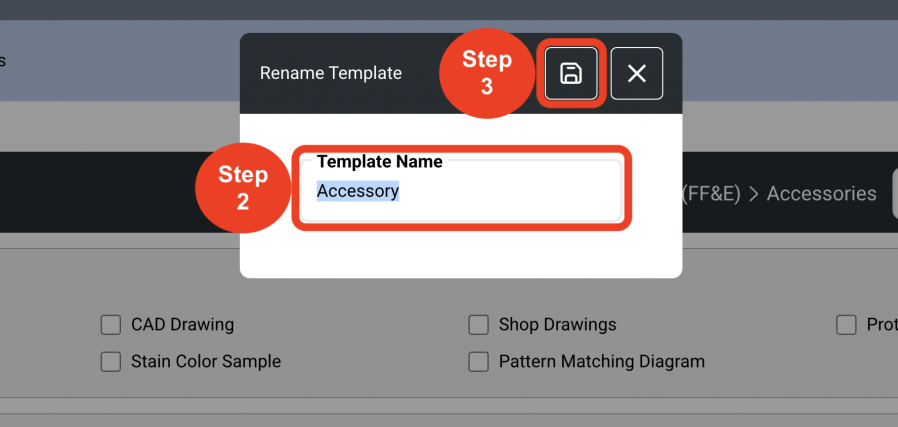
- Step 2: Enter the New 'Template Name'.
- Step 3: Click on 'Save'.
Copy a Template
A single Template can be copied to another Standard, Spec Type or Item Type. This enables an office to maintain standard information and formatting required throughout different Projects.
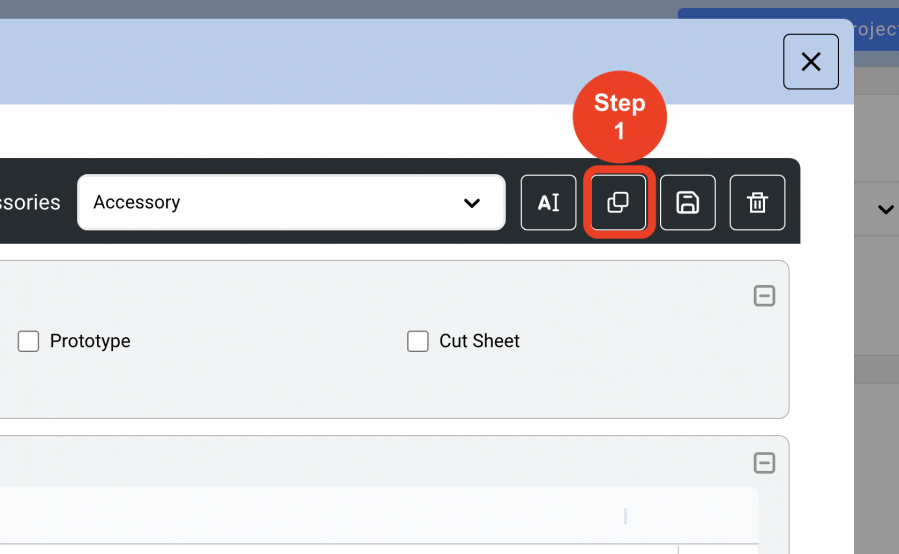
- Step 1: Click on the 'Copy' icon.
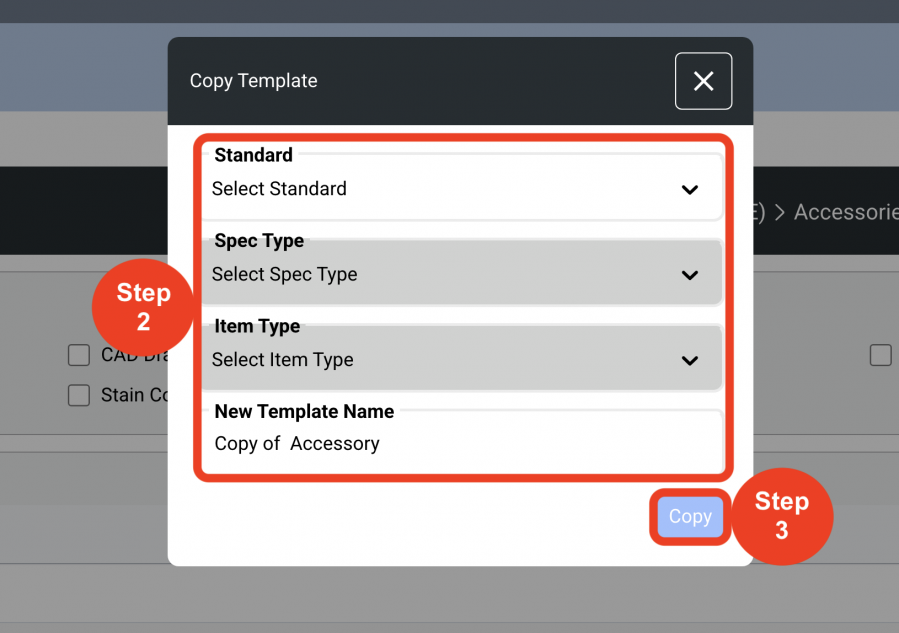
- Step 2: Click on the dropdowns to select the 'Standard', 'Spec Type', 'Item Type', and enter a 'New Template Name'.
- Step 3: Click on 'Copy'.
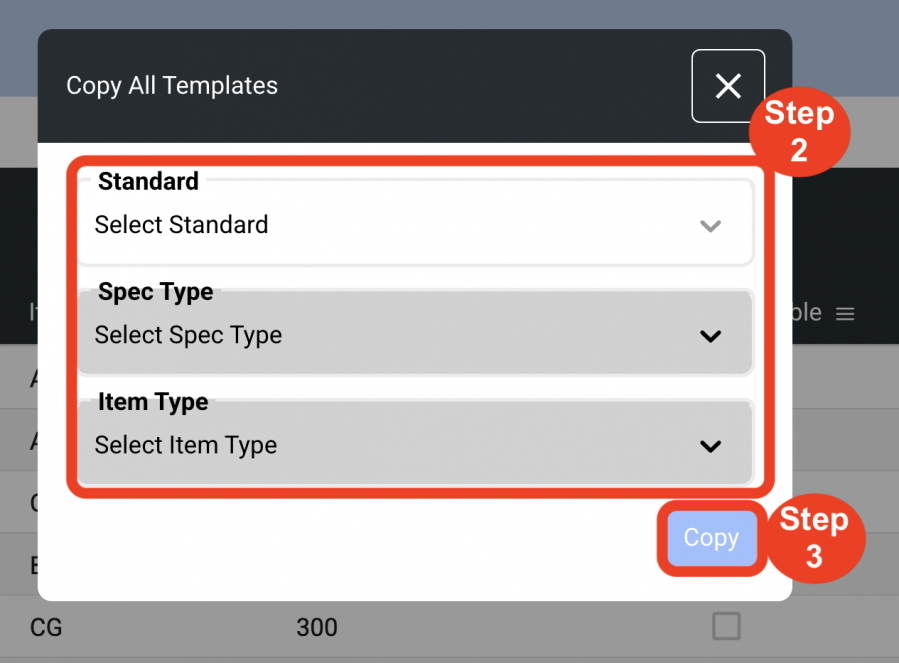
Copy All Templates
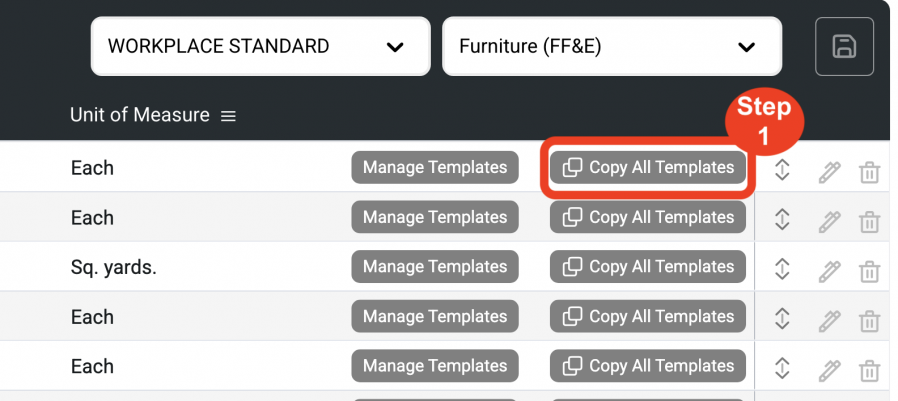
In the Item Types / Templates screen, for each of the Item Type categories, the button ‘Copy all Templates’ enables ALL of the Templates that have been created for each category to be copied as a group, at the same time.
- Step 1: Click on the ‘Copy all Templates’ button.
- Step 2: Click on the dropdowns to select the 'Standard', 'Spec Type', and 'Item Type'.
- Step 3: Click on 'Copy'.