
Project Navigation
Purchase Orders – Pay Requests Option
(Role: PO Manager)
OVERVIEW
During the procurement process a PO Manager (Purchasing Agent) will require the creation of and tracking of Pay Requests based on invoices received from outside Manufacturers and Vendors. Pay Requests are associated with a Purchase Order (PO). Multiple Pay Requests can be created as required for PO.
In addition to printing a Purchase Order, Pay Request reports can be printed.
This section covers:
- Create New Purchase Order
- Add PDFs
- Add Acknowledgements
- Add Payment Requests
- Add Documents
Accessing the Purchase Order section (8 Steps)
The Purchase Order section must be activated in an existing project in order to be able to create POs and Pay Requests.
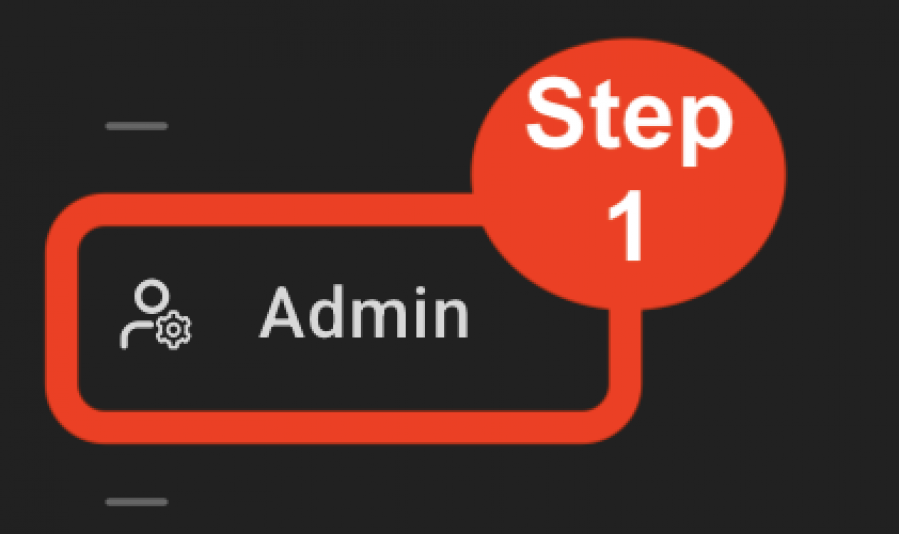
- Step 1: Go To Admin > Tools.
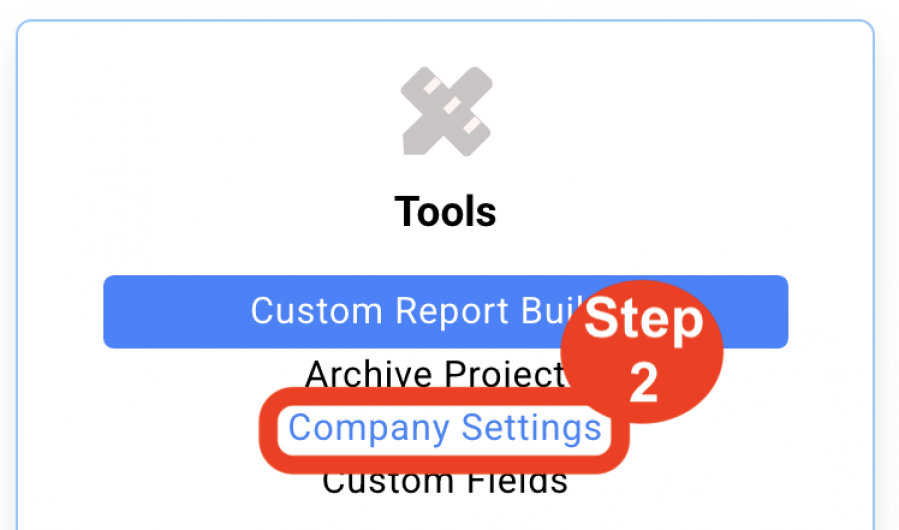
- Step 2: Click on ‘Company Settings’.
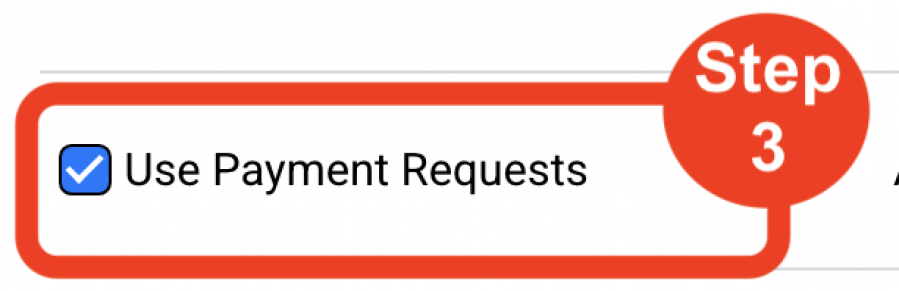
- Step 3: Click on ‘Use Payment Requests’.
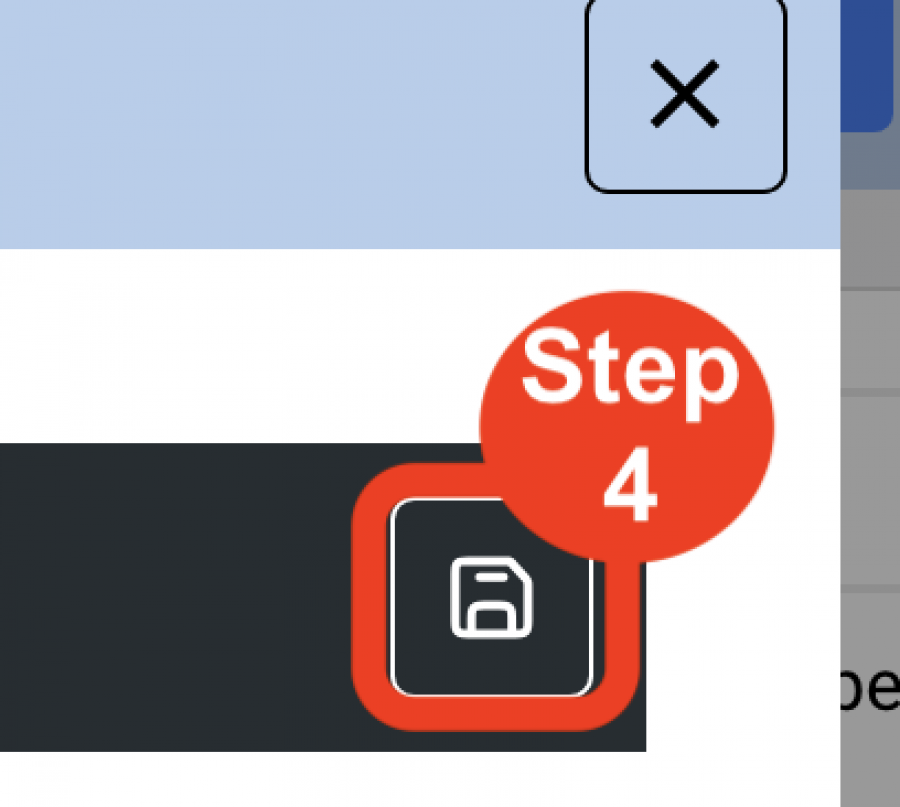
- Step 4: Click Save icon. Close window.
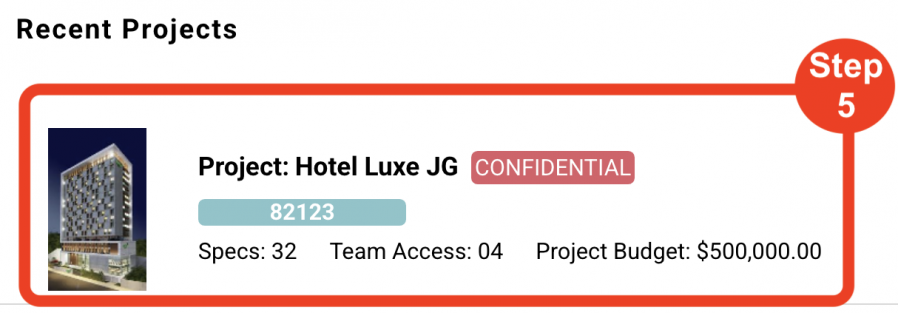
- Step 5: Open a Project
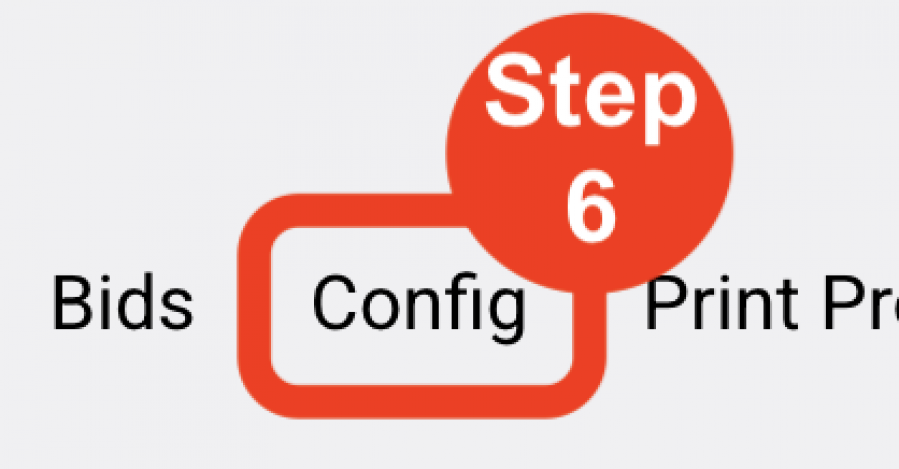
- Step 6: Click on the Project section ‘Config’
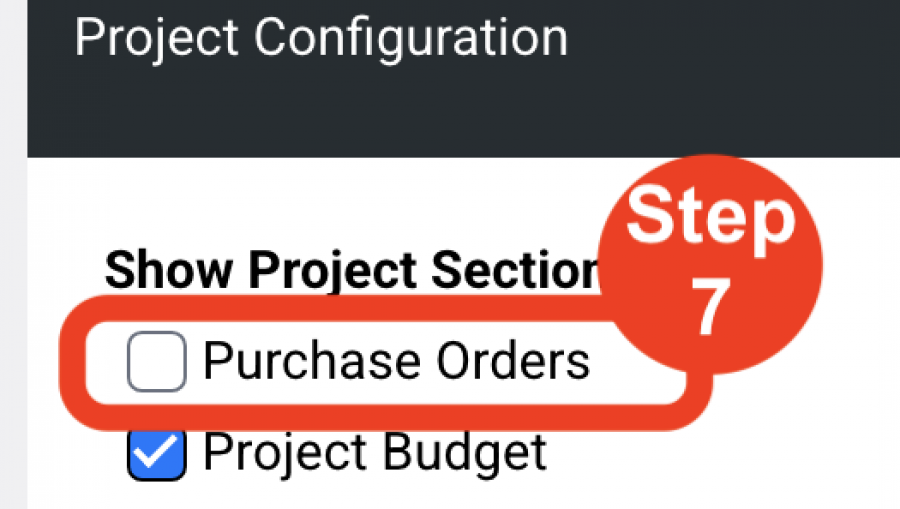
- Step 7: Select ‘Purchase Orders’ at the upper left corner.
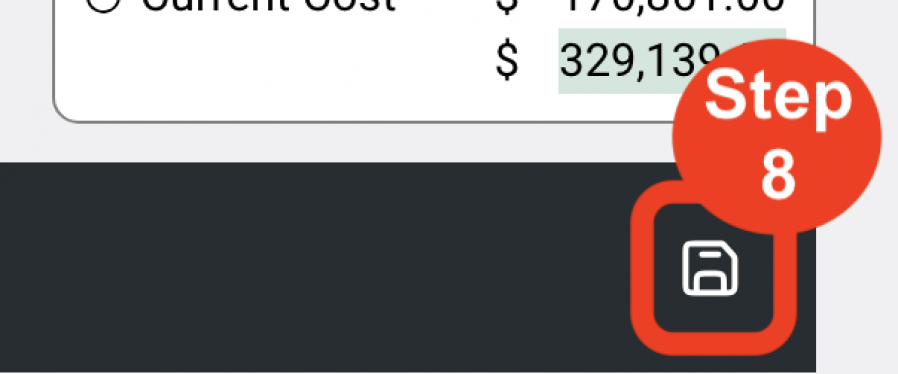
- Step 8: Click Save icon. The Purchase Order section will appear in the Project Navigation section.
Create New Purchase Order (11 Steps)
A Purchase Order (PO) can be created for one or multiple items on a single PO. A PO can be directed toward a Manufacturer or a Vendor. Several options of information from the Spec Sheet are available to be included on a PO. Once a PO is generated, it becomes a separate document from the designer’s Spec Sheet. Future modifications to the Spec Sheet do not affect the PO. Future modifications to the PO do not alter the original Spec Sheet.
General Section
- Step 1: Click ‘Create New Purchase Order’ button in the black navigation header. The view will now become the ‘Main Page’ of the PO.

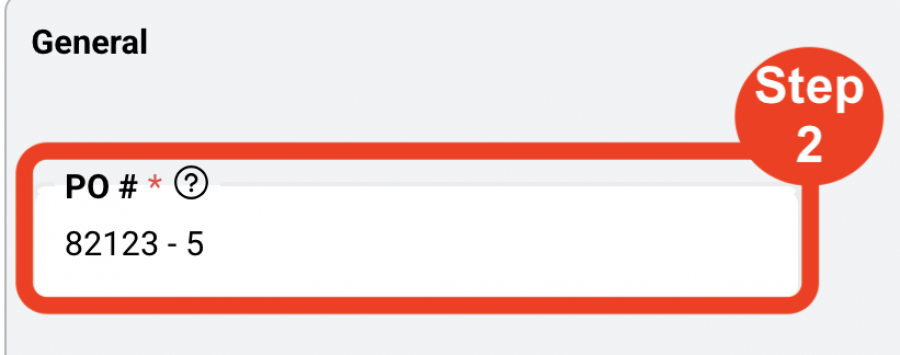
- Step 2: PO #. The PO number is auto generated; however, a user can edit this number as required. (Required)
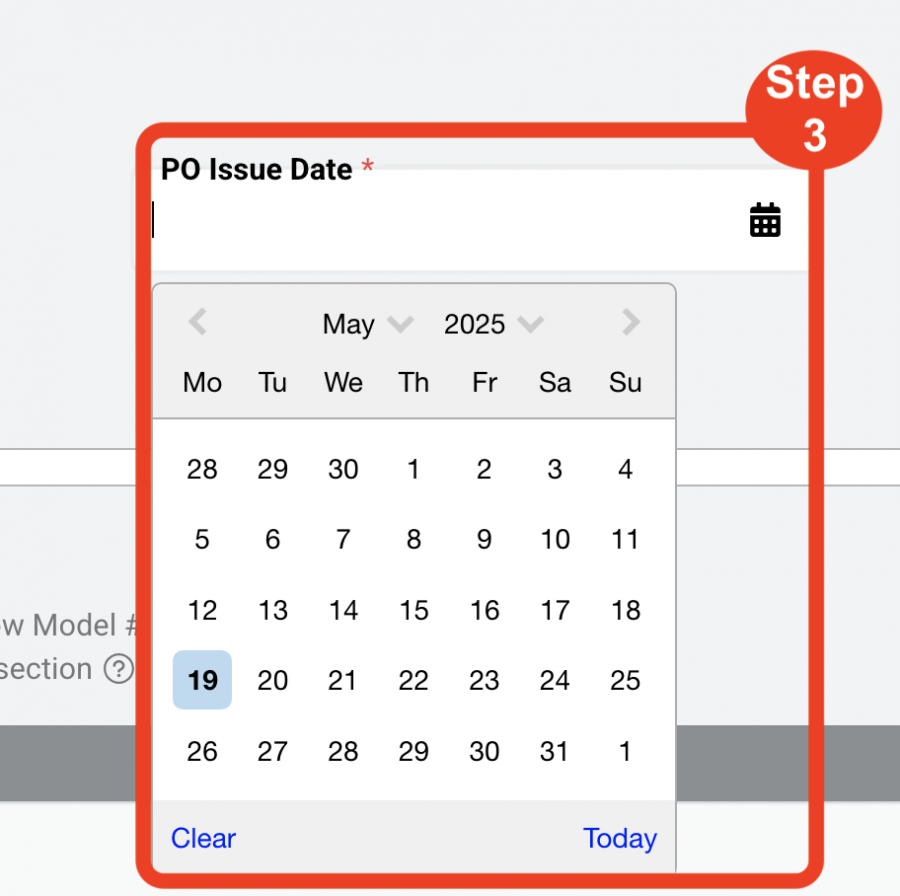
- Step 3: Select the ‘PO Issue Date’ by clicking in the field or on the calendar. (Required)
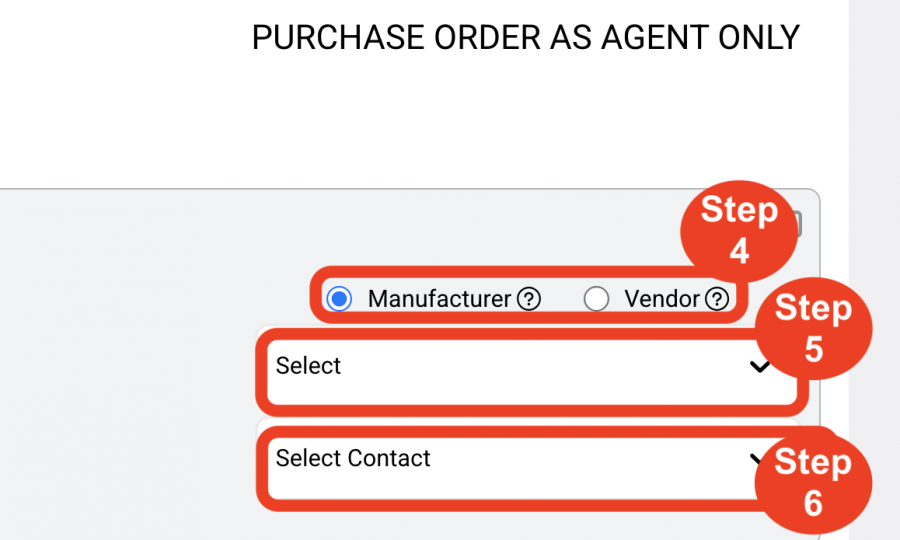
- Step 4: Select either a Manufacturer or Vendor as recipient. (Required)
- The Manufacturer and Vendor must first be assigned by the Designer / User in a Specification. Refer to ‘Edit Spec Sheet’.
- Step 5: Select the Company Name.
- Step 6: Select the Contact Name.
Items Section
- Step 7: Filter by either Spec Type of Item Type.
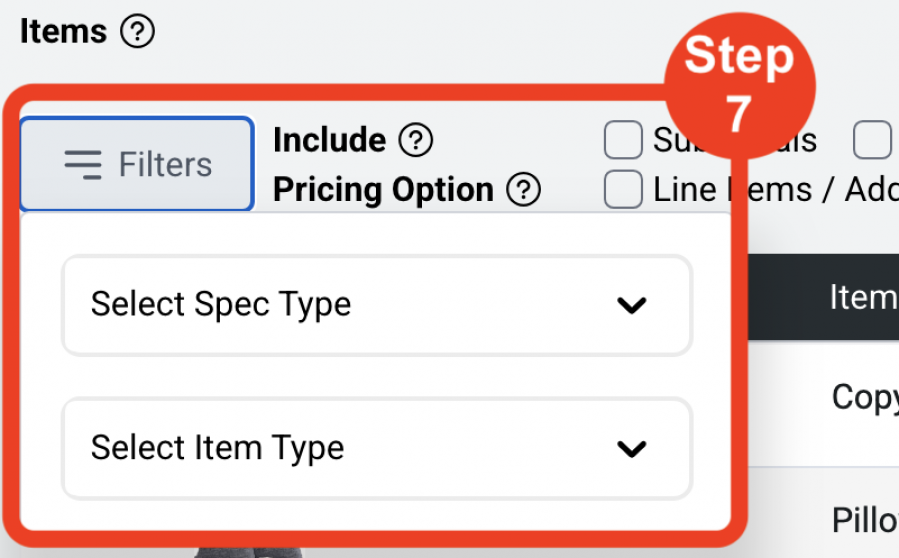
- Step 8: Select items to be included in the PO. (Required)

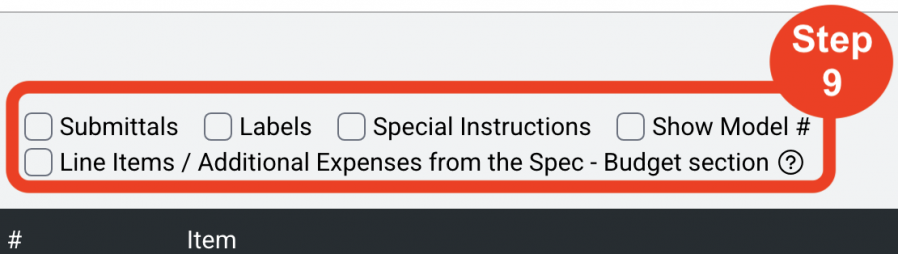
- Step 9: Select Spec Sheet options ie.
- Submittals
- Labels
- Special Instructions
- Model #
- Pricing Option ‘Use Line Items / Additional Expenses from Item Budget tab.’
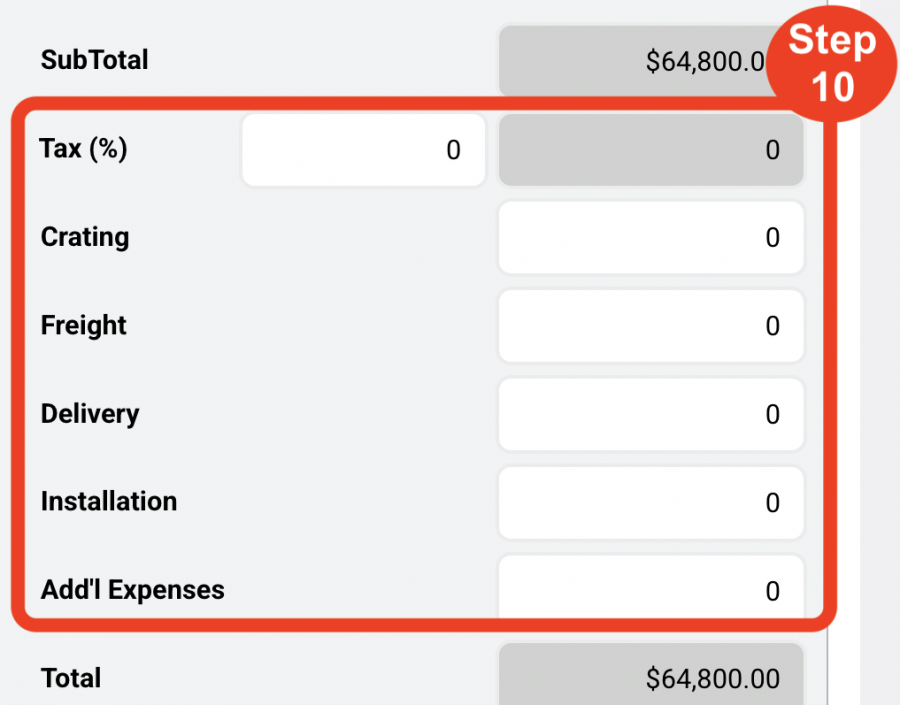
- Step 10: Enter Line Items for the PO.
- Enter Tax(%).
- Enter Crating.
- Enter Freight.
- Enter Delivery.
- Enter Installation.
- Enter Additional Expenses.
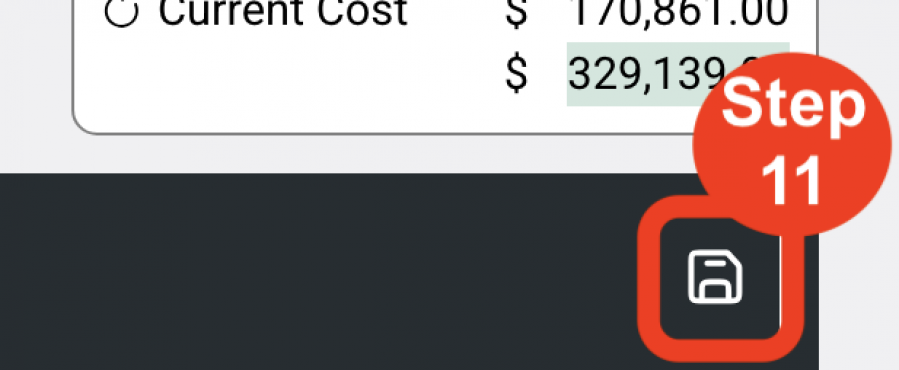
- Step 11: Click Save icon.
Edit Purchase Order
Additional information can be added / edited for each Purchase Order (PO). Information sections include:
- General
- Vendor / Bill To / Ship To
- Items
- Procurement
- Shipping and Delivery
- IncoTerms
- Terms and Conditions
- Packing Instructions
- Shipping Instructions
- Invoice Instructions
- Notes
- PDFs
Edit General section (9 Steps)
- Step 1: Select ‘Client’ from the drop down.
- Step 2: Select ‘Client Contact’ from the drop down.
- Step 3: Select ‘Client Approval-Date’.

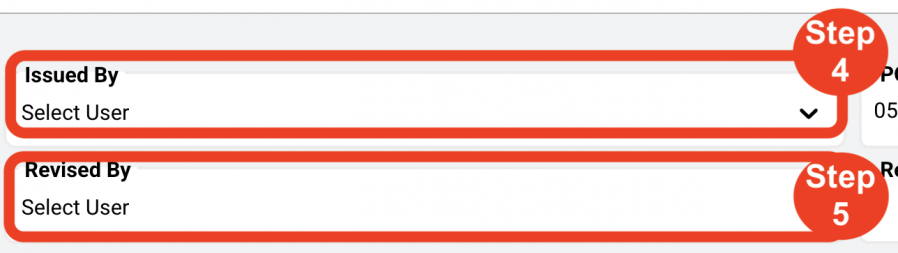
- Step 4: Select ‘Issued By’ designer.
- Step 5: Select ‘Revised By’ designer.
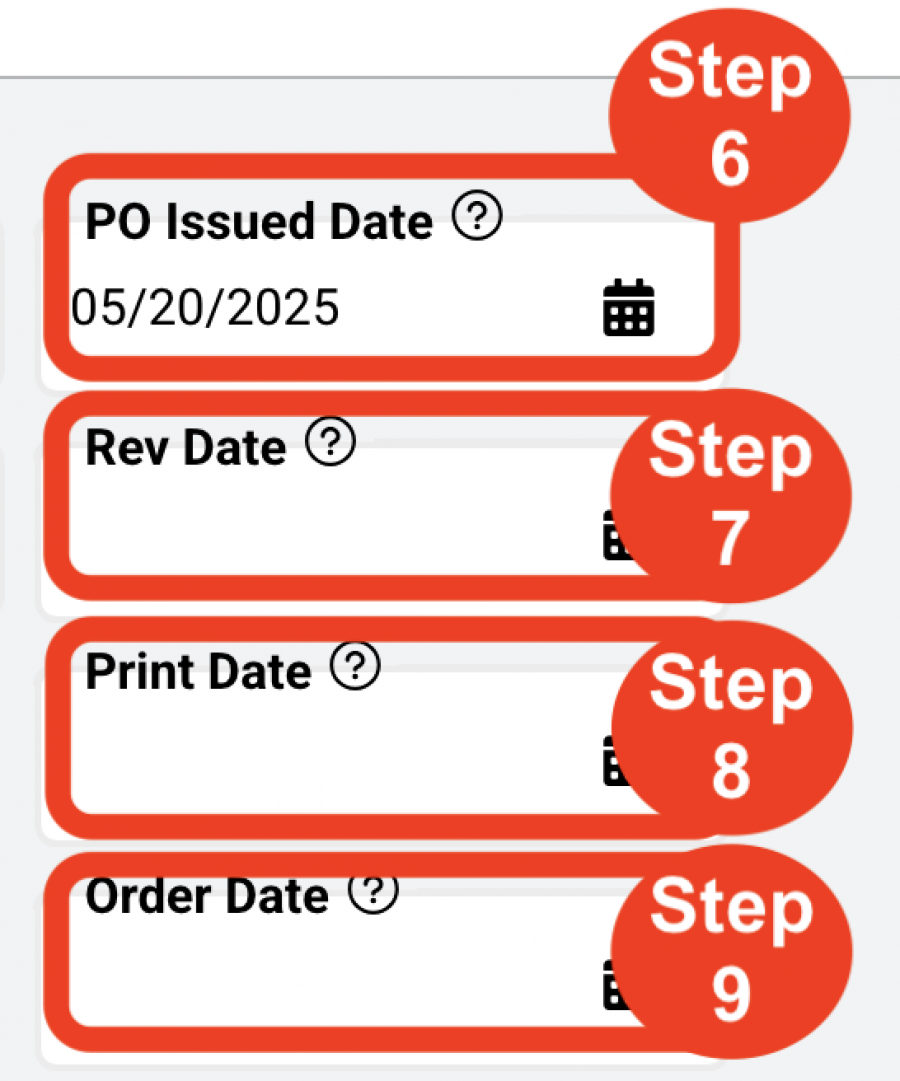
- Step 6: Select the ‘PO Issued Date’.
- Step 7: Select the ‘Rev Date’.
- Step 8: Select the ‘Print Date’.
- Step 9: Select the ‘Order Date’.
Important Fact: Client Names and Client Contact information must first be entered in the Admin > Purchase Orders > Client Addresses section by a Super Admin, Admin Panel Manager or a PO Manager role.
Edit Vendor / Bill To / Ship To section (4 Steps)
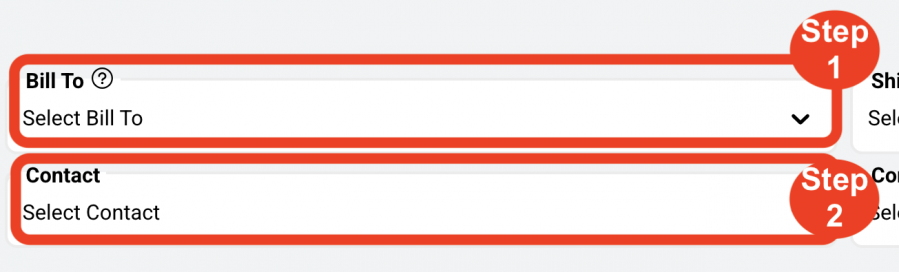
- Step 1: Select the ‘Bill To’ name.
- Step 2: Select the ‘Bill To’ contact.
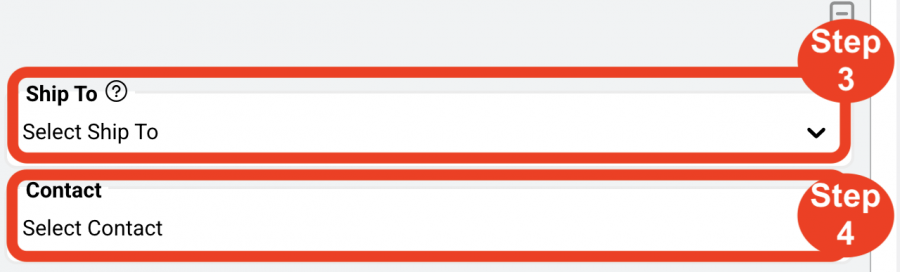
- Step 3: Select the ‘Ship To’ name.
- Step 4: Select the ‘Ship To’ contact.
Important Fact: Bill To and Ship To information must first be entered in the Admin > Purchase Orders > Bill To section and Ship To section by a Super Admin, Admin Panel Manager or a PO Manager role.
Edit Items section (7 Steps)
- Step 1: Edit PO Item Detail Options - Include additional information from the item(s) specification within the body of the PO ie.
- Submittals
- Labels
- Special Instructions
- Model #

- Step 2: Use Line Item Cost Option – Use spec item’s individual Line Item Costs directly from the pricing data entered in the Budget tab of a spec item. These costs are predicated on individual items information and not a collective amount for all items on a single Purchase Order.

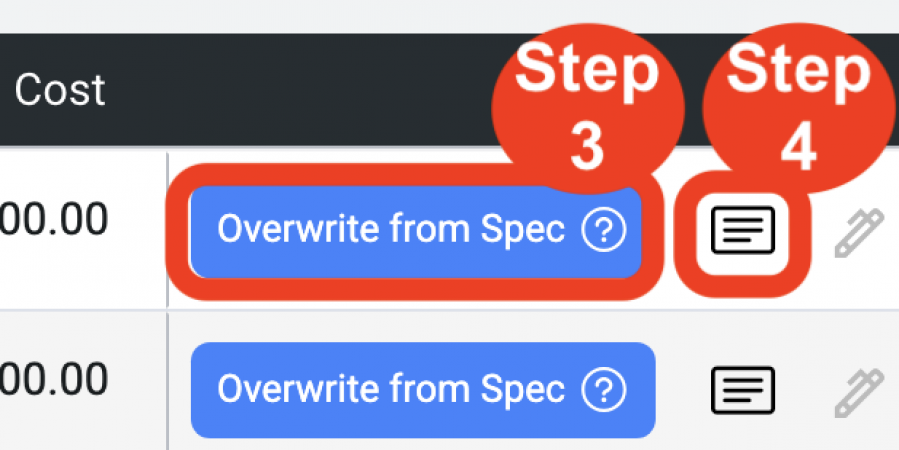
- Step 3: Edit Purchase Order information using ‘Overwrite PO’. This option will overwrite existing Purchase Order information with the Spec Sheet data for Submittals, Labels, Special Instructions and model #s.
- Step 4: Edit PO Item Details – Allows the PO Editor to revise/update information in the Purchase Order without modifying the original Spec Sheet data.
- Step 5: Edit Pen icon – Allows data to be revised/updated in each column with a red heading, directly in the grid, without modifying the original Spec Sheet’s Item Name, Qty, or Unit Cost.
- Step 6: Delete Trash Bin icon – Remove items from the PO as required.
- Step 7: Edit Line Item Cost fields as required.
Add Item(s) Pull-Out Tab (4 Steps)
- Step 1: Click on the blue ‘Add Item(s)’ pull-out tab.
- Step 2: Filter by Spec Type or Item Type.
- Step 3: Select Item(s) to be added to the PO.
- Step 4: Click ‘Add Selected Item(s) to PO.
Edit Procurement section (3 Steps)
- Step 1: Select a Procurement Contact from the dropdown menu to be used and the main point of contact for communication regarding the PO.
- Step 2: Enter Confirmation information as required with standard company verbiage. This field is free text.
- Step 3: Enter Payment Terms as required. This field is free text.
Edit Shipping and Delivery section (5 Steps)
- Step 1: Select the Delivery Method from the drop-down menu. Delivery Methods are created in the Admin > Purchase Orders > Delivery Method section by a Super Admin or PO Manager role.
- Step 2: Enter Lead Time. This field is free text.
- Step 3: Select an Estimated Ship Date.
- Step 4: Select an Estimated Delivery Date.
- Step 5: Select a Requested Delivery Date.
Edit Incoterms section (2 Steps)
- Step 1: Select the Incoterm from the drop-down menu. Incoterms are created in the Admin > Purchase Orders > Incoterms section by a Super Admin or PO Manager role.
- Step 2: Enter
Edit Terms and Conditions section (4 Steps)
- Step 1: Click on ‘Add Terms and Conditions’.
- Step 2: Select the Terms and Conditions note(s).
- Step 3: Click on ‘Add selected Terms and Conditions notes to this PO.’
- Step 4: Modify text formatting as required.
- As an option, Terms and Conditions can be manually entered in the text box as free text and formatted as required.
Important Fact: Adding a new Terms and Conditions notes manually does not automatically update the Terms and Conditions section in the Admin > Purchase Orders > Terms and Conditions section.
Edit Packing Instructions section (4 Steps)
- Step 1: Click on ‘Add Packing Instructions’.
- Step 2: Select the Packing Instructions note(s).
- Step 3: Click on ‘Add selected Packing Instructions notes to this PO.’
- Step 4: Modify text formatting as required.
- As an option, Packing Instructions can be manually entered in the text box as free text and formatted as required.
Important Fact: Adding new Packing Instructions notes manually does not automatically update the Packing Instructions section in the Admin > Purchase Orders > Packing Instructions section.
Edit Shipping Instructions section (4 Steps)
- Step 1: Click on ‘Add Shipping Instructions.’
- Step 2: Select the Shipping Instructions note(s).
- Step 3: Click on ‘Add selected Shipping Instructions notes to this PO.’
- Step 4: Modify text formatting as required.
- As an option, Shipping Instructions can be manually entered in the text box as free text and formatted as required.
Important Fact: Adding new Shipping Instructions notes manually does not automatically update the Shipping Instructions section in the Admin > Purchase Orders > Shipping Instructions section.
Edit Invoice Instructions section (4 Steps)
- Step 1: Click on ‘Add Invoice Instructions.’
- Step 2: Select the Invoice Instruction note(s).
- Step 3: Click on ‘Add selected Invoice Instructions notes to this PO.’
- Step 4: Modify text formatting as required.
- As an option, Invoice Instructions can be manually entered in the text box as free text and formatted as required.
Important Fact: Adding new Invoice Instructions notes manually does not automatically update the Invoice Instructions section in the Admin > Purchase Orders > Invoice Instructions section.
Edit Notes section (4 Steps)
- Step 1: Click on ‘Add Notes.’
- Step 2: Select the Note(s).
- Step 3: Click on ‘Add selected Note(s) to this PO.’
- Step 4: Modify text formatting as required.
- As an option, Notes can be manually entered in the text box as free text and formatted as required.
Important Fact: Adding new Invoice Instructions notes manually does not automatically update the Invoice Instructions section in the Admin > Purchase Orders > Invoice Instructions section.
Add PDFs
PDFs can be assigned to a PO so that they can be printed as accompanying documents to the PO when it is issued or revised. PDF files can be uploaded or selected from a PDF Library created in the Admin > Purchase Orders > PDFs section by a Super Admin or PO Manager roles.
Upload a PDF (6 Steps)
- Step 1: Click on the red button ‘Add PDFs.’
- Step 2: Select ‘Upload PDF.’
- Step 3: ‘Drag and drop a file’ or ‘Upload a file from your computer’.
- Step 4: Select/confirm the Page Size and Page Orientation.
- Step 5: Use the drag-n-drop arrows to arrange in the desired order.
- Step 6: Use the delete Trash bin icon to remove PDFs.
Add PDF (6 Steps)
- Step 1: Click on the red button ‘Add PDFs.’
- Step 2: Select ‘Add PDF(s) from Admin >Purchase Orders > PDFs.’
- Step 3: Select desired PDF document to attach to the PO.
- Step 4: Click Save.
- Click Preview is an option to review the document before saving.
- Step 5: Select/confirm the Page Size and Page Orientation.
- Step 6: Use the drag-n-drop arrows to arrange in the desired order.
- Step 7: Use the delete Trash bin icon to remove PDFs.
Add Acknowledgements
Acknowledgements can be assigned to a PO in order to maintain these documents with the PO. Acknowledgements files can be uploaded by a Super Admin, PO Manager or PO Editor role.
Upload an Acknowledgement (6 Steps)
- Step 1: Click on the red button ‘Add Acknowledgements.’
- Step 2: Drag and drop a file or Upload a file from your computer.
- Step 3: Select the Designer to approve the Acknowledgement.
- Step 4: Select the Approval Date.
- Step 5: Select/confirm the Page Size and Page Orientation.
- Step 6: Use the drag-n-drop arrows to arrange in the desired order.
- Step 5: Use the delete Trash bin icon to remove PDFs.
Add Payment Requests – Inside a PO
The Payment Requests option of Purchase Orders allows for the management of incoming Invoices received and the application and tracking of Payment Requests. Adding a Payment Request can be done in an individual PO and also in the Purchase Order Schedule.
Add Payment Requests Inside a PO (9 Steps)
- Step 1: Click on the red button ‘Add Payment Requests’.
- Step 2: Click on the button in the black header at right ‘Add Payment Requests’.
- Step 3: Enter the Invoice Date.
- Step 4: Enter the Invoice # (Required)
- Step 5: Select the Due Date.
- Step 6: Enter Payment Terms. Text is entered manually in this free text field.
- Step 7: Select Remit To.
- Step 8: Enter Invoice Details as required ie>
- Goods
- Freight
- Packing
- Customs
- Add’l Charges
- Overage
- Step 9: Click Save.
Important Fact: Saving a Payment Request adds the Payment Request # and amount in a visible list below the red button for information only. A Payment Request schedule is created in order to manually update Payment Request and Invoice Details.
Edit Payment Requests
- Step 1: Click on Purchase Orders section of a project.
- Step 2: Click on the PO.
- Step 3: Click on ‘Add Payment Requests’ or Click on a visible Payment Request.
- Step 4: Click on the Edit Pen icon.
- Step 5: Click in the grid of the desired red column heading to edit information.
- Step 6: Click Save.
Important Fact: To view the Payment Request schedule, click the ‘Back’ button to move to the Purchase Orders Schedule. Click on ‘View Payment Requests Schedule.
Add Documents
Miscellaneous Documents can be assigned to a PO in order to maintain these documents with the PO. A variety of document files can be uploaded by a Super Admin, PO Manager or PO Editor role.
Upload a Document (4 Steps)
- Step 1: Click on the red button ‘Add Documents.’
- Step 2: Drag and drop a file or Upload a file from your computer.
- Step 3: Select/confirm the Page Size and Page Orientation. Use the drag-n-drop arrows to arrange in the desired order.
