Address Books
Manufacturer Source List
(Roles: Super Admin, Address Book Manager, Admin Panel Manager)
OVERVIEW
A Manufacturer is typically the company that makes products and items. In order for a Manufacturer to be selected when writing a specification, the address and contact information must first be entered in the ‘Admin > Address Books’ page.
In the Manufacturer Source List, Manufacturers can be grouped by item type so that when writing a Casegoods Spec, for example, the Manufacturer dropdown can be filtered by the item types.
In the Manufacturer Source List, Vendor Reps can be assigned to a Manufacturer in order to limit the master Vendor Rep list to only those that have been assigned to that Manufacturer.
The Manufacturer Source List can be filtered by Offices, Standards, Spec Types, Item Types, and Status. After viewing the filtered list, the filter is de-activated by selecting the Filter button and clicking ‘Clear’.
QUICK TUTORIAL
Adding Manufacturers
Option 1: Add a Manufacturer Manually (6 Steps)
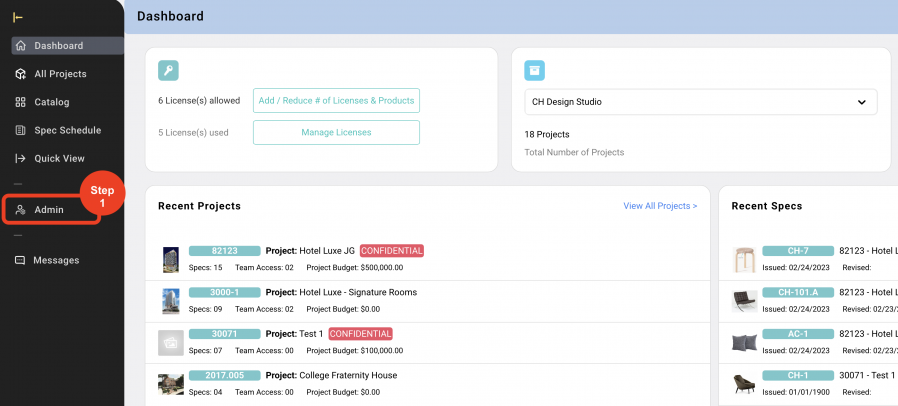
- Step 1: In the Left Navigation click on ‘Admin’.
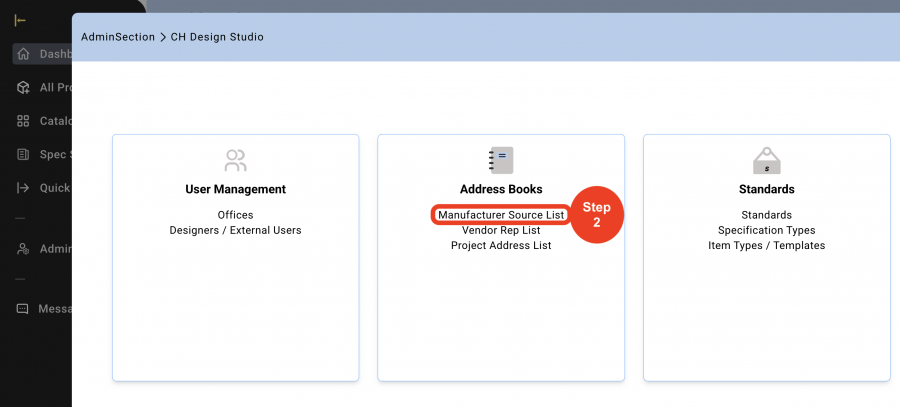
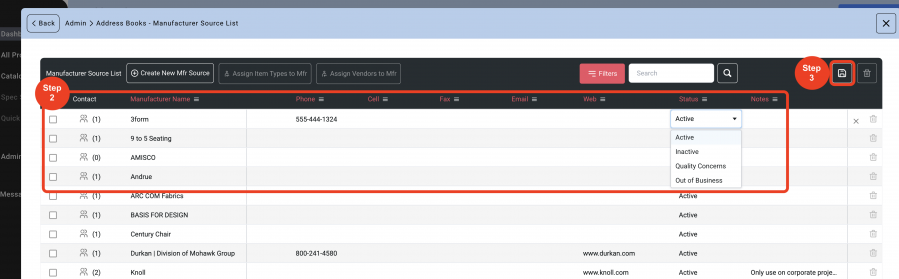
- Step 2: Go to 'Address Books' and click on ‘Manufacturer Source List’.
- Step 3: Click on ‘Create New Manufacturer Source’.

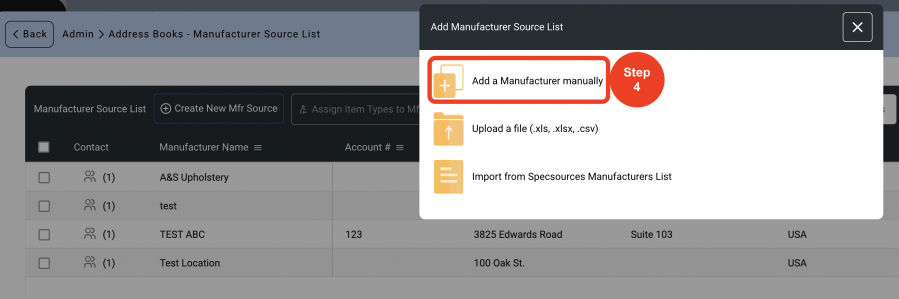
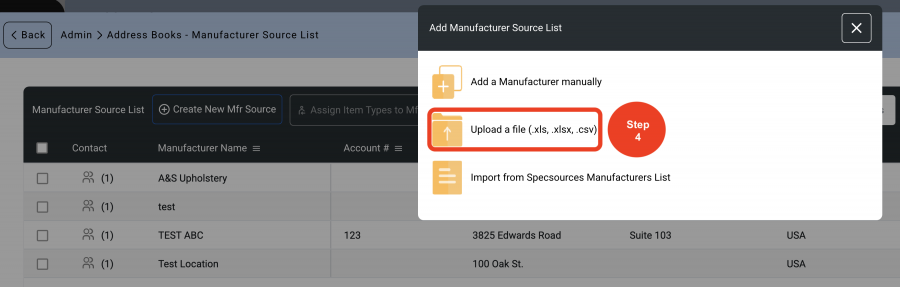
- Step 4: Click on 'Add a Manufacturer Manually'.
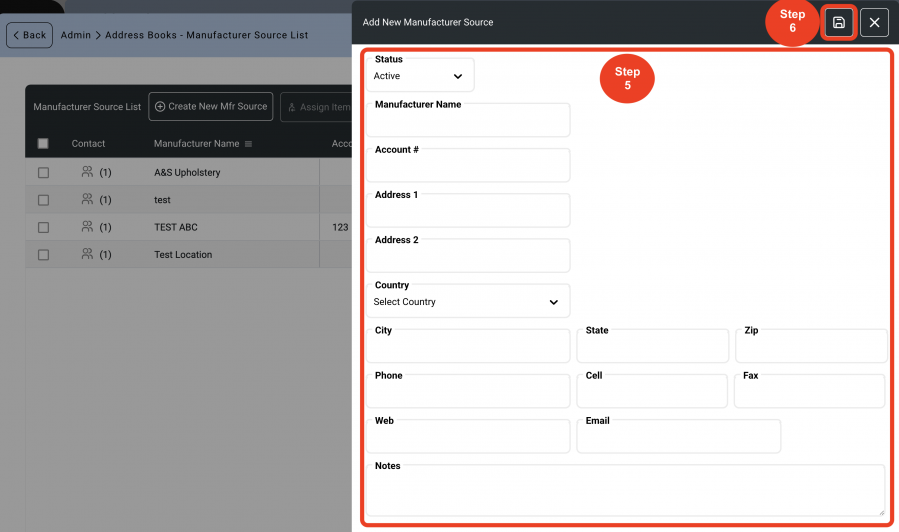
- Step 5: Click on the dropdown to change the Vendor ‘Status’. A Manufacturer or Vendor can be taken out of the active list to be selected by a User using the ‘Status’ box. This will NOT delete them from Items they were previously attached to, it will just prevent them from being attached to any new items.
Fill out the information. - Step 6: Click on ‘Save’.
Option 2: Upload a File (9 Steps)
- Step 1: In the Left Navigation click on ‘Admin’.
- Step 2: Go to 'Address Books' and click on ‘Manufacturer Source List’.
- Step 3: Click on ‘Create New Manufacturer Source’.
- Step 4: Click on ‘Upload a file ( .xls, .xlsx, .csv)’.
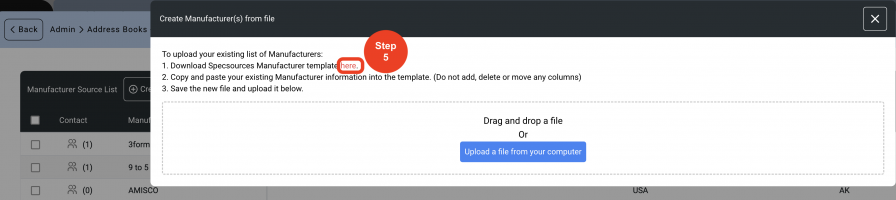
- Step 5: Click on the red word ‘here’ to download an Excel template and fill.
* Follow the instructions on the Excel file to fill the cells.
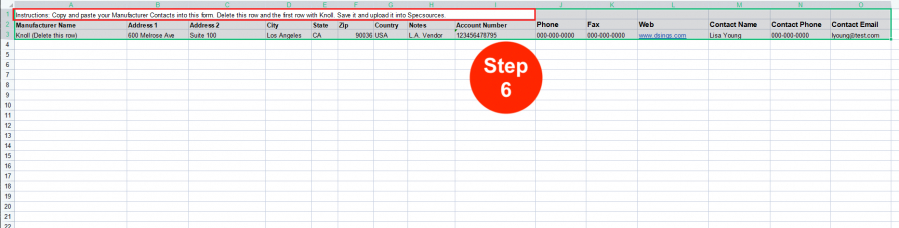
- Step 6: Copy and Paste your Manufacturer information into the template.
*DO NOT add or remove any columns on the spreadsheet. Do not try to upload your own file.
Save this file on your computer.
- Step 7: Drag and drop file or click on 'Upload a file from your computer'.
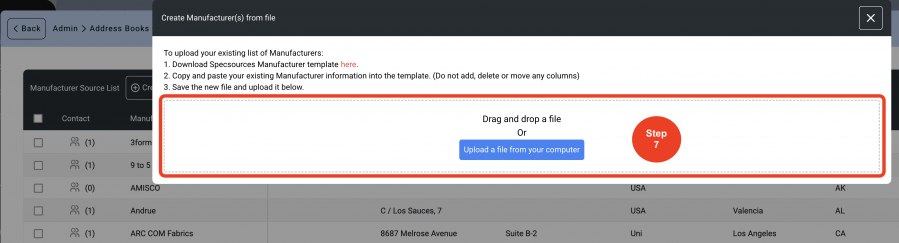
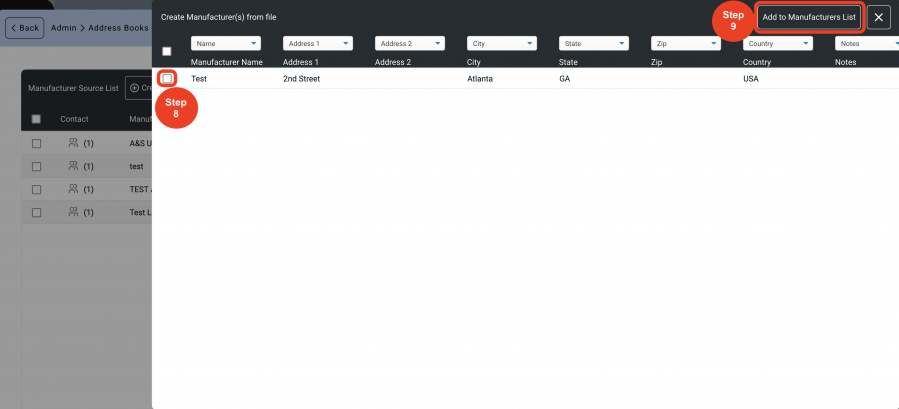
- Step 8: A confirmation window will appear to show that the column headings match the data that was entered from the spreadsheet. If there are no errors, click on the ‘Select All’ box in the black header above the column of check boxes at left.
- Step 9: Click on 'Add to Manufacturers List'.
Option 3: Import from Specsources Master List of Manufacturers (6 Steps)
A database of Manufacturers exists within Specsources. Using this option allows a Designer / User to review this master list and select one or all Manufacturers to be imported into the primary Manufacturer Source List.
- Step 1: In the Left Navigation click on ‘Admin’.
- Step 2: Go to 'Address Books' and click on ‘Manufacturer Source List’.
- Step 3: Click on ‘Create New Manufacturer Source’.
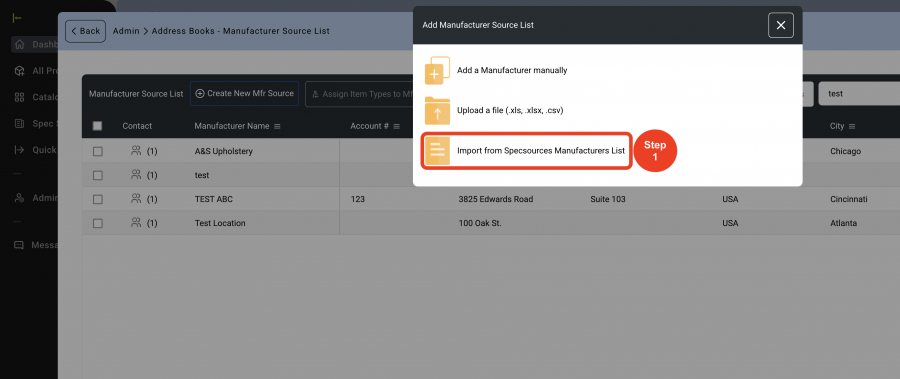
- Step 4: Click on ‘Import from Specsources Master List of Manufacturers’.
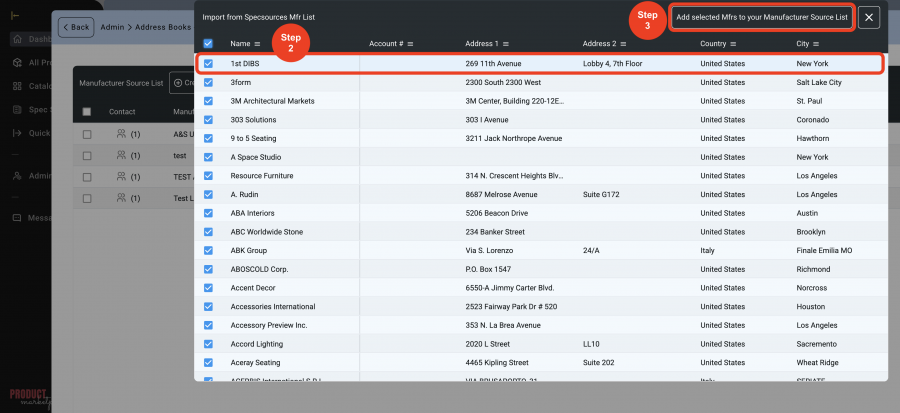
- Step 5: Click on the checkbox for each Manufacturer to be added.
- Step 6: Click on ‘Add these Manufacturers to your Manufacturer Source List’.
Editing Manufacturers (3 Steps)
A Manufacturer’s company name, company address, notes or status can be edited within the individual rows in the Manufacturer Source List schedule. Manufacturers can be filtered by ‘Status’ assignments.
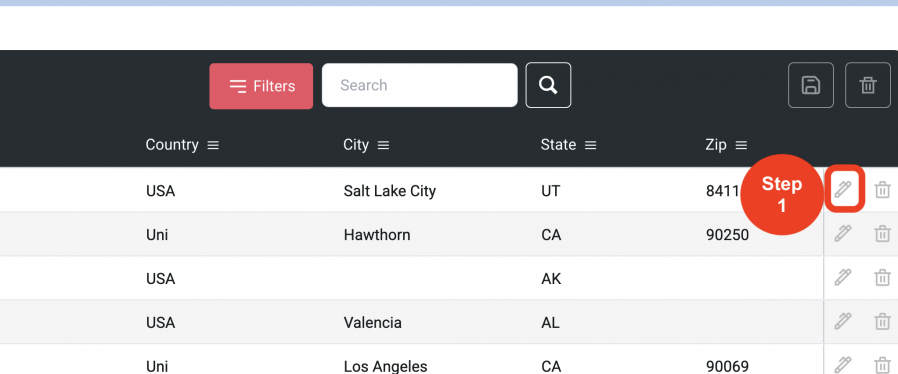
- Step 1: Click the on the 'Pen Icon'.
This is a toggle on. When toggled on, column headings will turn red indicating that information can be edited directly in the rows.
- Step 2: Enter information in the desired text box of any of the columns with the red headings directly in the grid.
* A status can be changed to ‘Inactive’ so as not to delete the Manufacturer and keep them on the list. This change in 'Status' takes the Manufacturer out of the active Master List that is used to select a Manufacturer when writing a Spec. - Step 3: Click on 'Save'.
Adding Contacts (4 Steps)
In order to populate the Manufacturer’s address fields, a contact must be selected from the Contact dropdown when writing a Spec. Therefore, contact names must be added to the Manufacturer’s Source List. If there is no contact person, then a contact must be created call ‘Default’ which will enable the action of selecting a contact from the dropdown in order to populate the text of the Manufacturer’s address in the Spec Sheet.
Multiple contacts can be added for each Manufacturer depending on region and office locations.
Contacts can also be assigned to specific Design firm offices which can then be filtered By Design Offices.
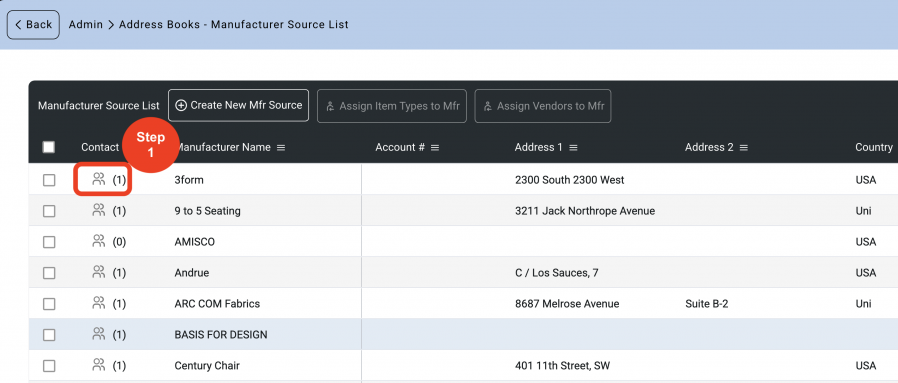
- Step 1: Click on the 'Contact Icon'.

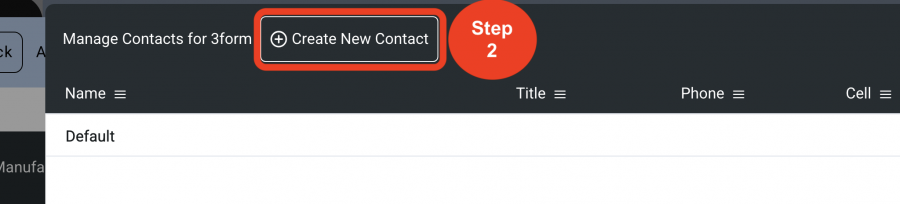
- Step 2: Click on 'Create New Contact'.
- Step 3: Enter the information and choose the Office from the Dropdown.
- Step 4: Click on 'Save'

Editing Contacts (4 Steps)
All contact information can be edited.
- Step 1: Click on the 'Contact Icon'.

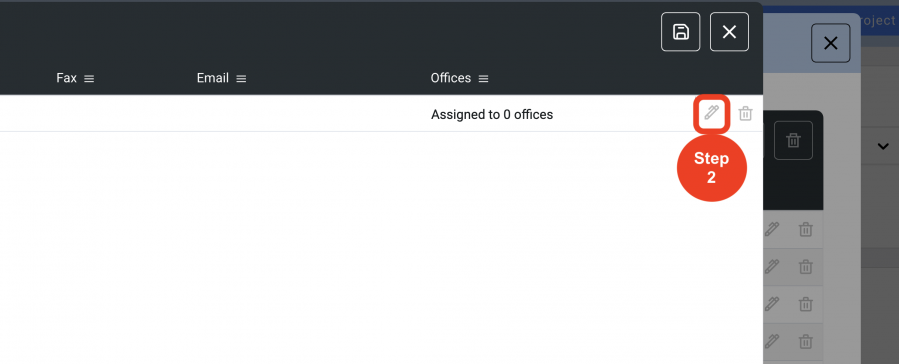
- Step 2: Click on the 'Pen Icon'.
This is a toggle on. When toggled on, column headings will turn red indicating that information can be edited directly in the rows.
- Step 3: Enter information in the desired text box of any of the columns with the red headings directly in the grid.
- Step 4: Click on 'Save'.

Deleting Contacts (3 Steps)
When a contact is no longer with a Manufacturer, the contact list can be updated by deleting this contact.
- Step 1: Click on the 'Contact Icon'.
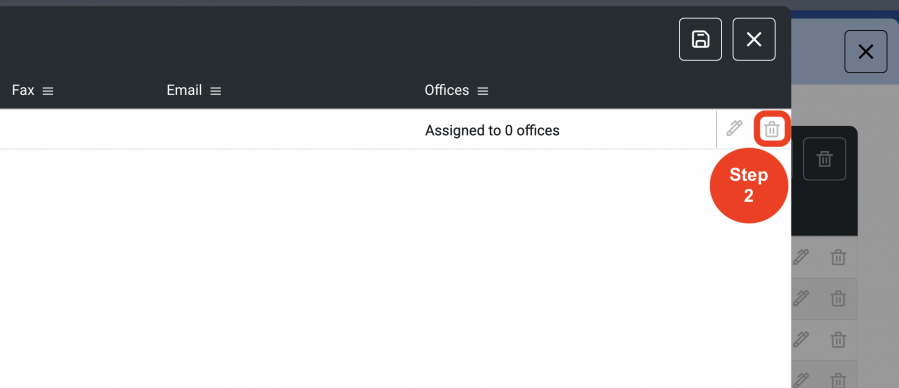
- Step 2: Click on the 'Trash Bin Icon'.
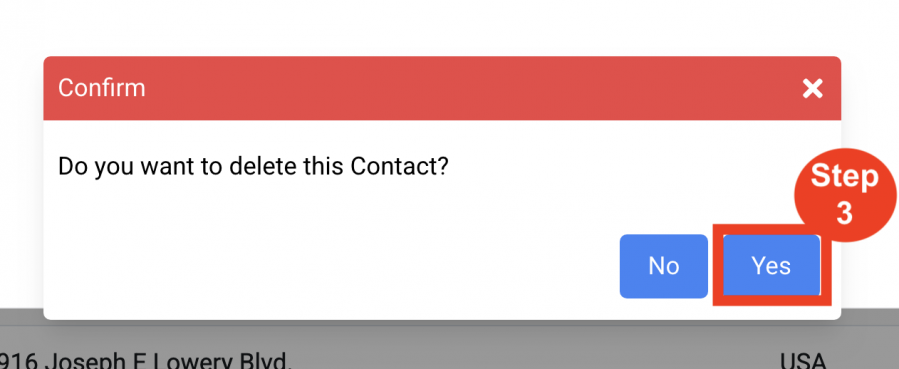
- Step 3: Click on 'Yes', if you want to delete.
Assign Item Types to Mfrs
Manufacturers can be grouped in order to save time assigning them to a Spec.
Assigning an Item Type to a Manufacturer in the Manufacturer Source List is a way to filter the Mfr dropdown list by the Item Types that have been assigned. For example, all Carpet Mfrs. can be grouped together, all Casegood Mfrs. can be grouped together.
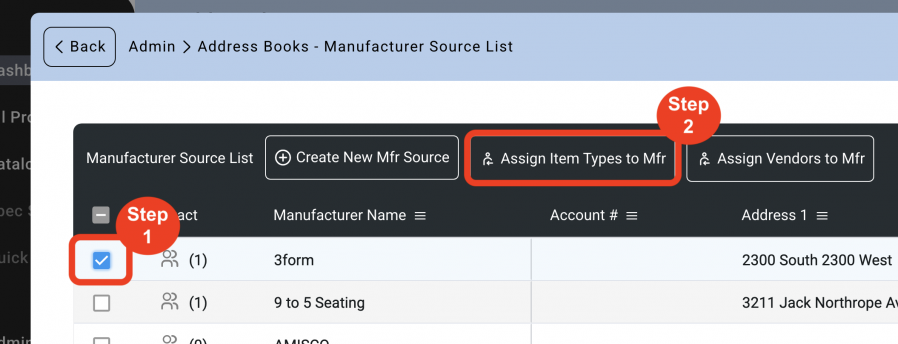
- Step 1: Select the check box next to the Mfr name. This activates the ‘Assign Item Types to Mfs’ button in the black header.
- Step 2: Click on the ‘Assign Item Types to Mfs’ button.

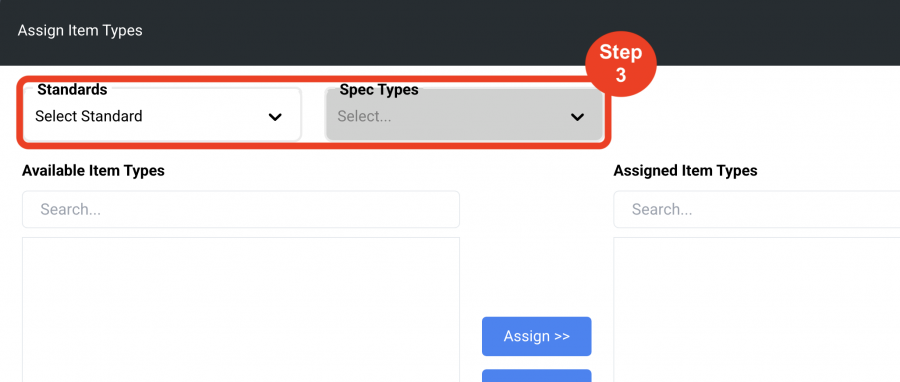
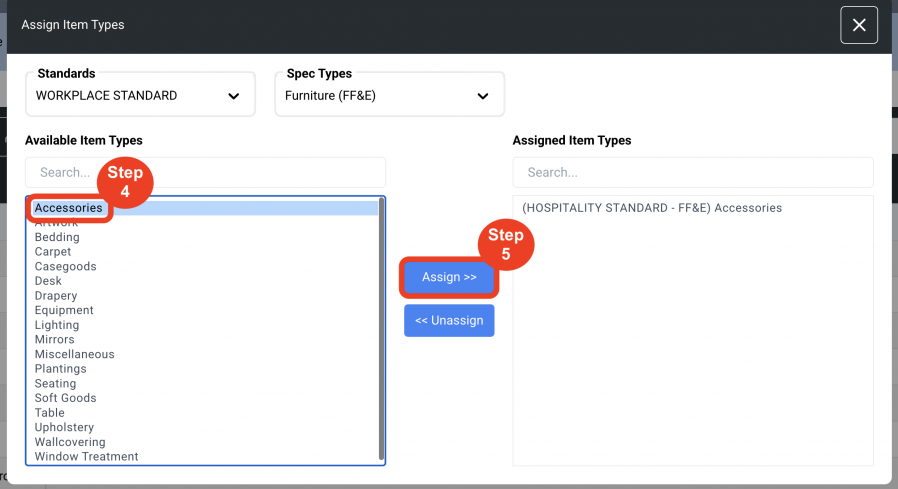
- Step 3: Select the ‘Standard’ and then select the ‘Spec Type’.
- Step 4: Highlight the Item Type by clicking on the Item Type name.
- Step 5: Click the ‘Assign’ blue button
Unassign Item Types to Mfrs
- Step 1: Select the check box next to the Mfr name. This activates the ‘Assign Item Types to Mfs’ button in the black header.
- Step 2: Click on the ‘Assign Item Types to Mfs’ button.
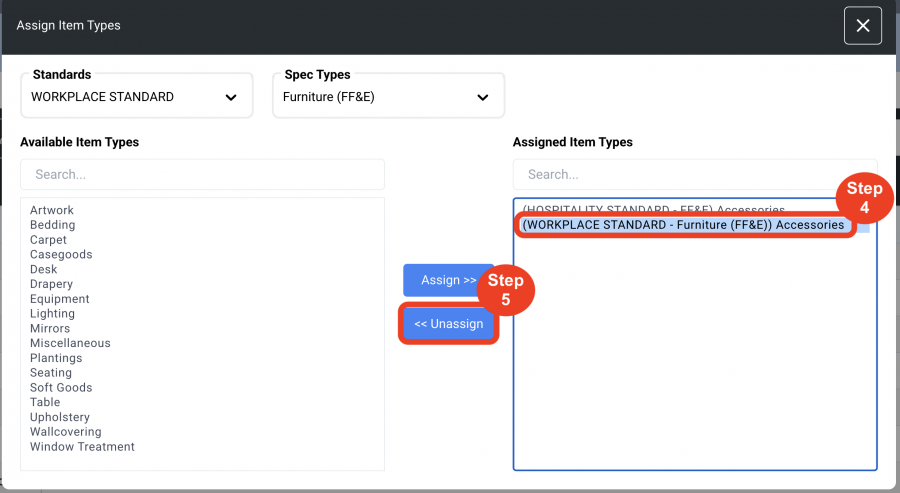
- Step 3: Select the ‘Standard’ and then select the ‘Spec Type’.

- Step 4: Highlight an already assigned Item Type by clicking on the Item Type name at right.
- Step 5: Click on the ‘Unassign’ blue button to remove that Item Type from the Assigned list.
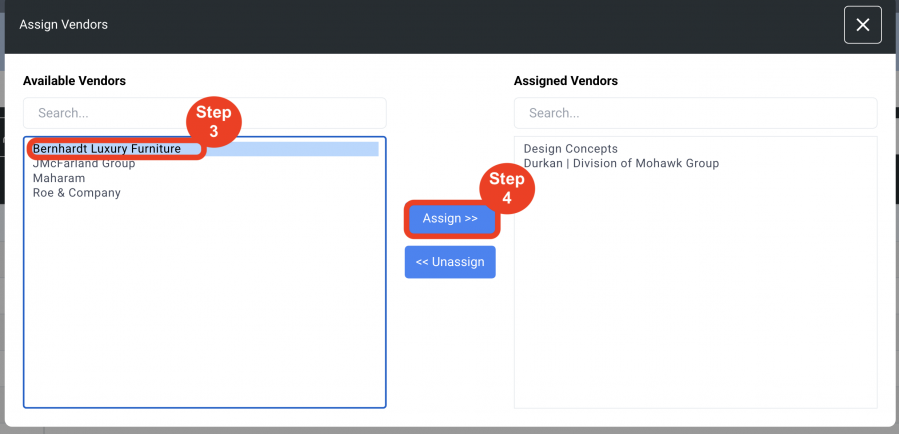
Assign Vendor Reps to Mfrs
Vendors can be assigned to a Manufacturer in order to save time writing a Spec.
Assigning a Vendor Rep to a Manufacturer in the Manufacturer Source List is a way to filter the Vendor dropdown list by the Vendors that have been assigned to a Manufacturer.
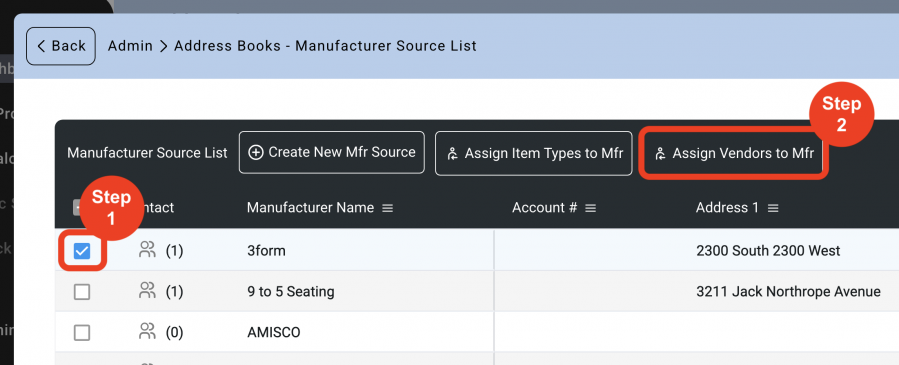
- Step 1: Select the check box next to the Mfr name. This activates the ‘Assign Vendor Reps to Mfs’ button in the black header.
- Step 2: Click on the ‘Assign Vendor Reps to Mfs’ button.
- Step 3: Highlight the item type by clicking on the Item Type name.
- Step 4: Click the ‘Assign’ blue button
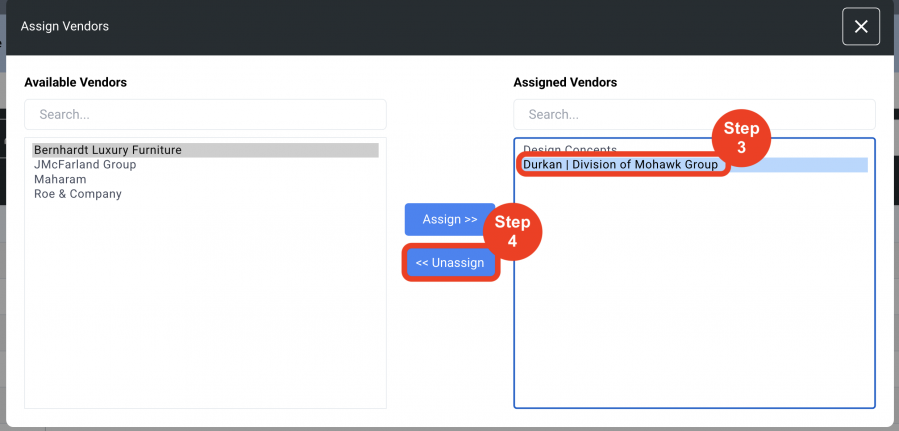
Unassign Vendor Reps to Mfrs
- Step 1: Select the check box next to the Mfr name. This activates the ‘Assign Vendor Reps to Mfs’ button in the black header.
- Step 2: Click on the ‘Assign Vendor Reps to Mfs’ button.
- Step 3: Highlight an already assigned Vendor by clicking on the Vendor name at right.
- Step 4: Click on the ‘Unassign’ blue button to remove that Vendor from the Assigned list.
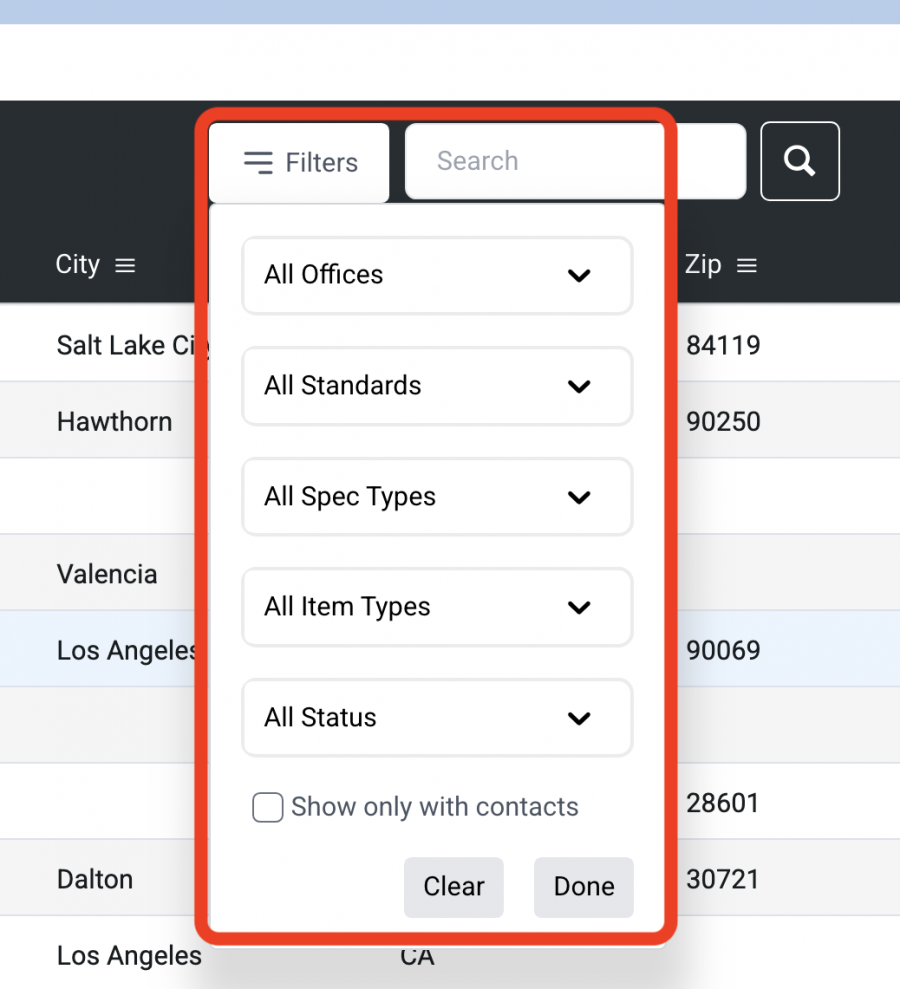
Filters and Searching
The Manufacturer Source List has the option to filter and to search through your whole list of Manufacturers.
Filters
The filters will filter by: Offices, Standards, Spec Types, Item Types and Statuses.
Statuses have the following options to select: Active, Inactive, Quality Concerns, and Out of Business.
By checking the checkbox at the bottom it will show the Manufacturers only with contacts.
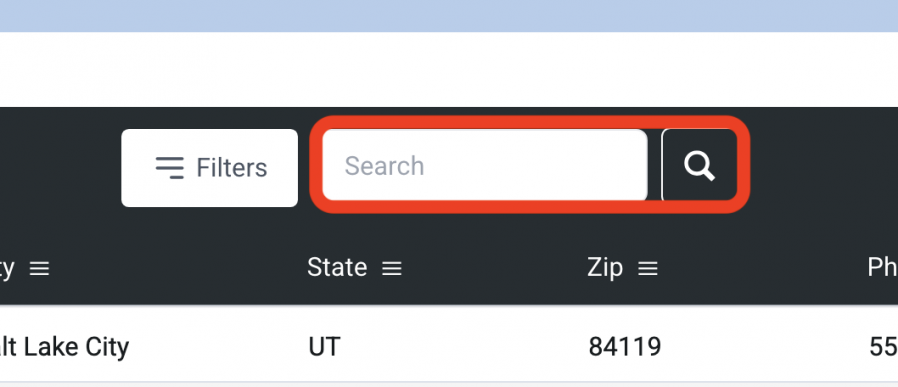
Search
The Search field will search within the Manufacturer Source List specifically.