Spec Sheet - Main Page
OVERVIEW
On the Main Page, the Sections which make up a Spec Sheet include:
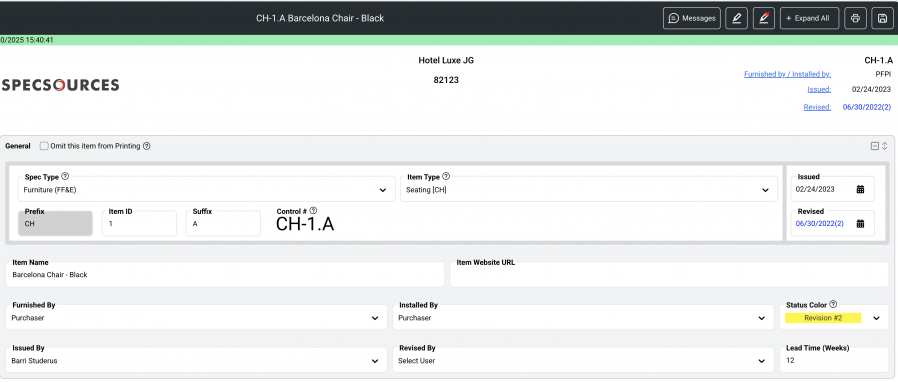
General
- Omit – This feature allows for an item to be designated as Omitted in order to account for the item without deleting it. The item will be clearly identified with the word ‘OMIT’ next to the Item Name in the Spec Schedule and Quick View.
- Omitted specs can be printed in the Spec Book. Select ‘Show Omitted Specs’ in Print Project.
- Omitted specs print with the header and footer on a blank page with the word Omitted diagonally across the page
- Item Numbering Configuration - Specsources allows the User to configure the Item Number on a Spec Sheet in a variety of ways. The Item Number can be edited by reselecting the Spec Type or Item Type. In order to edit an Item Type Code or Delimeter within an existing project, the User must refer to the Config page of the project to make any adjustments.
*The Prefixes, Delimiters, Numbers and Suffixes have been predetermined by a Super Admin or Admin Panel Manager in the Admin page but can be edited by the Designer / User in the Config page.- Edit the Spec Type selection – this will relocate the spec to a new Spec Book.
- Edit the Item Type selection – This will update the Item Type Code or an Item Type Series Number.
- Item ID must be a number. Add a 0 in front of the number if needed.
- Add a number or letter designation in the Suffix, ie. .1 or .A
- Issued – The Issued Date for an item can be edited by clicking in the field and selecting a new date for a single item. Other options include:
- Click on ‘Clear’ to remove the date.
- Click ‘Today’ to automatically use Today’s date.
- Revised – The Revision date for an item can be edited by clicking on the calendar icon.
- Item Name - Edit text here.ie. Barcelona Chair
- Item Website URL – Enter the Item’s website URL. This an option that can be printed on the Spec Sheet, under the Item Name.
- Item Price –Enter or Edit value here.
- Furnished by / Installed by - These lists are hard coded into SpecWeb and CANNOT be customized.
- Status Colors – Edit the Status Color by reselecting from the drop down.
- Issued by - Select a User from the dropdown list. This list is populated from Admin > User Management > Designers list.
- Revised by - Select a User from the dropdown list. This list is populated from Admin > User Management > Designers list.
- Lead Time - Edit Lead Time required. Typically, the duration is in weeks.
- Click ‘Save’ to ensure that Edits have been saved.
QUICK TUTORIAL
Spec Sheet Main Page
Images & Uph / Attached Items
- Images – All images in SpecWeb can be edited directly in the application with Image Editor. Click on the Edit Pen icon at upper right corner of uploaded images.
- Primary Image – Prints on the front of the Spec Sheet. A Caption can be added of not more than 80 characters.
- Finish / Details #1 and #2 – Secondary images that print on the front of the Spec Sheet. Captions can be added of not more than 18 characters.
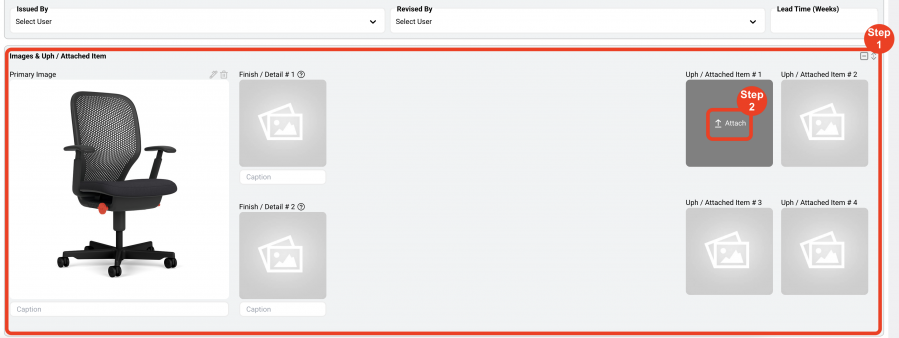
- Uph / Attached Items – In order to attach an Upholstery or Attachable Item, those Specs must be created first. Four attached items print on the front of the Spec Sheet. Once the 4th item is attached, a blue button appears to ‘Add More’. An Item can have unlimited number of attached items.
- Step 1: Within the Spec go to Images & Uph / Attached Items page.
- Step 2: Click ‘Attach’ on the desired tile.
- Step 3: Select the ‘Item Type’.
- Step 4: Select the ‘Upholstery / Attachable Spec Sheet’ to be attached.
- Step 5: Enter a Quantity per Item. The Unit Cost, Cost per Item and Unit of Measure are populated from the Uph / Attached Items spec.
- Step 6: Enter a brief Instruction. ie.
- “Use on seat back only.”
- “Railroad fabric pattern.”
- “Option A”
- Step 7: Click Save.
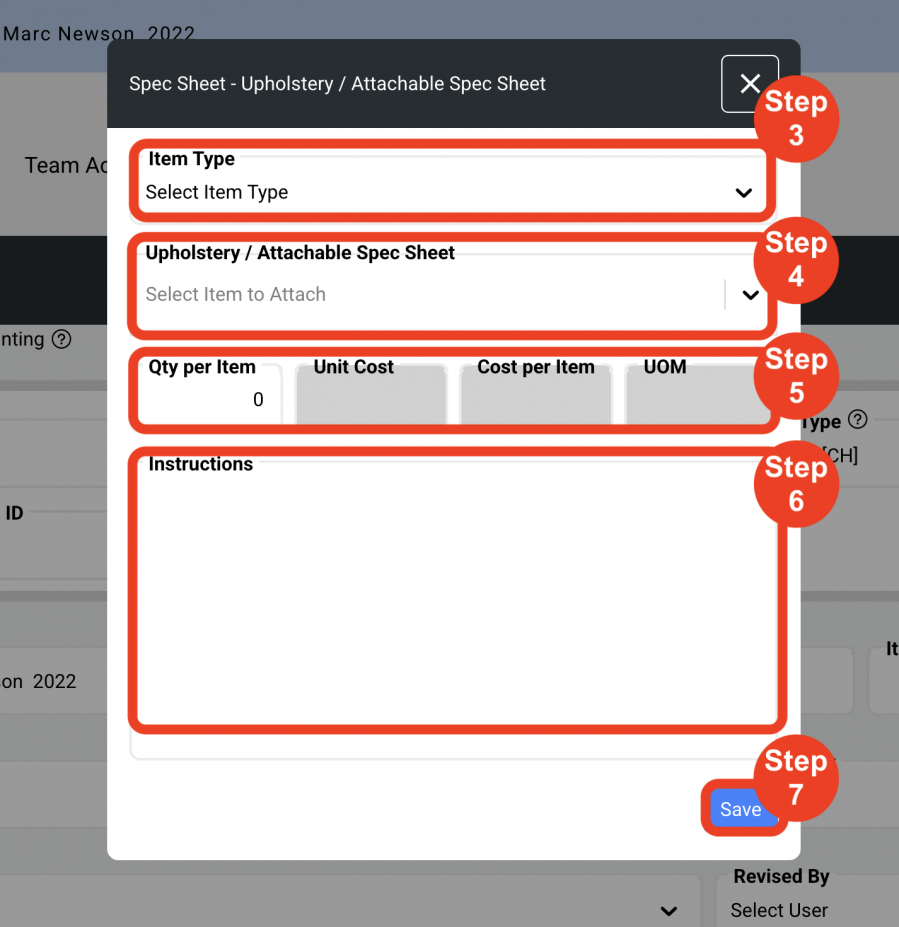
Image Editor
QUICK TUTORIAL
Image Editor
Manufacturer/Vendor
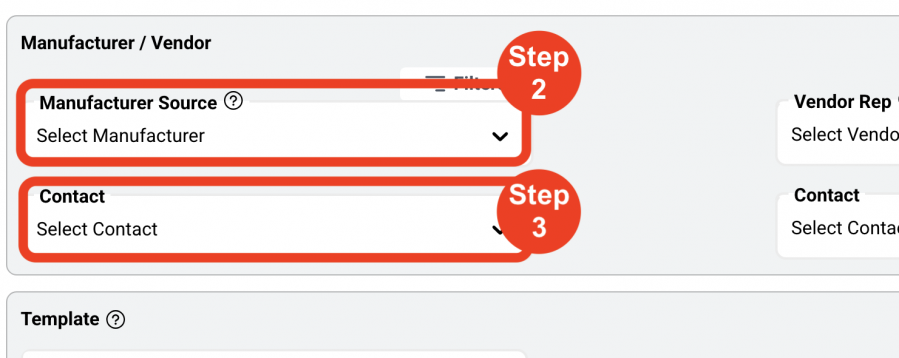
Assign a Manufacturer Source to an item.
- Step 1: Filter the Mfr list by either Item Type or Office
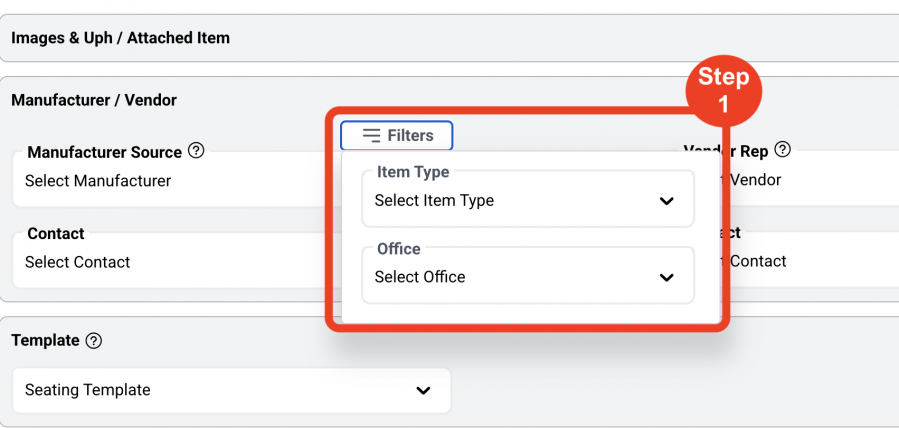
- Step 2: Select the Manufacturer from the drop-down list.
- Step 3: Select the Contact from the drop-down list.
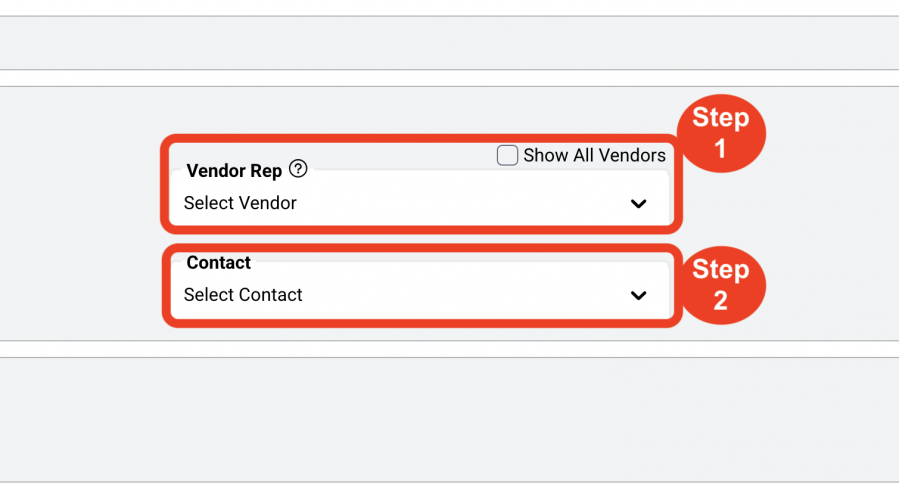
Assign a Vendor Rep to an item.
- Step 1: Select the Vendor Rep company from the drop-down list which displays all vendor Rep companies that have been assigned to the selected Manufacturer Source.
Select the ‘Show All’ option to display the complete Vendor Rep list. - Step 2: Select the Contact from the drop-down list.
Template
The User can select a Template that has been previously created in the Admin > Standards > Item Types / Templates page by a Super Admin or Admin Panel Manager role. The intent of applying a template is to save the User time when writing a specification and to apply firm-wide standards for spec writing. A Template includes three sections:
- Submittals. Pre-selected Submittal options appear within the Template so that the User does not have to create from scratch. However, this section can be edited by the User by checking and unchecking the submittal options.
Labels
Labels are descriptors for writing specifications ie. Model #, Model Name or Dimensions. The User writes the specifications in the Text column under the Text heading. The User can add, edit or delete the required labels and text in this section. A Sustainability and Accessibility notes feature can be toggled on in this section.
Adding Labels. (5 Steps)
Labels can be added to the Template Label list at any time.
- Step 1: Enter a label in the label column. Hit ‘Tab’.

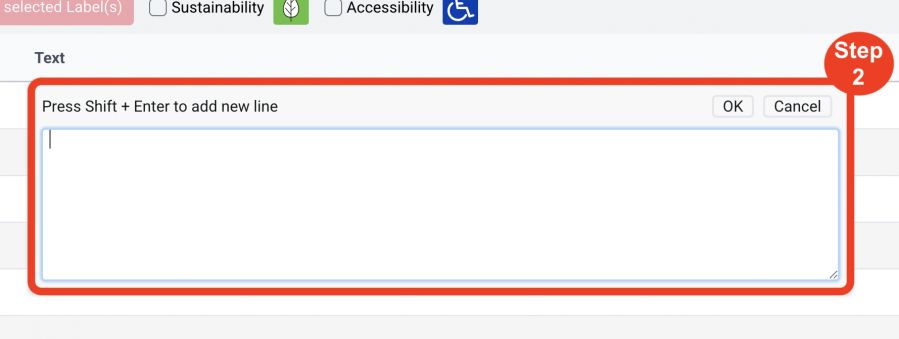
- Step 2: Enter text in the Text pop-up box. Click Ok or Cancel.
Multi-line text within a label row can be achieved by clicking Ctrl -Return.
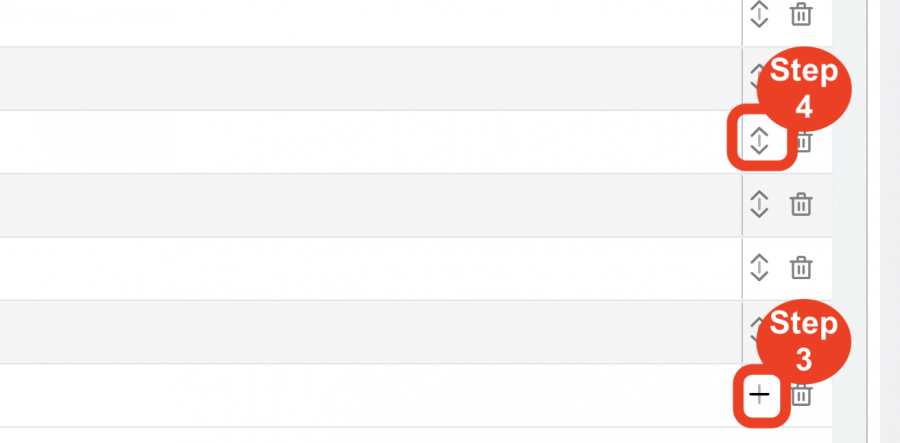
- Step 3: Click the + icon on the right to add the row to the Labels list.
- Step 4: Use Drag and Drop arrows to position the label row.
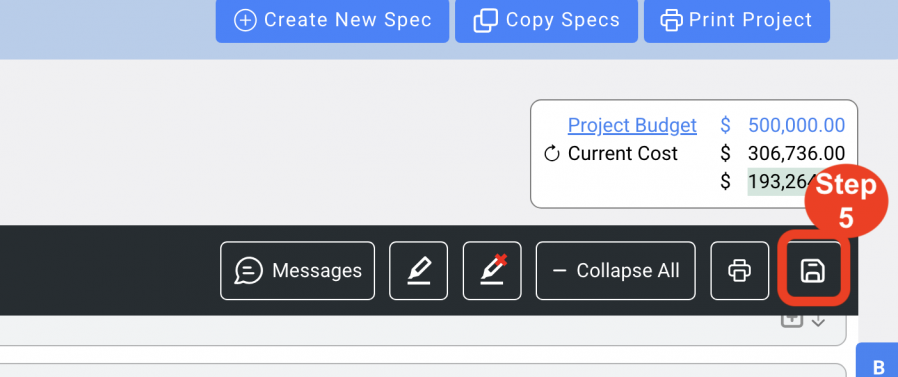
- Step 5: Click the 'Save' icon.
Copy to another Item(s) (7 Steps)
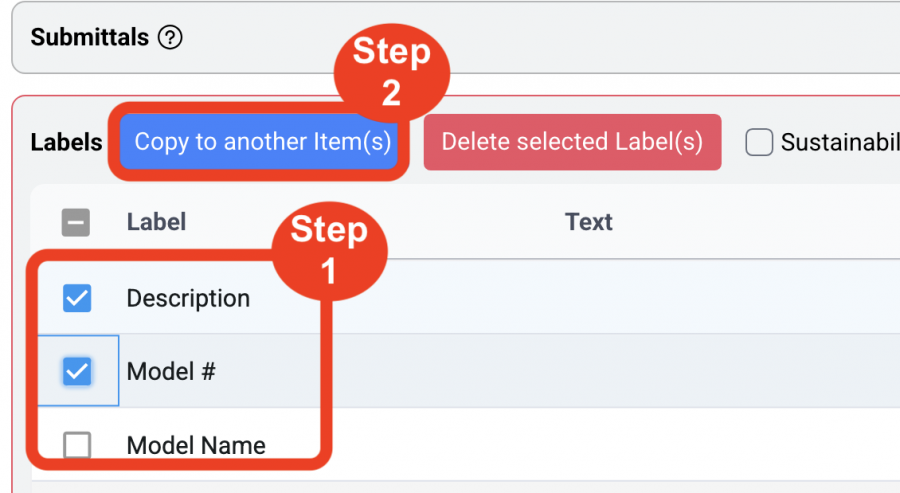
Label(s) along with the text in the Text column can be copied to one or multiple Items at once.
- Step 1: Select one or multiple label rows.
- Step 2: Click the blue button ‘Copy to another Item(s)’.
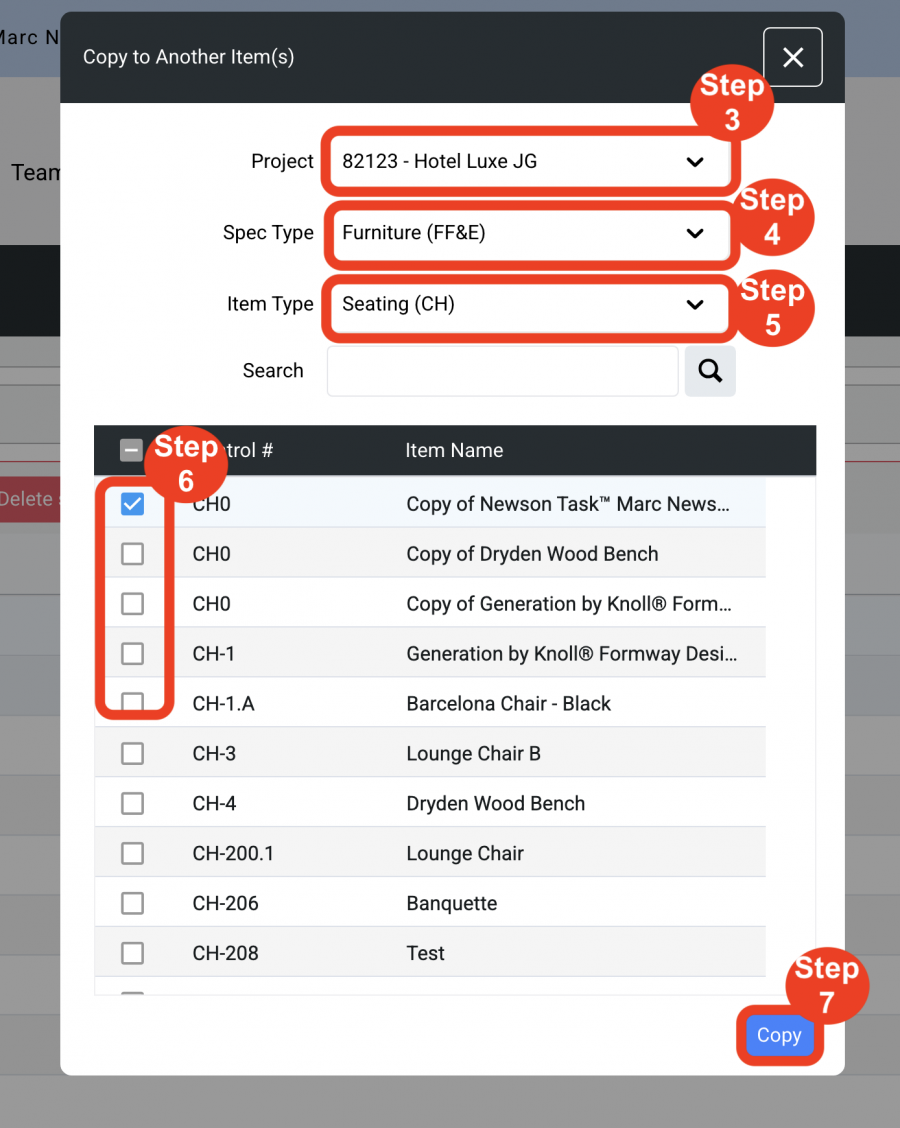
- Step 3: Select the Project.
- Step 4: Select the Spec Type.
- Step 5: Select the Item Type.
- Step 6: Select the Item(s) to be copied.
- Step 7: Click ‘Copy’.
Delete Labels. (3 Steps)
Labels can be deleted from the Template Label list at any time.
- Step 1: Select one or multiple Labels.
- Step 2: Click on the red button ‘Delete selected label(s).’
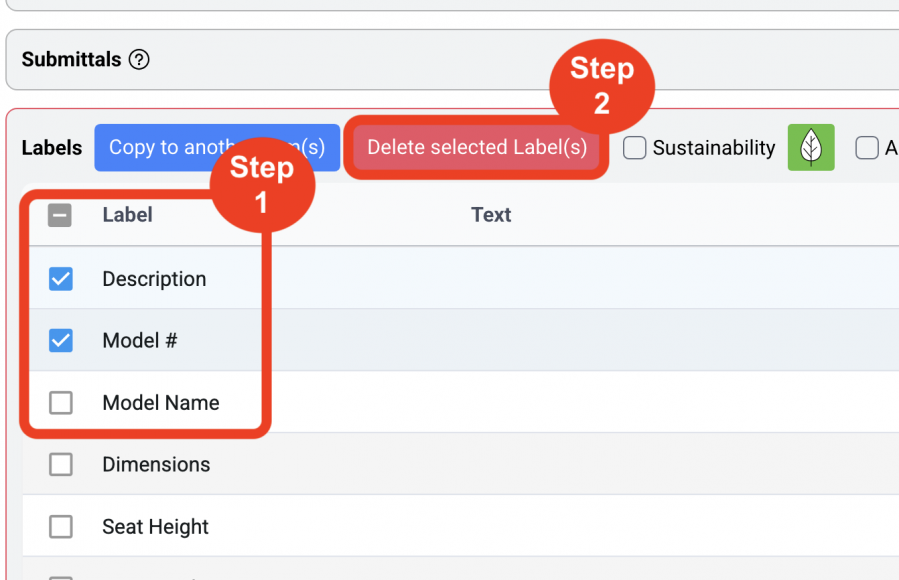
- Step 3: Click Save icon.
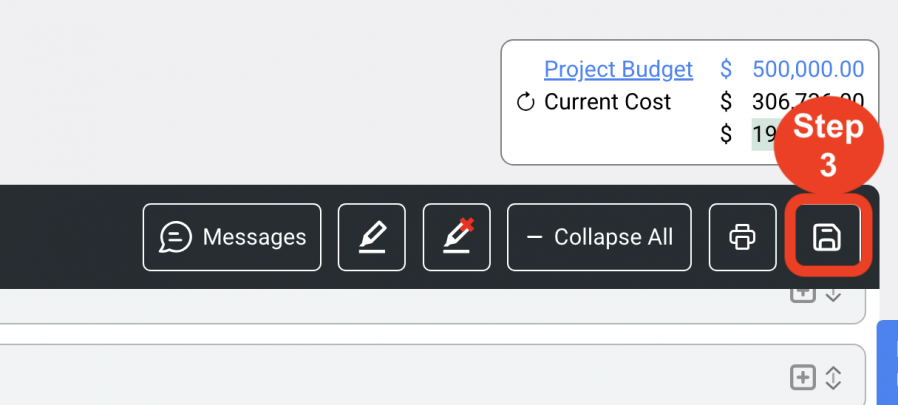
Sustainability. (4 Steps)
The Sustainability feature can be toggled on in order to add a label to describe a Sustainability note on the Spec Sheet. The note will print in a fixed location at the top of the Label list on the Spec Sheet beside a label titled ‘Green’
- Step 1: Select the check box next to ‘Sustainability’.
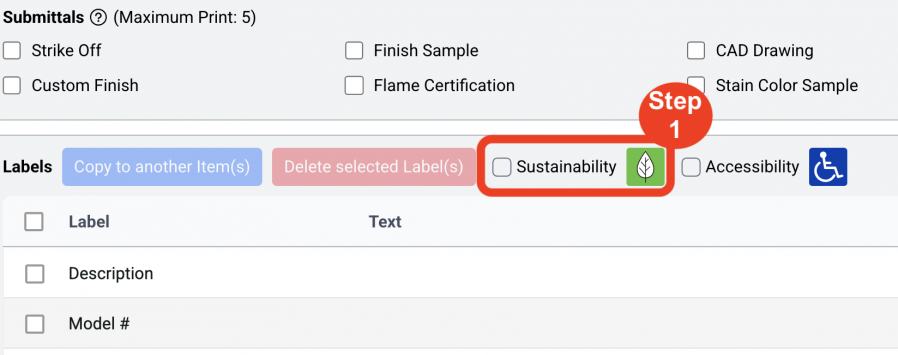
- Step 2: Enter a sustainability note in the text pop-up box. Click Enter or Close.
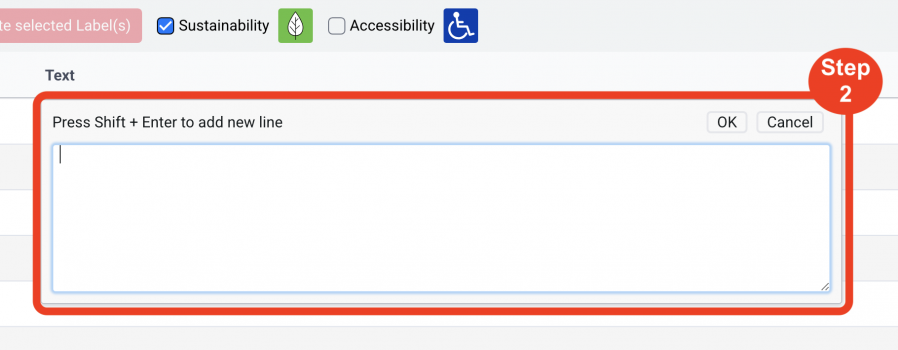
- Step 3: Click Save icon.
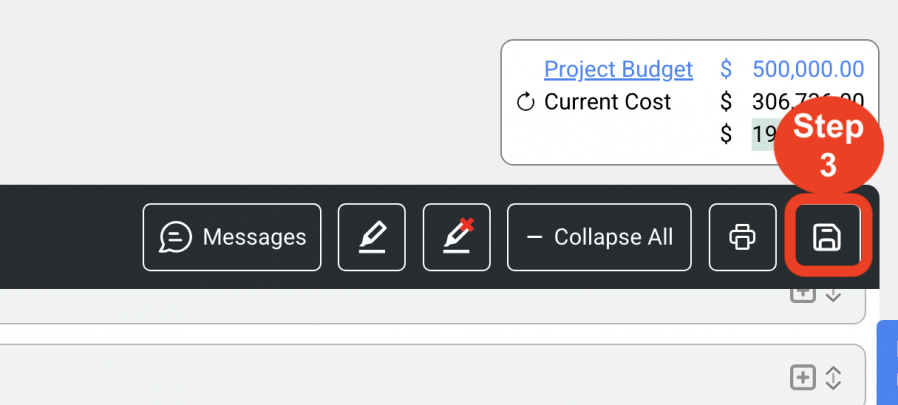
By clicking Save, a sustainability icon will appear at the top right corner of the header on the Spec Sheet.
Accessibility. (4 Steps)
The Accessibility feature can be toggled on in order to add a label to describe an Accessibility note on the Spec Sheet. The note will print in a fixed location at the top of the Label list on the Spec Sheet beside a label titled ‘Accessibility’
- Step 1: Select the check box next to ‘Accessibility’.

- Step 2: Enter an accessibility note in the text pop-up box. Click Enter or Close.
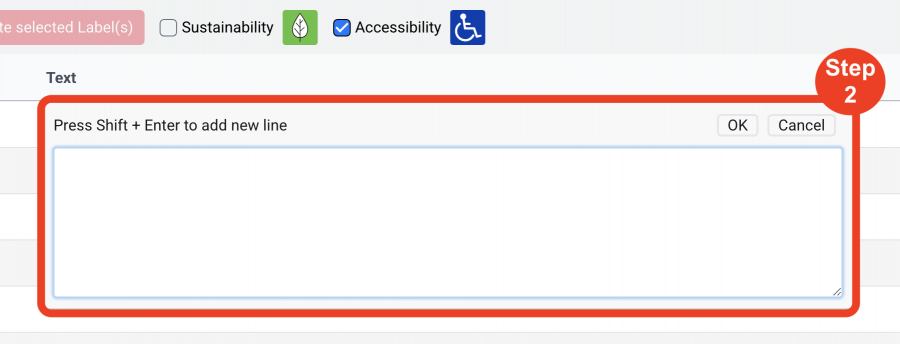
- Step 3: Click Save icon.
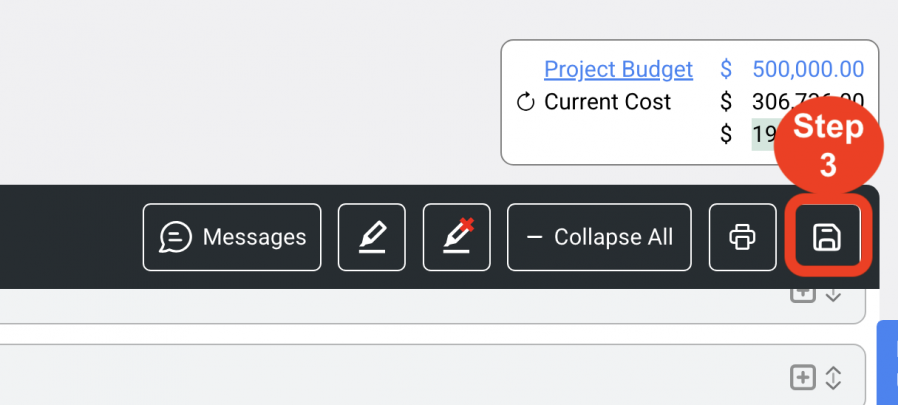
By clicking Save, an accessibility icon will appear at the top right corner of the header on the Spec Sheet.
Item Special Instructions.
Item Special Instructions which are displayed when applying a template are notes that have been curated specifically for an Item Type Template from the more general Item Special Instructions Library. Item Special Instructions are created in Admin > Standards > Item Types / Templates > Manage Templates page by a Super Admin or an Admin Panel Manager.
Text can be edited within the Spec Sheet using the Text Editor ribbon at the top of the Text Box.
Item Cost
The Item Cost section enables the User to enter the price of the item in the unit price field. When the item pricing is entered into the Item Cost section, cost reports can be run in the Cost Reports tab in Print Project. Multiple discounting and multiple markups can be applied to the item price to calculate a net unit price for the item. Other pricing information includes any attached item pricing and line item pricing to generate a grand total unit price of an item.
Quantities.
Quantities are calculated from Items assigned to a Room, or a Room assigned to an Item. Three Quantity fields include:
- Area Quantity – This number is calculated from the Areas / Rooms page. The field is grayed out for this reason.
- Bulk Quantity – This quantity is ONLY intended to account for additional pieces ie. Attic Stock.
- The Bulk Quantity field can be hidden from a User by a Super Admin or Admin Panel Manager role in Admin > Standards > Specification Types > Spec Sheet Options.
Total Quantity – Area Quantity plus Bulk Quantity equals Total Quantity. The field is grayed out for this reason.
Areas / Rooms
* A Pre-requisite to use the Areas / Rooms page is to first enter all Areas / Rooms in the Project > Areas / Rooms page. This can be achieved manually or with the SpecBIM Revit Add-on. Refer to the Project > Areas / Rooms page of the User Guide.
When in an Item proceed with the following steps:
Assign Areas / Rooms to an Item. (5 Steps)
- Step 1: Expand the Areas / Rooms section.

- Step 2: Select the check box ´View Unassigned´ to assign the Area / Room Name / # to an Item.
- Step 3: Enter a quantity in the ‘Qty per Room’ column.
- Step 4: Click Autosave icon. (Will save automatically)
- Clicking Save will remove the room from the Unassigned List and place it in the list ‘Show Rooms Assigned’.

- Step 5: Select the check box ‘View Assigned’ to view all rooms / quantities that have been assigned to the item.

Edit an Item Quantity (7 Steps)
- Step 1: Expand the Areas / Rooms section.
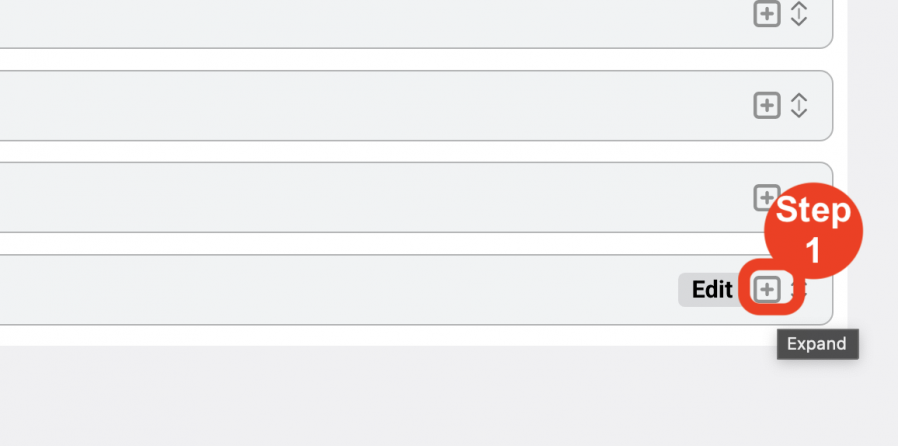
- Step 2: Click on the ‘Edit’ button.
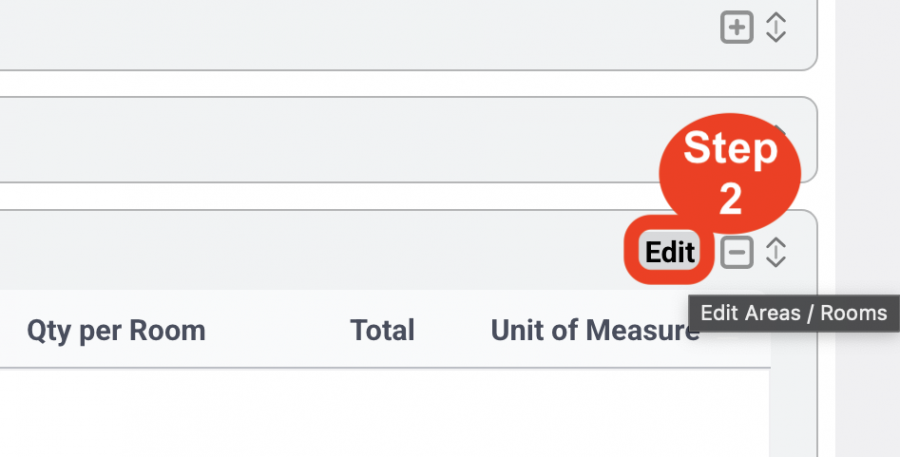
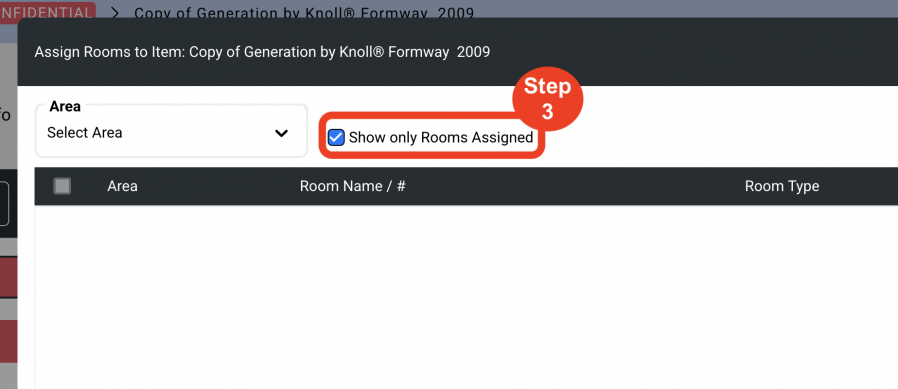
- Step 3: Select the check box ‘Show only Rooms Assigned’ to view all rooms / quantities that have been assigned to the item.
- Step 4: Uncheck the check box to unassign the Area / Room Name / # to an Item. OR
- Step 5: Enter a new quantity in the ‘Qty per Room’ column.
- Step 6: Click Save icon.
- Clicking Save will update the Rooms assigned and/or the item quantity.
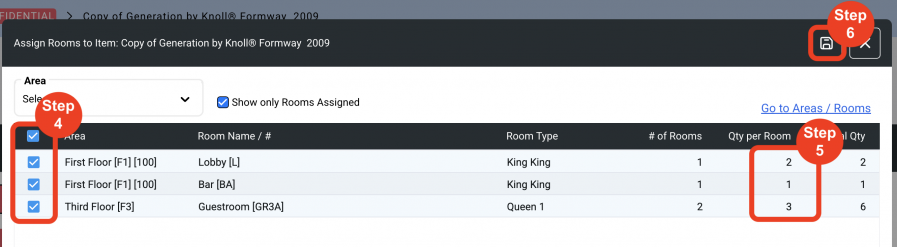
The total Area Quantity will be displayed in the Quantities page > Area Quantity.