Create New Project - Project Info
QUICK TUTORIAL
Create New Project
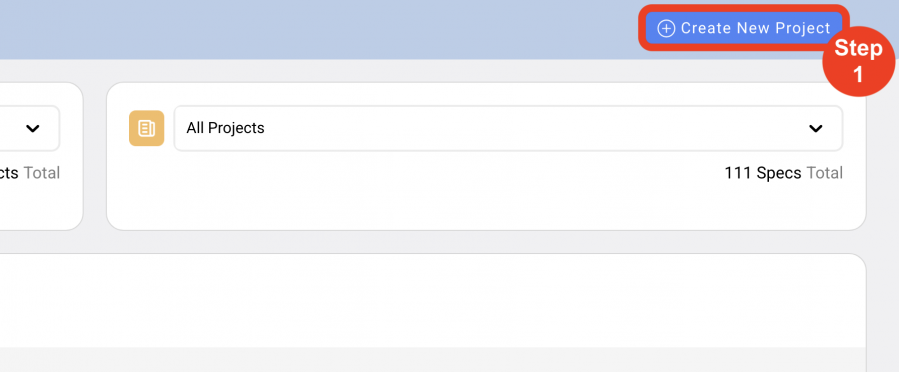
Create New Project (6 steps)
- Step 1: Go to Dashboard. Click on the blue button ‘Create New Project’ in upper right corner.
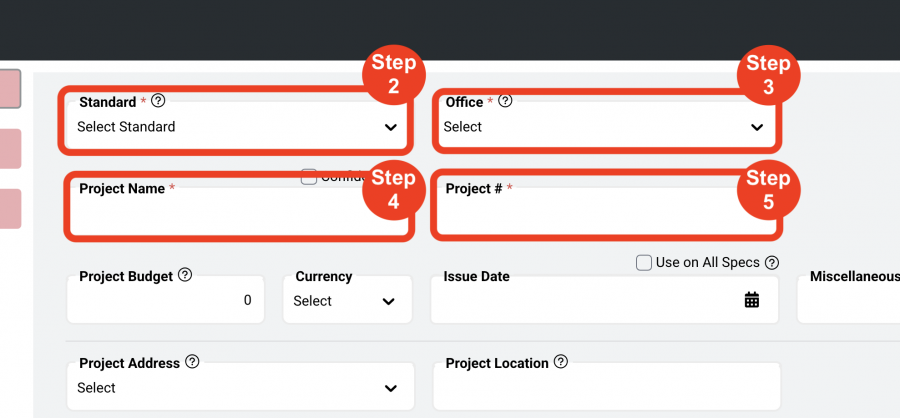
- Step 2: Select the Standard (Required)
By selecting a Standard, the Designer / User is assigning the breakdown of different Spec Types, Item Types, Templates and Special Instructions - all created under the particular Standard that is selected.
- Step 3: Select the Office (Required)
By selecting an Office associated with this Project, that office address will be used to print as the footer on the bottom of Spec Sheets and reports.
- Step 4: Type in a Project Name (Required)
- Step 5: Type in a Project Number (Required)
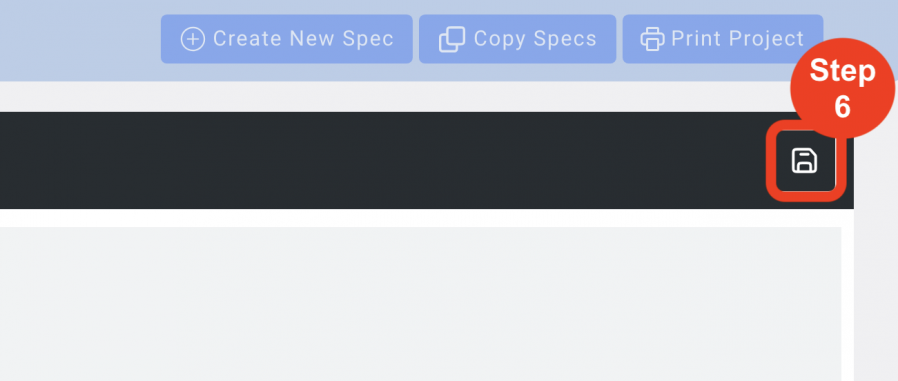
- Step 6: Click Save
This action generates and saves the Project. Additional information can be input in the Project Info page.
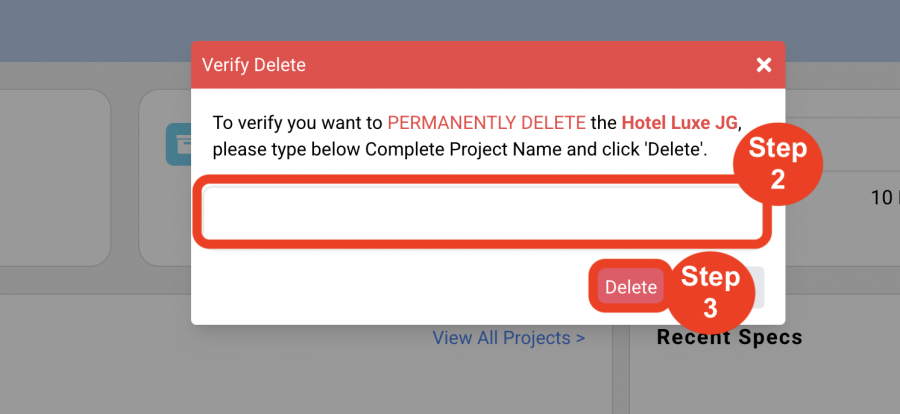
Delete a Project
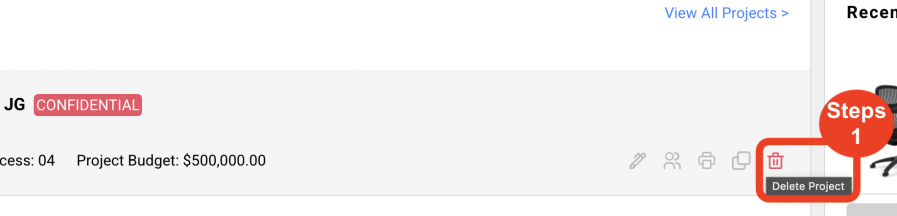
- Step 1: Click the 'Trash Bin Icon', which appears when scrolled over with the mouse pointer.
- Step 2: Type in the text box the Complete Project Name to delete.
*This is a case sensitive text box.
- Step 3: Click ‘Delete’ to delete.
*Once deleted, the Project is not restorable.