Sign Up Now
OVERVIEW
By signing up for a Specsources' SpecWeb subscription, your company agrees to manage your subscription internally via a Designer, Payment Manager or IT Manager assigned Roles. It is the responsibility of the Company to cancel this subscription at any time to avoid further charges to the account.
Please notify Specsources if your company does not authorize credit card payments so that an alternative payment method can be provided.
Subscription Options
- Annual Subscriptions
- Monthly Subscriptions
Remote Training
- Remote via Teams meetings - Unlimited attendees
- 2 separate training sessions included (Recordings provided):
- Admin Training: This training session is for those designers who are establishing their office Standards regarding Spec Book package deliverables, Item numbering on the Spec Sheets, Templates and Special Instructions. (1 hour)
- User Training: This training session is for the general design team regarding creating a new project, creating Spec Sheets, printing options and several other features. (1.5 hours)
SpecBIM Revit Add-on (Optional)
- Syncs Areas, Rooms and Qtys between Revit and Specsources
SpecCAD AutoCAD Add-on (Optional)
- Syncs Areas, Rooms and Qtys between AutoCAD and Specsources
Output Spec Sheet / Report Customizations
- Customizations to any Spec Sheet design or report layout is billed hourly.
Sign Up (Company)
- Step 1: Go to the website https://web.specsources.com
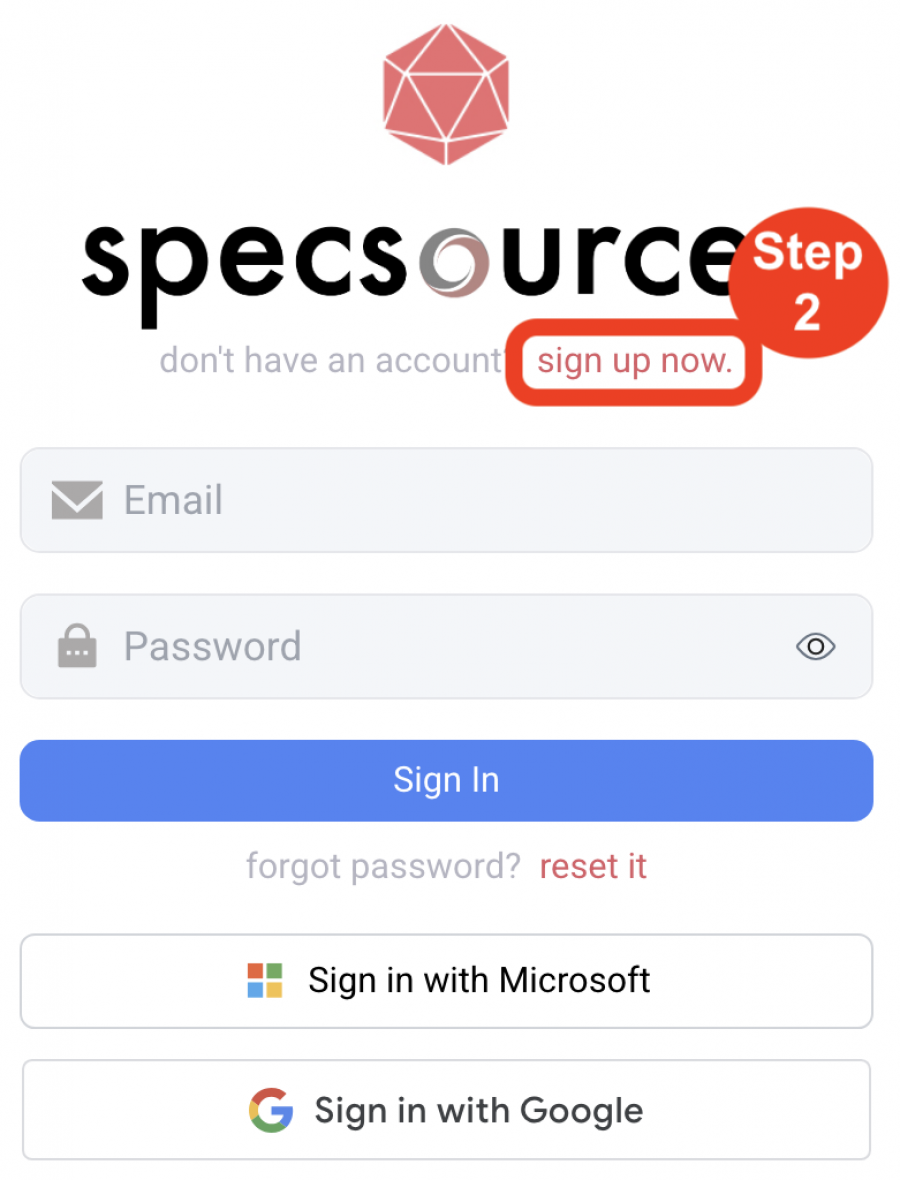
- Step 2: Click on the red words ‘sign up now’ underneath the Specsources' logo.
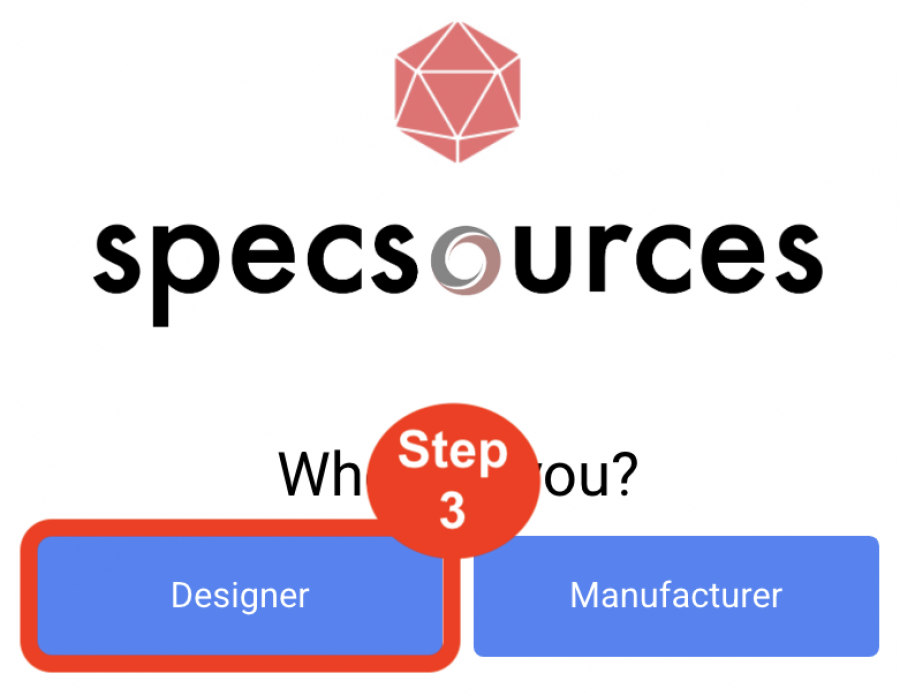
- Step 3: Click on the blue button ‘Designer'.
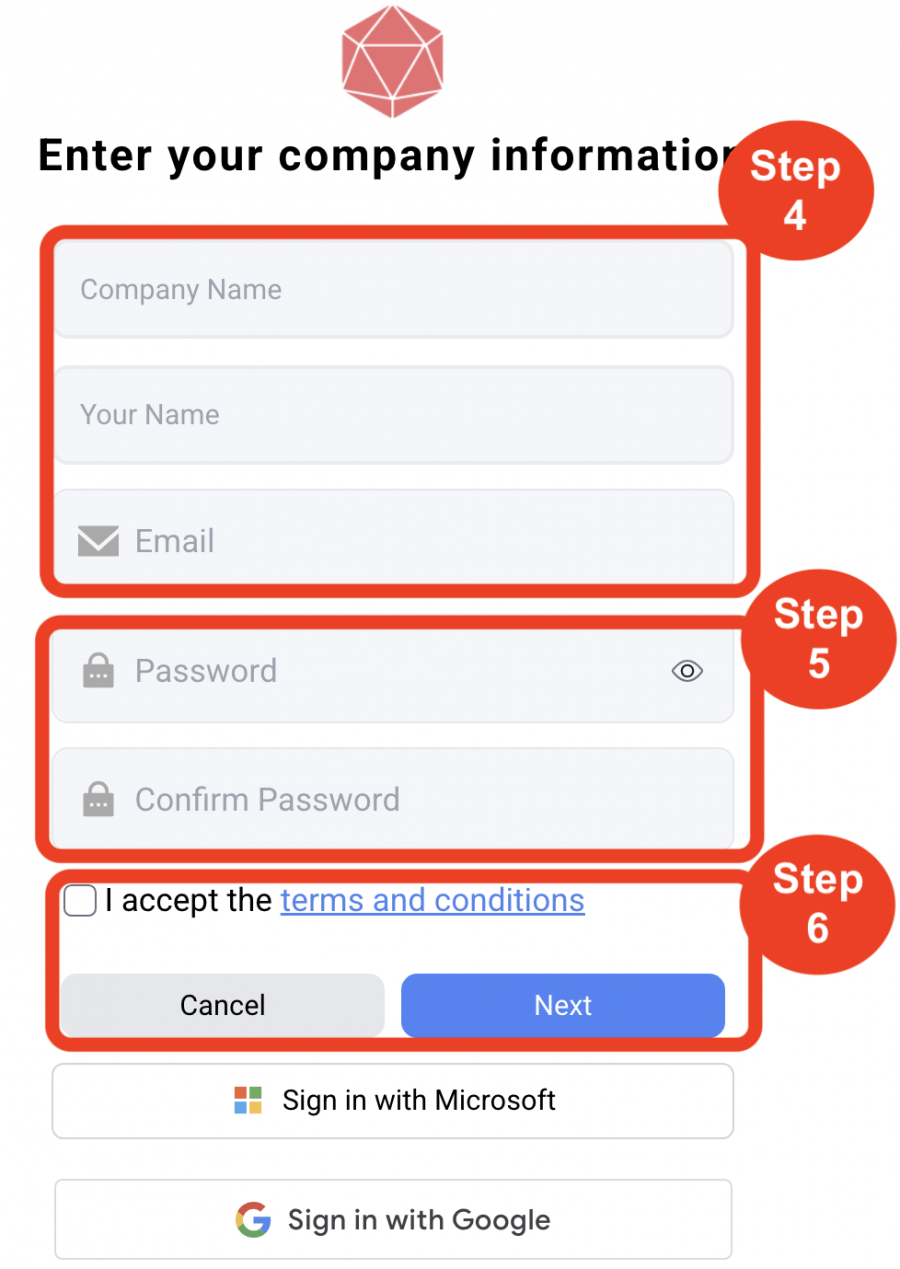
- Step 4: Enter your Company Name, your Name and your Email.
- Step 5: Create your Password and confirm your Password.
- Step 6: Click the checkbox to 'Accept the Terms and Conditions' and the blue ‘Next’ button.
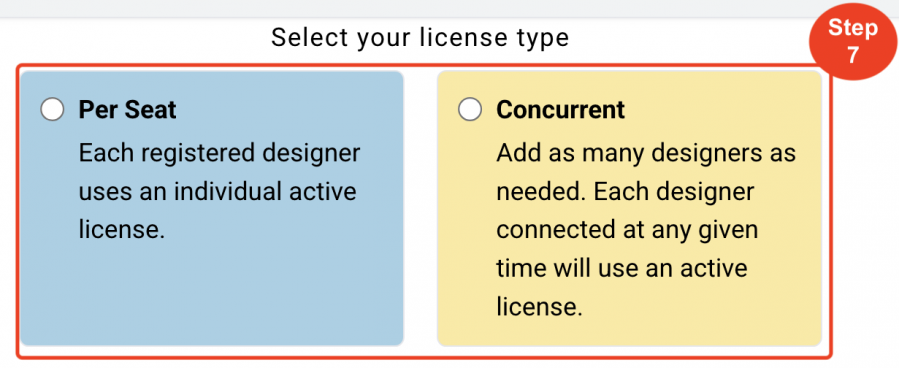
- Step 7: Select your license type.
Named: Each registered Designer / User uses an idividual active license.
Concurrent: Each Designer / User connected at any given time will use an active license.
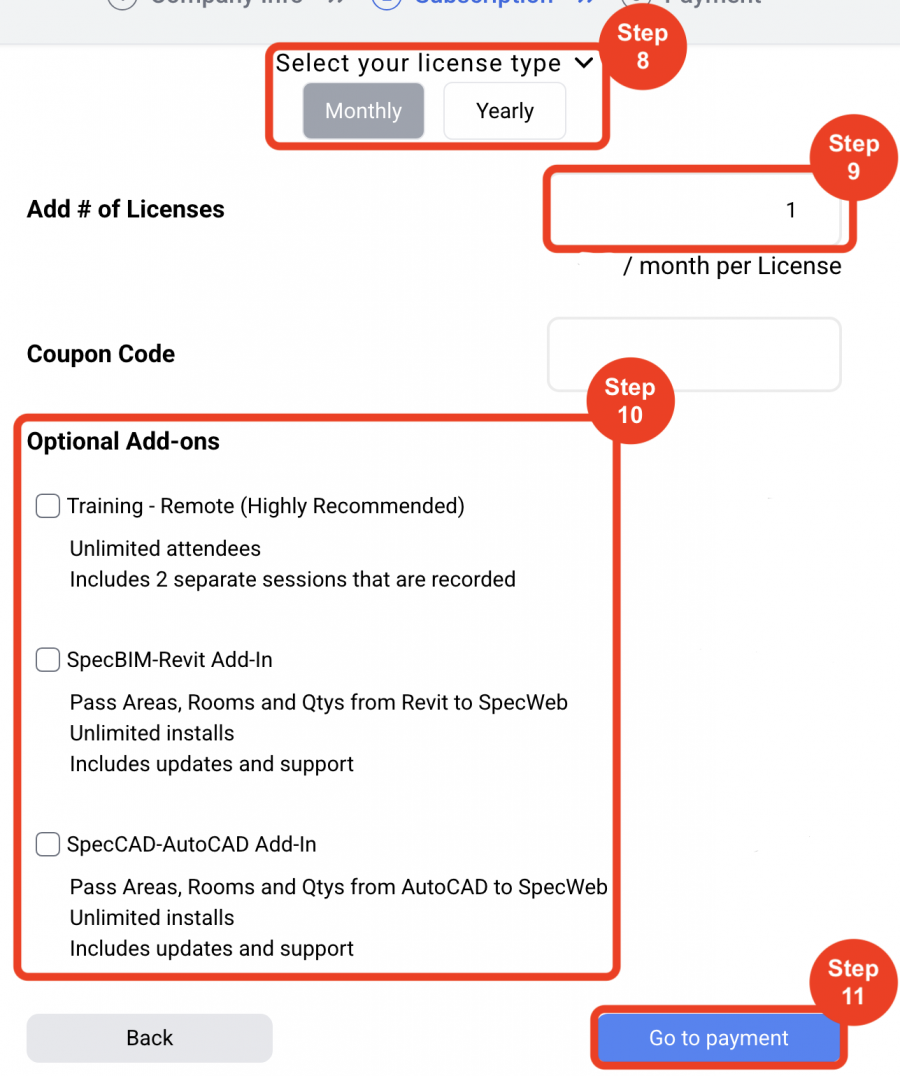
- Step 8: Select your subscription duration – Monthly or Yearly.
- Step 9: Enter the number of licenses.
- Step 10: You can purchase the training and Revit Add-in at a later date.
- Step 11: Click ‘Go to Payment’.
- Step 12: The next screen will prompt you to input your credit card information.
- Step 13: UNCHECK 'Remember my Credit Card Information'.
- Step 14: Click 'Proceed to checkout'.

- Step 15: A screen will pop-up thanking you for registering and to look for an email from info@specsources.com
This will generate a verification email that will be sent to your email address inbox for you to click the button ‘Verify’. (Please also check your spam/junk folder)(Please white list SpecWeb@specsources.com and Info@specsources.com)

- Step 16: Upon email verification, a pop-up screen will appear, to download the Specsources’ ‘Start Up Data’.
Important Fact: We recommend clicking the blue button ‘Get Start Up Data’ because it contains a lot of pre-made templates, special instructions, and a Test Project that is used for trainings.


Sign In (User)
OVERVIEW
SpecWeb is a completely web-based application. Anywhere you can access the internet, you can access Specsources’ projects and specifications by typing the web address below into any browser.
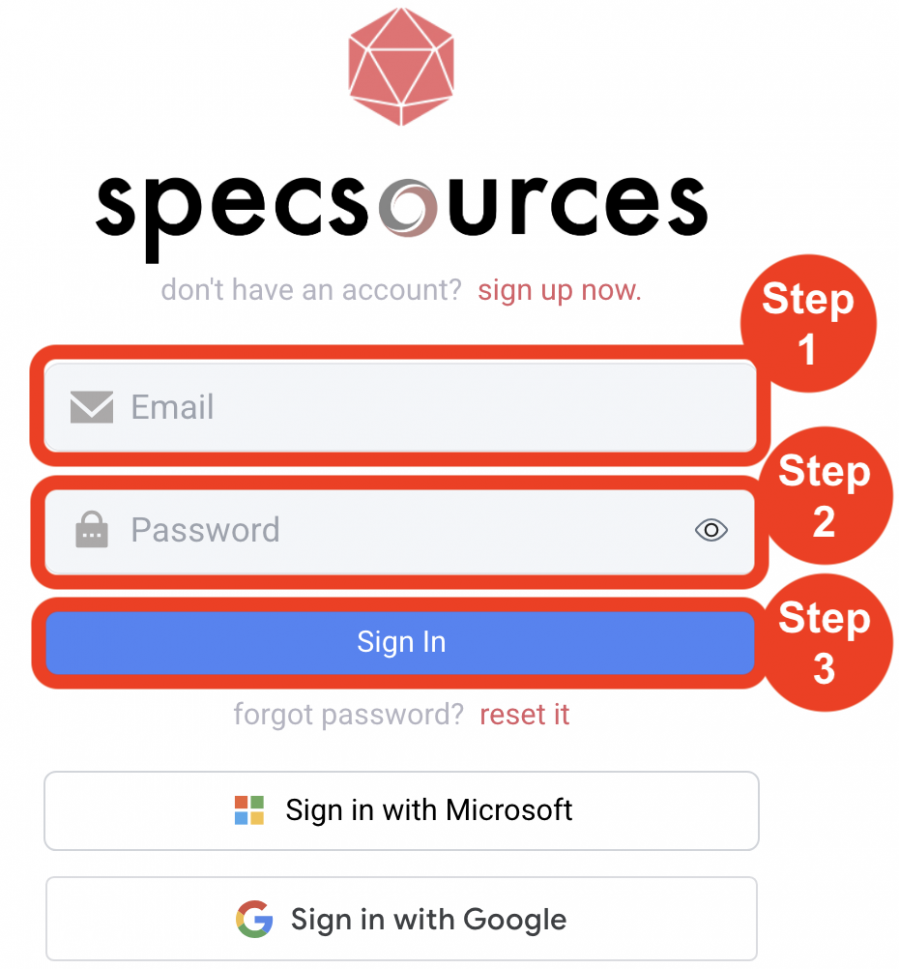
- Step 1: Open your prefered browser and paste the following link in the address bar: https://web.specsources.com.
- Step 2: Enter your Email address.
- Step 3: Enter your Password
- Step 4: Click 'Sign In'.
Single Sign On (SSO)
Single Sign On allows a user to use their company’s Microsoft or Google account. Simply click the Microsoft icon on the login page and sign in using your Microsoft account credentials.
This step requires your IT to authorize your company to use SSO. Please follow the steps below:
- Step 1: Go to SpecWeb: https://web.specsources.com
- Step 2: Click Sign in with Microsoft

- Step 3: When prompted, sign in using your company Microsoft credentials

- Step 4: During the sign in, your Entra ID administrator will be asked to authorize Specsources to access limited account information (name and email only)
- Step 5: Approve the authorization to link your existing SpecWeb account with Microsoft Entra ID
- Step 6: Once this step is completed, the rest of your users will be able to sign in to SpecWeb using their Microsoft accounts.
Signing in with Access to Multiple Offices.
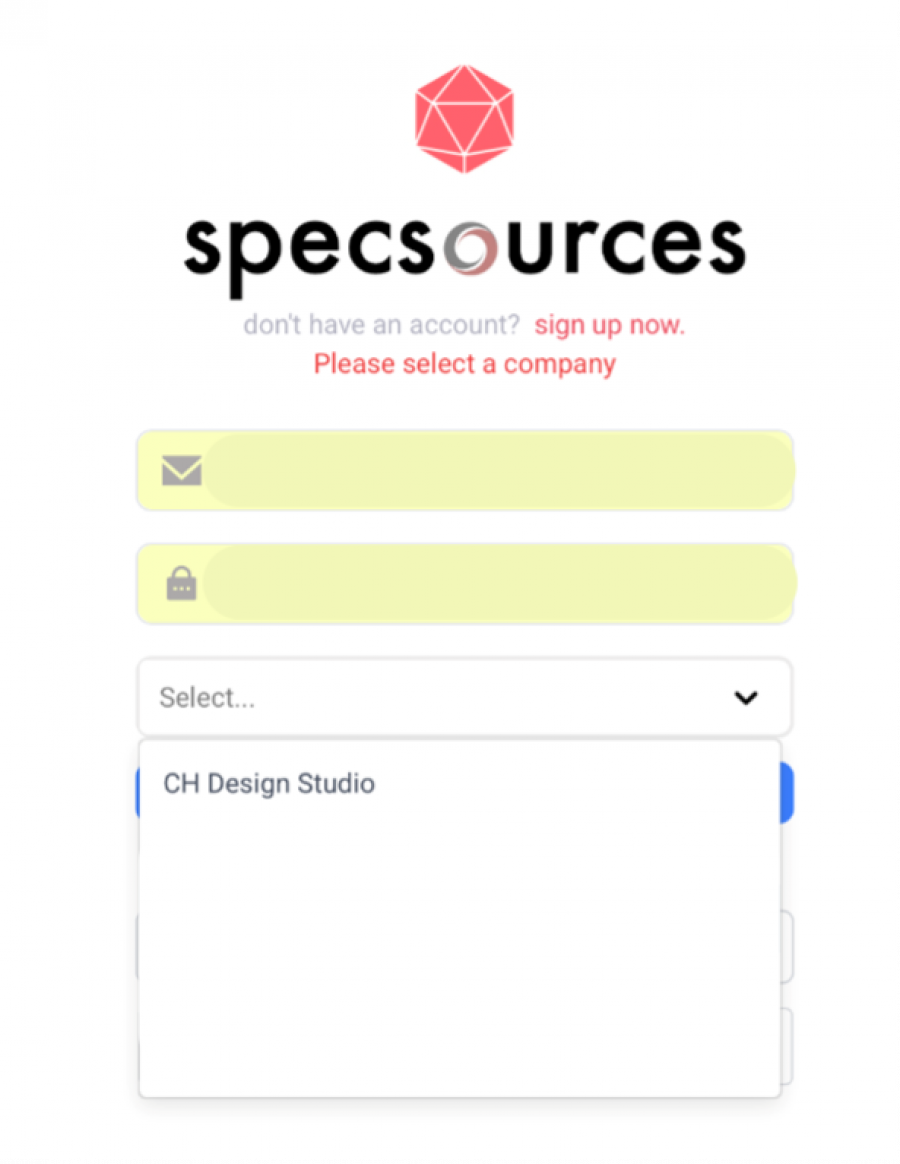
Some companies have mulitple offices. When a Designer / User signs in, a dropdown appears listing available offices.
- Step 1: Enter your email address.
- Step 2: Enter your password.
- Step 3: Choose the office from the dropdown.
- Step 4: Click Sign in.